

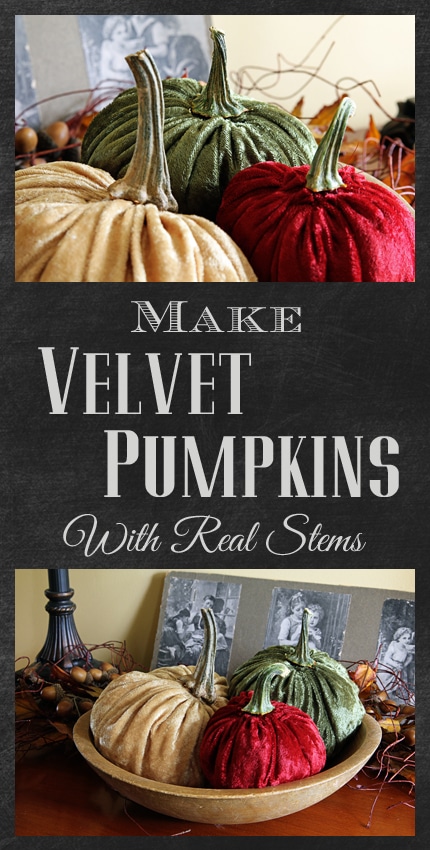
I've been dying to make some of these velvet pumpkins for the last two years, but just never had the time to try them.
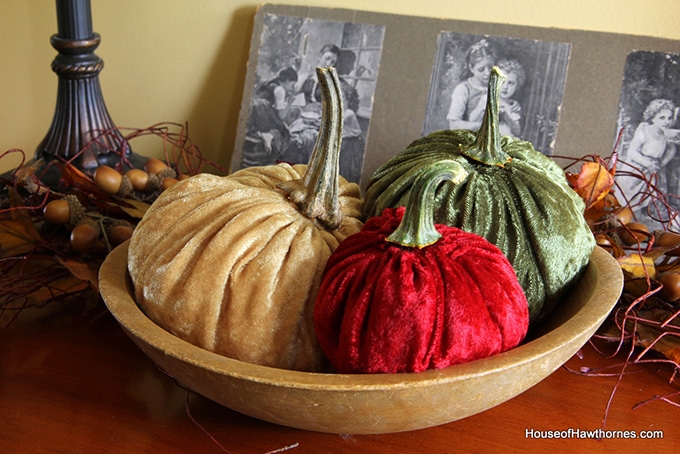
Stupid, stupid, stupid. They only take about 10 minutes each to make and are about as easy a craft as you've ever seen.
I could have been swimming in velvet pumpkins by now.
At first I was going to use thrift store velvet dresses and repurpose the fabric into pumpkins, but the only color I could find was black and I wasn't in to black pumpkins right now (maybe for Halloween though).
So I popped over to JoAnn Fabrics and picked up some crushed panne velvet, which is a lightweight version of velvet with more stretch to it. The traditional velvet tends to be a little stiffer and not as easy to get a needle through.
The day I went, the crushed panne was on sale for only $2.49 a yard. I bought ½ yards each of three different colors, so I skipped out of JoAnn's with $3.75 in fabric.
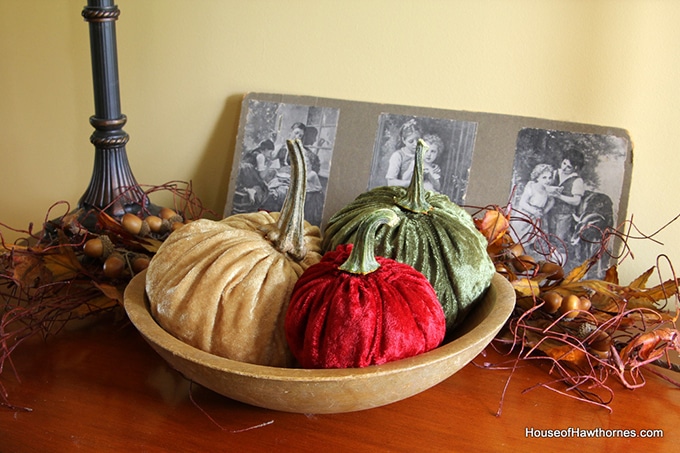
DIY Velvet Pumpkins
I have seen these pumpkins in stores for upwards of $35.00 each and I made mine for way, way under $5.00 a piece (so small that I, the Accountant, didn't bother to break out the actual cost per pumpkin).
They really are so easy it's silly.
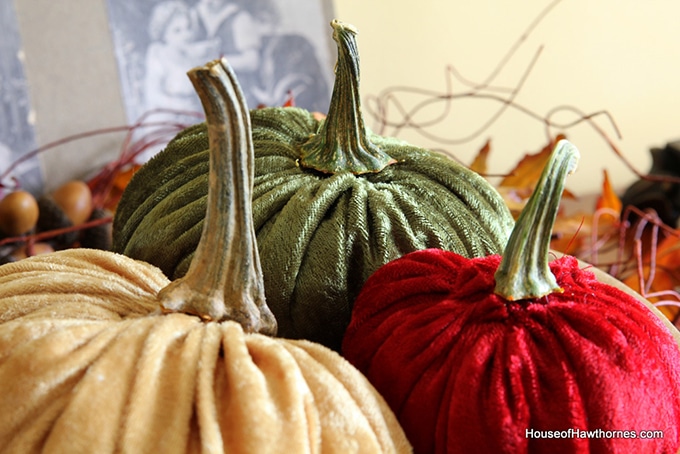
Where To Buy Dried Pumpkin Stems
If you didn't save your stems from last year's pumpkins, you can buy dried pumpkin stems on Etsy. One of my favorite Etsy shops for stems is Natural Pumpkin Stems. You can also use a chunky twig as a stem if you don't want to use real pumpkin stems.
(This post contains some affiliate links for your convenience. You can read my full disclosure policy here.)
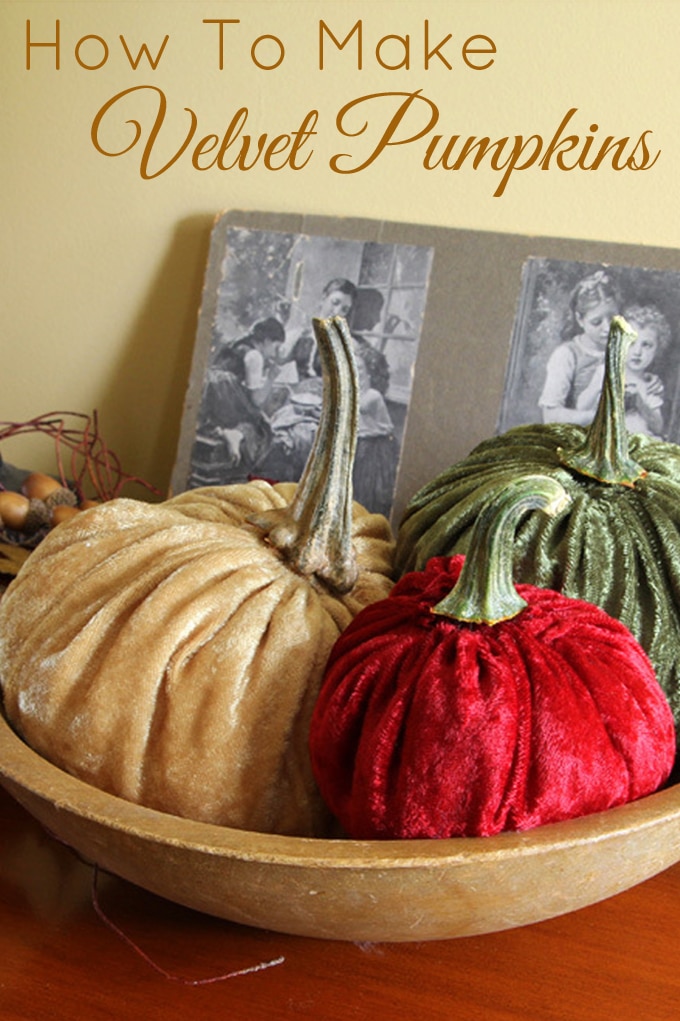
How to Make Velvet Pumpkins With Real Stems
Supplies needed:
- fabric of your choosing - velvet, crushed panne velvet, burlap or whatever the heck you like
- scissors
- needle and thread
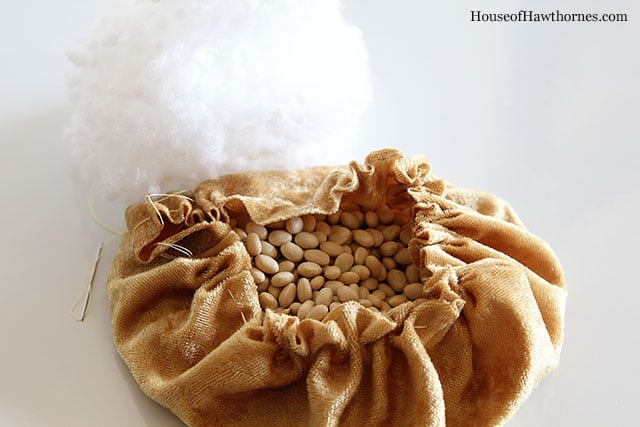
- navy beans
- polyester fiber fill
- glue - I used E6000
- an old pumpkin stem (you could use a twig instead) or I found this vendor on etsy with pumpkin stems for sale
Instructions:
Use a dinner plate to draw a circle on the back of your fabric. Cut the circle out.

Thread your needle and make long stitches around the perimeter of the circle.
Contrary to what your mother told you, neatness does NOT count here. You are just stitching so that you can gather the fabric later, so you have my permission to be sloppy.

Lightly pull on the thread on each end to loosely gather up the fabric.

Put some navy beans in the bottom of the pumpkin. This gives the pumpkins a little weight and also helps to keep them from rolling around when the dog walks by.
Add some fiber fill to puff it up a bit. If you don't have fiber fill, I'm sure you could use cotton balls or pantyhose (if you have any lying around from 1984).
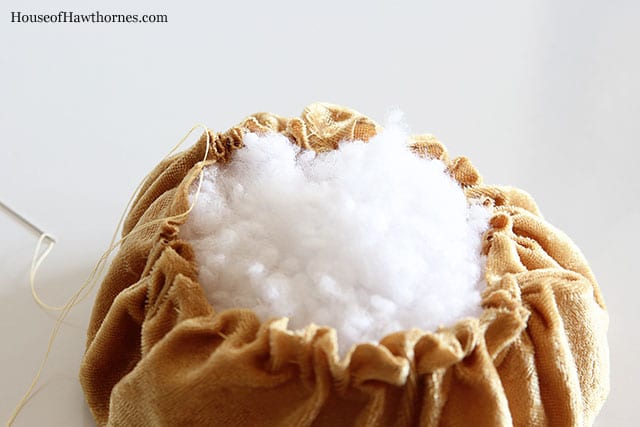
Once filled, tighten up your opening and tie a knot in the thread.
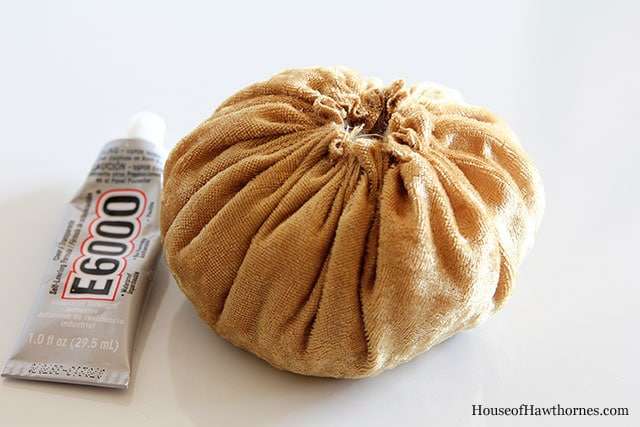
Use your glue to stick the pumpkin stem to the top.

And you're done in less than ten minutes!
View the web story version of this article HERE.
If you like this you may also like:
100 Best DIY Fall And Halloween Decor Ideas
Ali
I headed to a charity shop an bought lots of diff clothes in Will , velvet cotton etc. For full £5 English £ I bought lots an lots of useful material, jumpers etc . Can’t wait to begin making these lovely items 😁
Wilhelmina
Love your pumpkins, so easy to make only if I can buy the materials here in Canada.
Janet D
Rolling when the dogs walk by and pantyhose from 1984! You crack me up! Pumpkins are cute. I just bought fabric that will look great as a pumpkin. Thanks!
Lisalisa
I have also used mini door knobs for the stem. Makes them look Victorian!
Lorraine Castellon-Rowe
You are a genius!!! Seriously, I've seen these darn pumpkins everywhere and you're right for $35 to $50 bucks!! Now I can make my own!!! You ROCK!! Thans so much!!
Pam
You're welcome Lorraine!
**** April ****
Love love love these! Pinned on pinterest and included on my blog of fall crafts I want to do!
Anonymous
I used potpourri in a pumpkin scent for part of the stuffing. Now they are beautiful and smell great too.
Marie Blackburn
Pam these are downright adorable! Thanks for the awesome tutorial...I must have some of these on my mantle this Fall 🙂
Marie@The Interior Frugalista
Lora@Patinageneral
I'm lovin' your blog and lovin' this project! Thanks for sharing on the link party. Just book marked you and will be checking back often. Your pic's are beautiful and love your sense of humor!
Roslyn
Wonderful post & I am going to make these just as soon as I can leave this bed & walk around Joann's! But that also means I have to buy real pumpkins or they will not look nearly as fine as yours do. Well after halloween pumpkins will be very cheap!
Thanks for an adorable idea!
Linda @ Itsy Bits And Pieces
OH, I love the fabric you used, Pam! Makes me want to try making some!
Tricia
Wow, these turned out great, Pam! This probably sounds kind of odd, but I really like the stems...for me that's an important thing in pumpkin selection 🙂
Melinda
So pretty! Great job.
M 🙂
LizlovesVintage
I just saw your on FB. this afternoon!! Wow, you copycat!! LOL! Pam, these are great and for $5.00 even better. Are you taking orders? I'll take two.
Have a wonderful week,
xxx Liz
Vickie @ Ranger 911
I love your pumpkins!!! I attempted to make them without any instructions last year and they turned out baaaad. The "velvet" I bought was stretchy. Is yours? They kept getting bigger and bigger as I stuffed them. The whole darn mess of overgrown pumpkins went right in the garbage.
I'm on my way to the tutorial.
Thank you!!!
Sherry@Back2Vintage
Crushed panne! I would have never known they weren't velvet if you hadn't told us. Great job and super thrifty!
Debby
Yours came out great. I want to make some as well. I saved the stems from last year. I need to get fabric. Yours looks like velvet.
I hope your son is feeling better.