

Bowling balls are one of the easiest things to turn into upcycled junk art for your garden.
And they are readily available at thrift shops and yard sales.
Psst - this post was originally published in 2011. I have recently updated it with a more current supply list, prettier photos, and a more complete tutorial.
✨ BTW, today is Thrift Store Decor Wednesday, so make sure you hang around to the end of the post to see the rest of the team's thrift store repurposes for the month!
Way back when I first started blogging, I showed you how to turn a garage sale bowling ball into a piece of yard art.
In that case, a penny bowling ball.
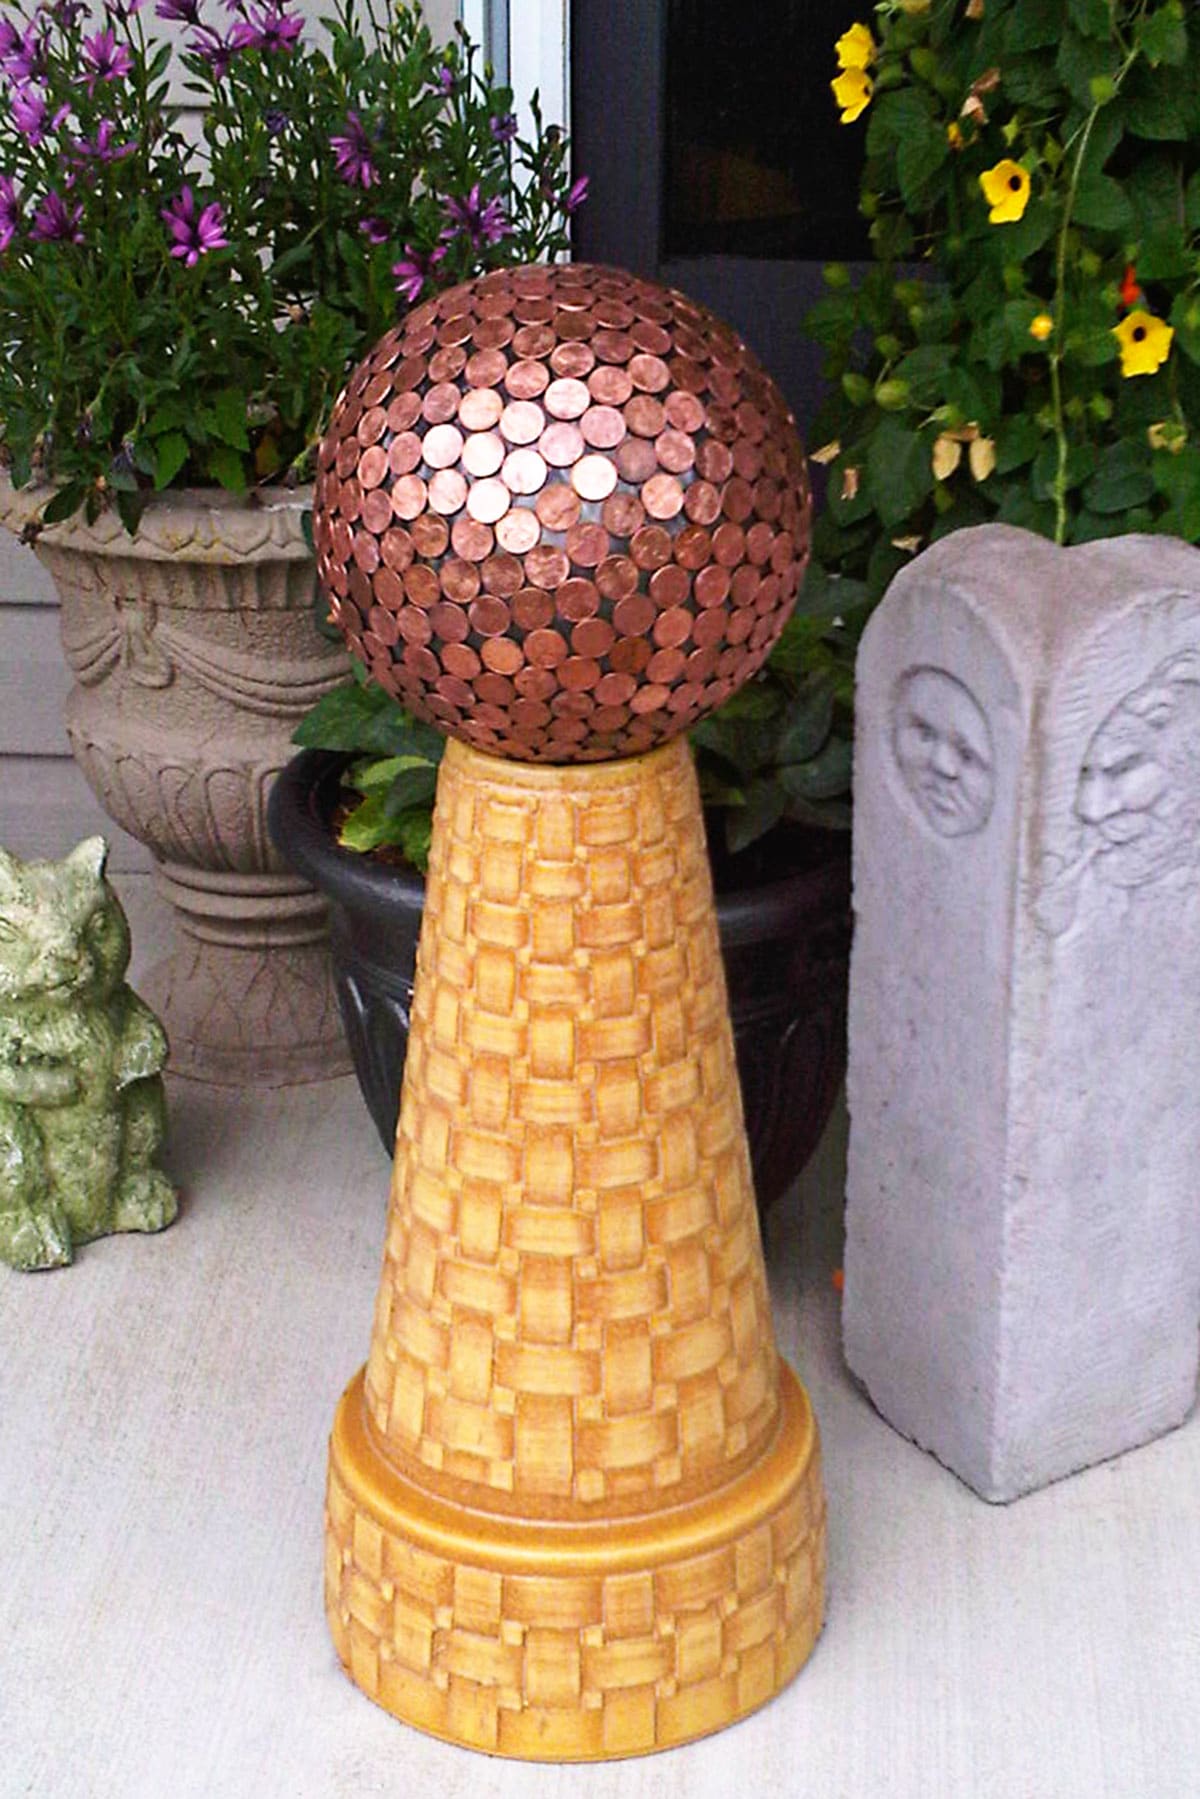
(Instructions for making the penny bowling ball can be found HERE)
I think bowling ball yard art has a sort of cult following because that post is by far the most Googled of my posts and brings quite a few people to my blog.
A few years later I decided to make a slightly different version of bowling ball yard art.
One with a mosaic look.

How To Make Decorated Bowling Balls For The Garden
(This post contains some affiliate links for your convenience. You can read my full disclosure policy here.)
MOSAIC GARDEN BALL SUPPLY LIST:
- Bowling Ball
- Mosaic Glass Flat Gems
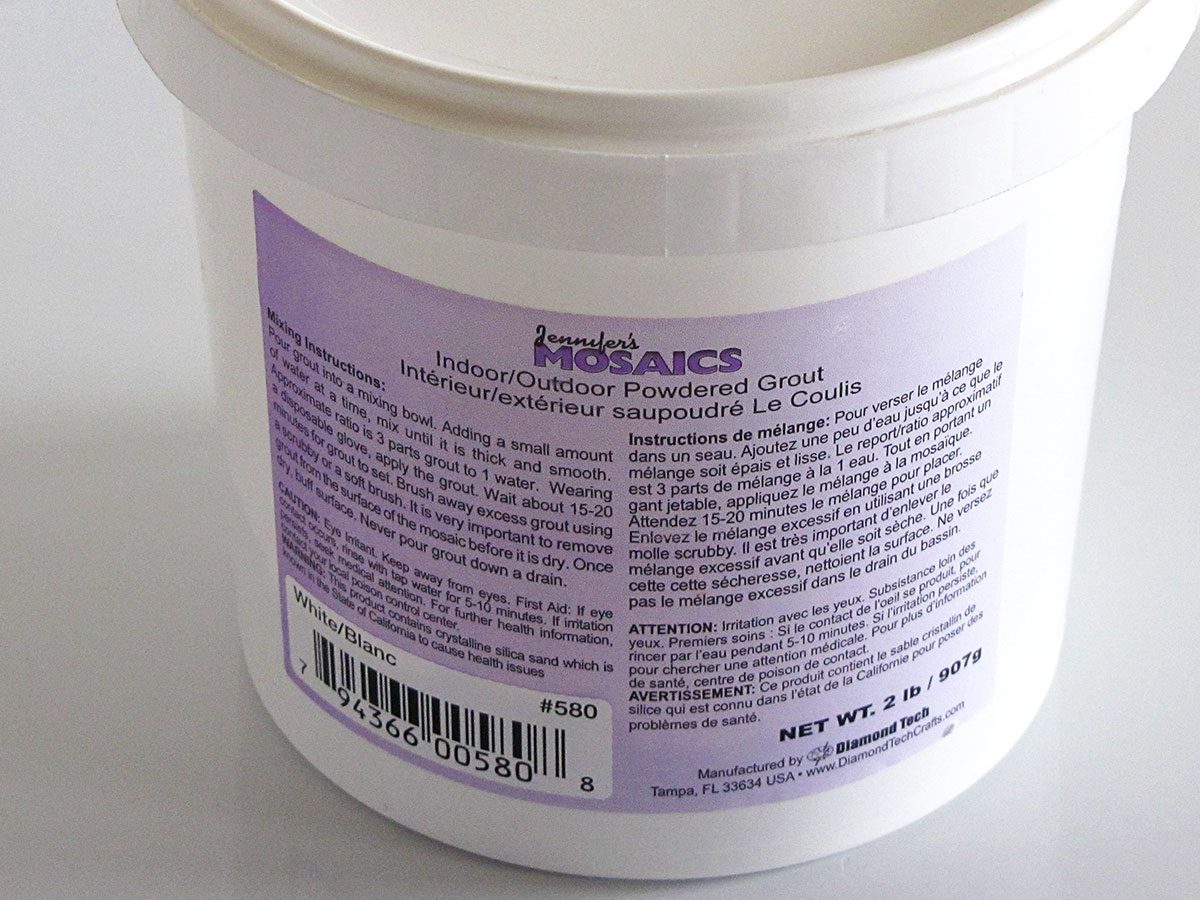
- Jennifer's Mosaics White Powdered Grout
- Sand Paper or Sanding Block
- Sponge, Soft Brush or Paper Towels
- Disposable Gloves
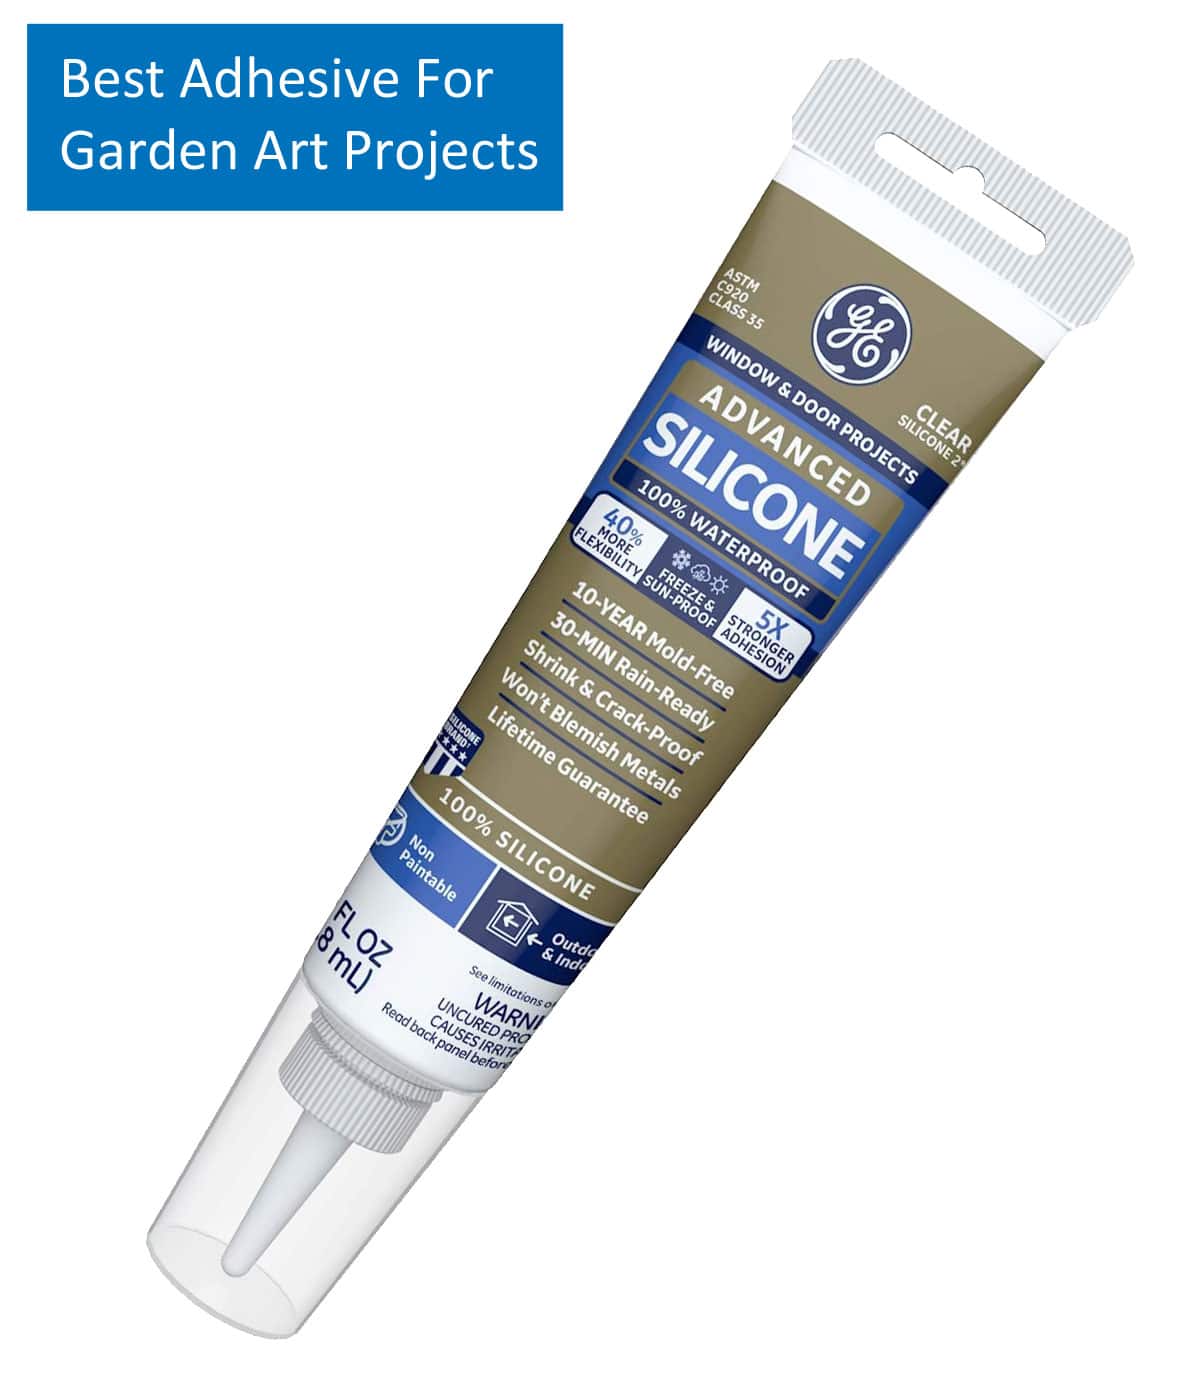
- GE Advanced Silicone Window & Door Sealant - Clear
- Grout Sealer for Bathroom & Shower Tiles - I like Fila Grout Sealer For Tile & Stone because it comes in a spray bottle and is more economical. Another good one for outdoor projects is Stonetech's Heavy Duty Grout Sealer although it is more expensive and comes in a larger non-sprayable bottle.
Instructions:
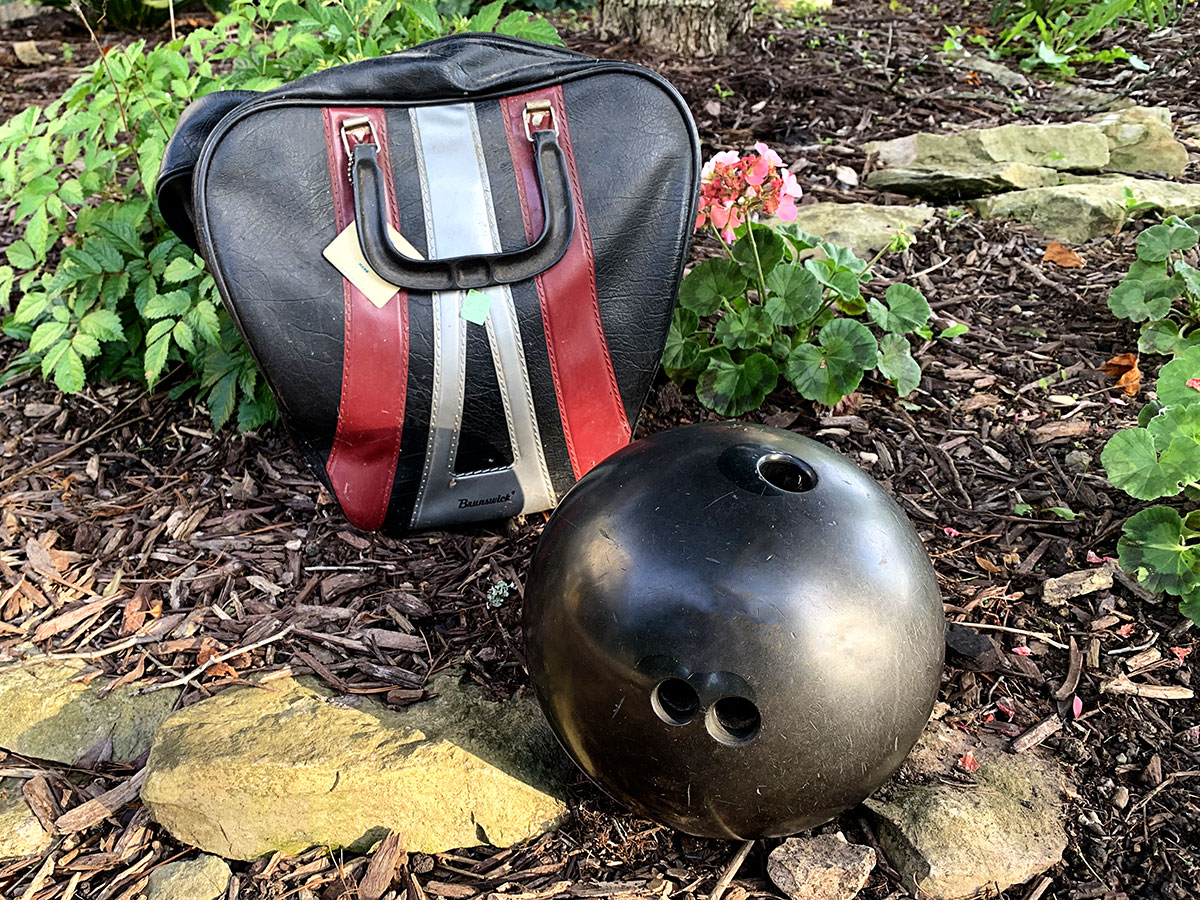
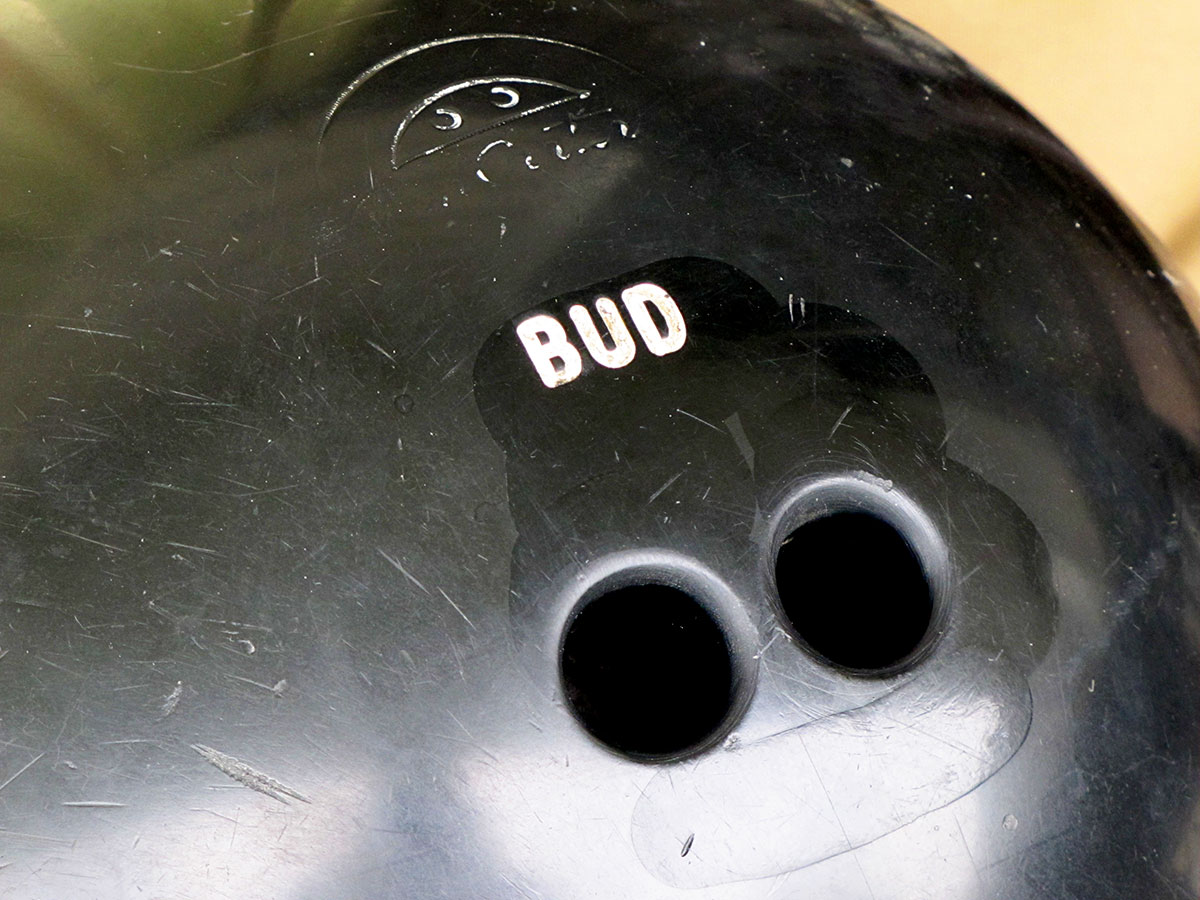
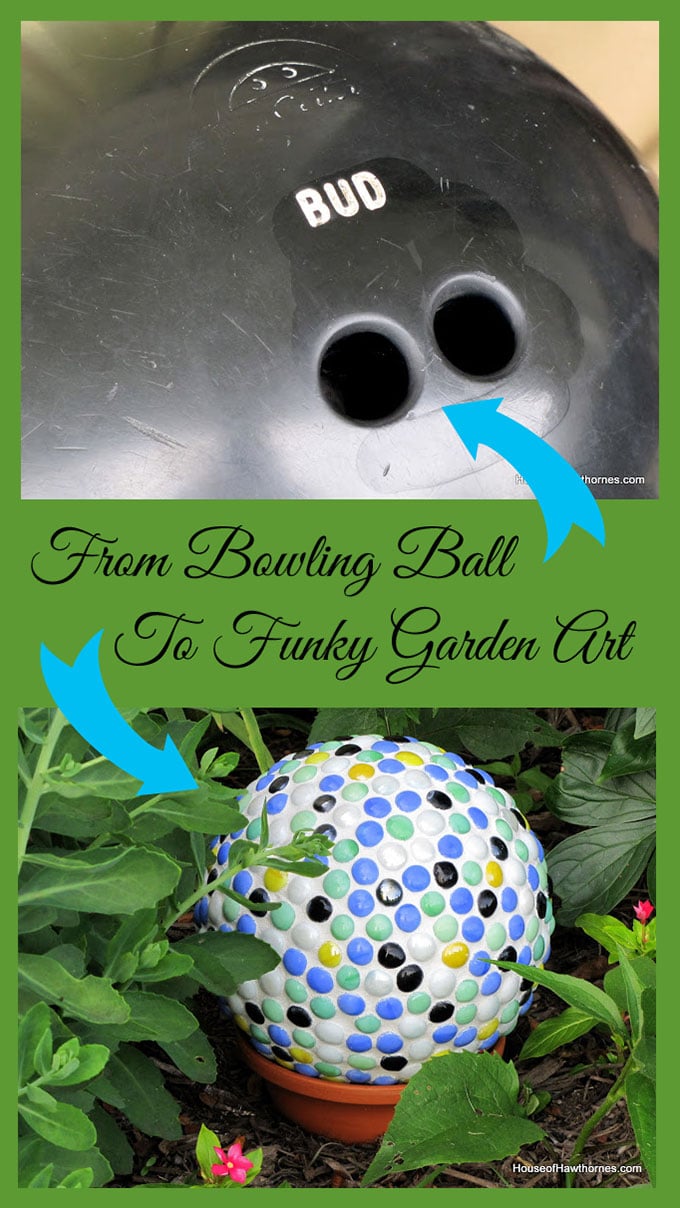
I picked up a bowling ball at my local thrift store. Bud's ball, to be exact.
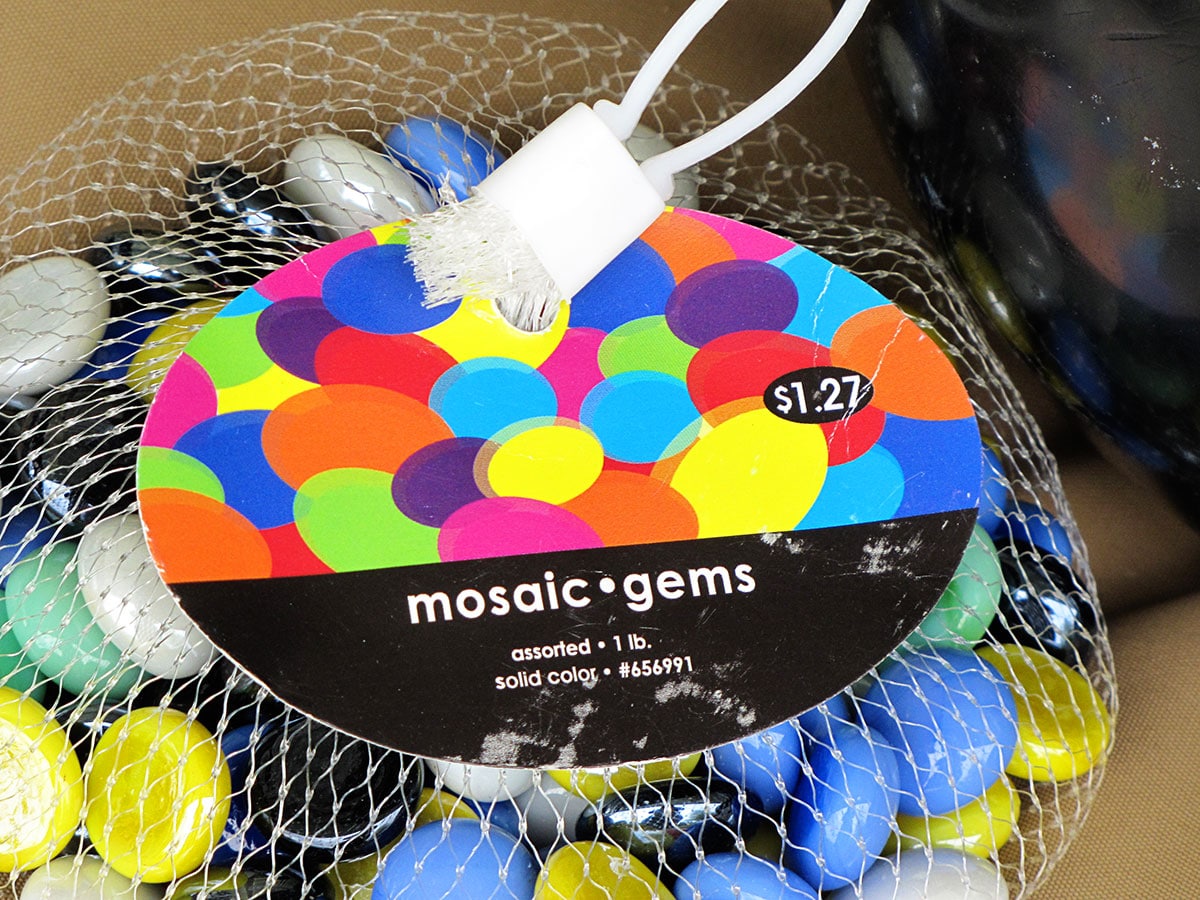
And some "gem" stones from the mosaic and glass tile aisle at my local craft store.
I used approximately 6 bags of these.
I started by filling in the huge finger holes so I would have a smooth surface to work with.
I wadded up some paper towels and stuffed them down into the holes filling them about ⅔rd of the way. I filled the rest in with the caulking.
Bud had some huge fingers and I didn't want to use up a whole tube of caulking, so that is the reason for the paper towels.

Ignore the glaring whiteness in the finger holes photo.
When I made this project I used a WHITE caulk as finger hole filler and my GE Advanced Silicone CLEAR caulk to adhere my mosaic gems. I was totally overthinking it and the color of the finger hole filler makes no difference whatsoever.
Just save yourself some money and use the GE Advanced Silicone for both.
I roughed the ball up with sandpaper a little just to give it a better tooth to grab the glue.
I used GE Advanced Silicone Window & Door Sealant - Clear as my adhesive since this was going to be placed outside. I wanted something that was waterproof, plus would set up quickly and this one does both wonderfully.
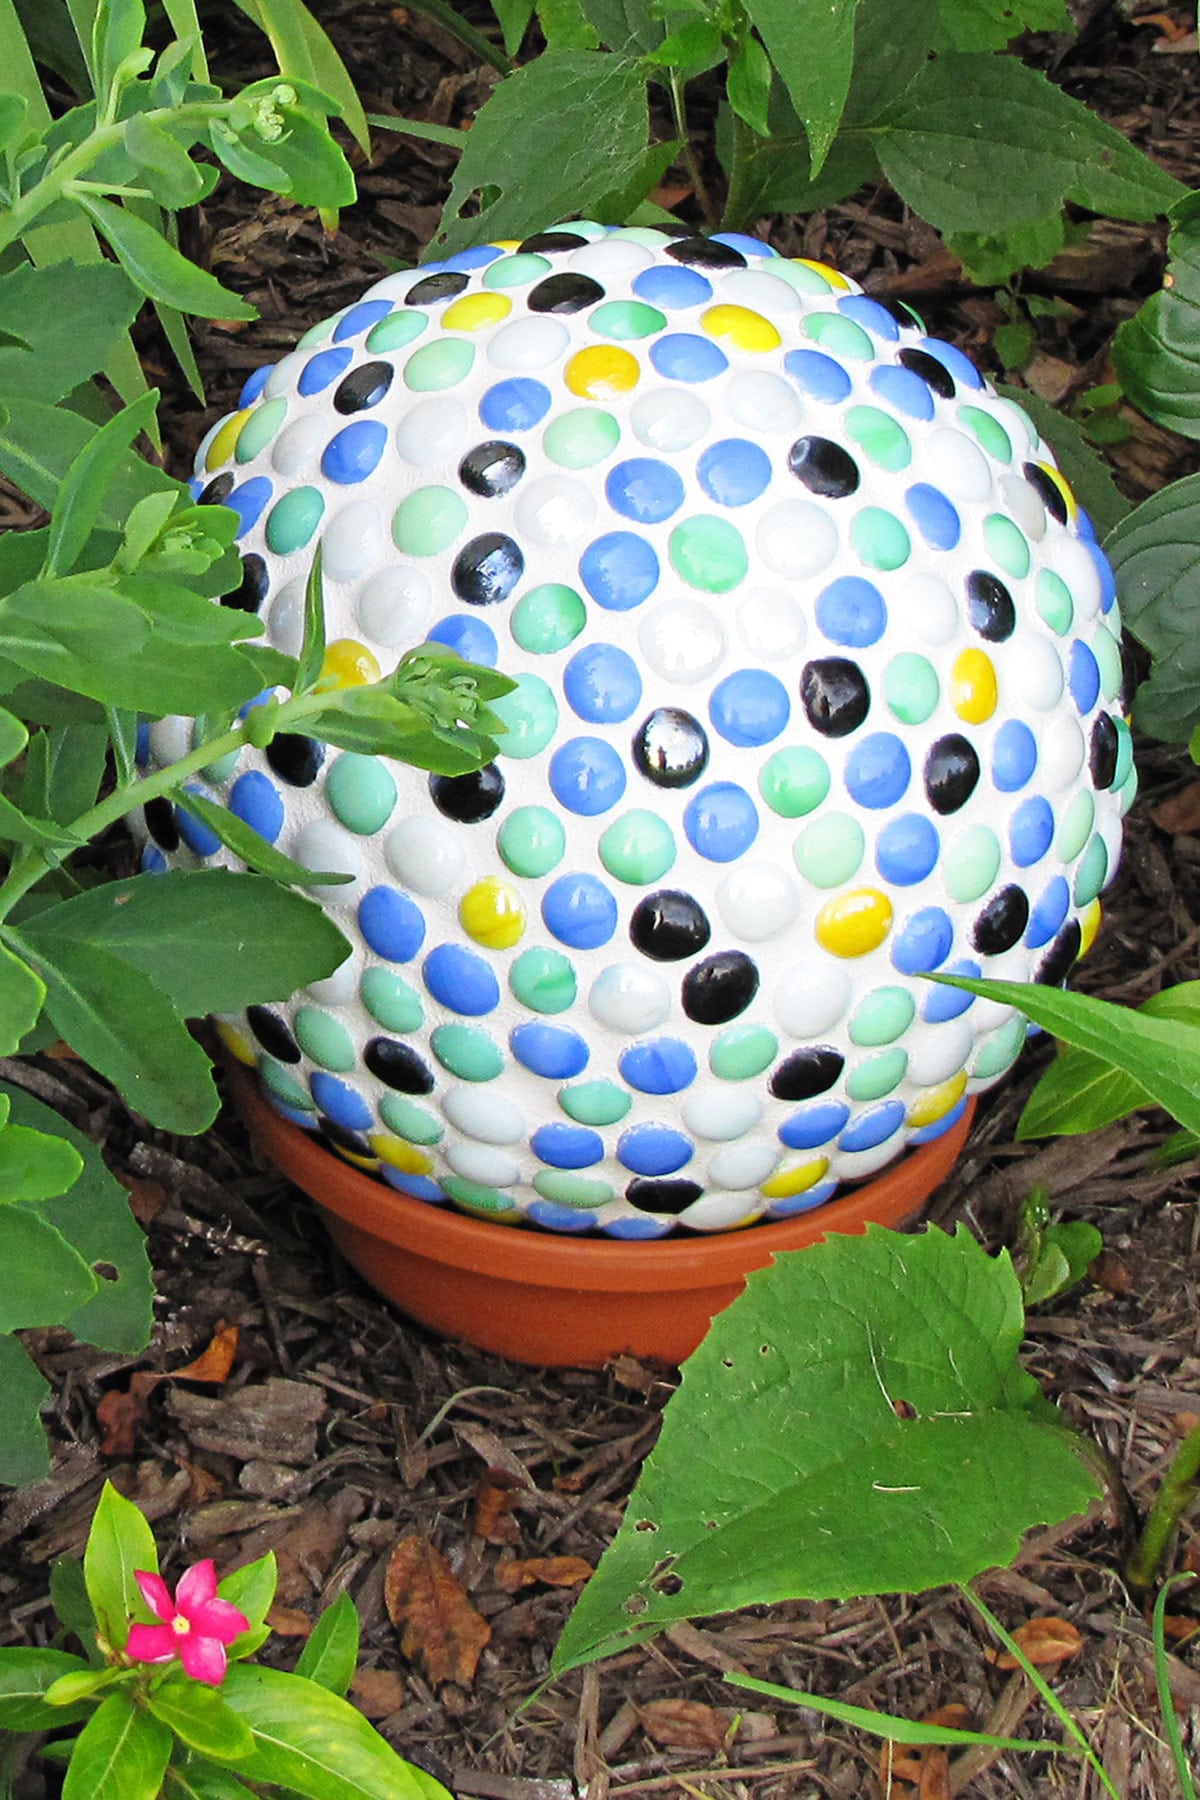
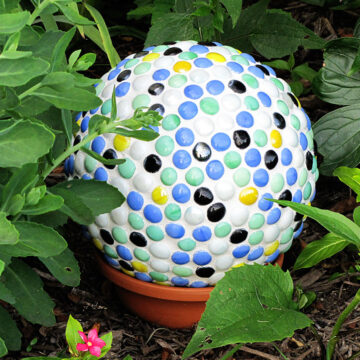
Then I glued my gems onto the ball.
This took me two months. A person with more patience and less ADD could finish the gluing in less than two hours though.
And most of that time would be waiting for one section to set up before you go on to the next section.
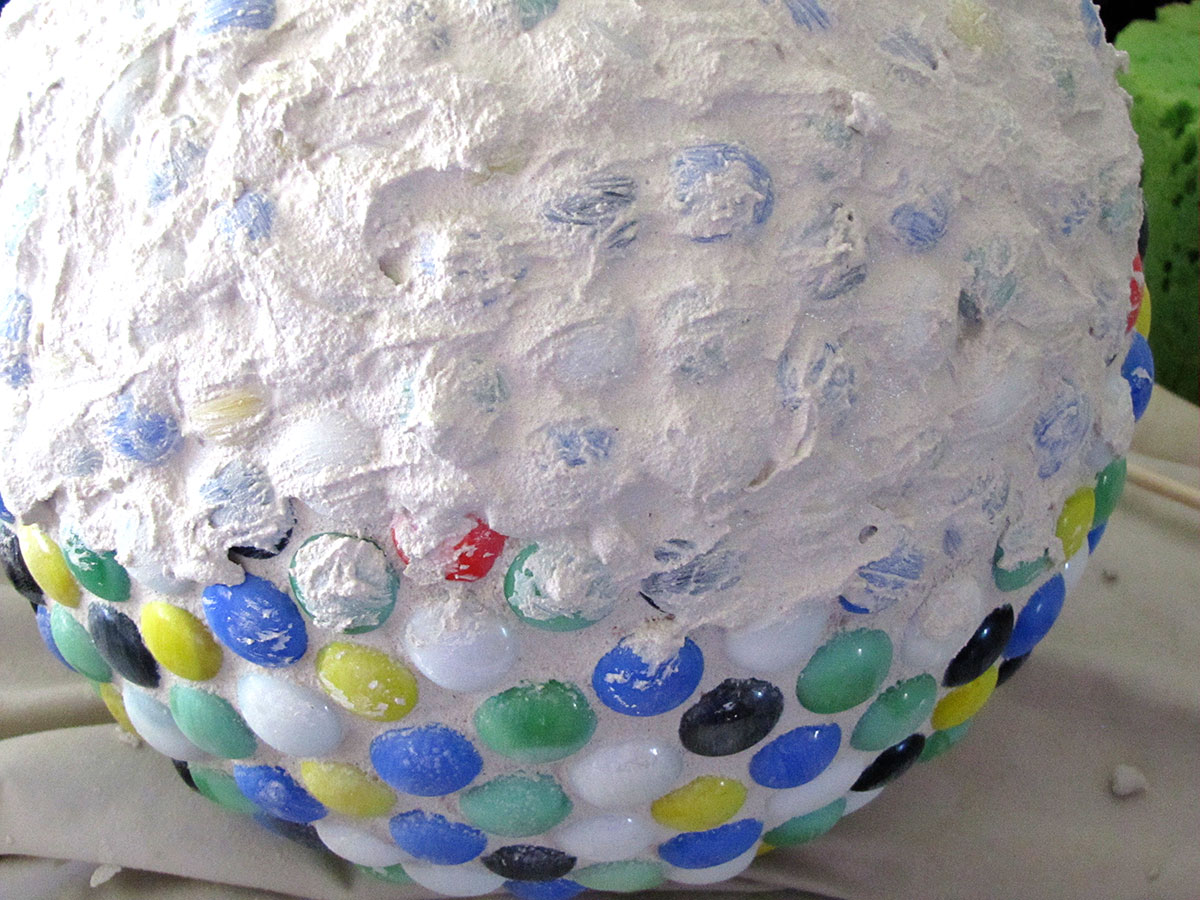
I decided to grout this ball, as opposed to my penny bowling ball, so I bought a small tub of powdered grout made for indoor/outdoor mosaic projects.
Using disposable gloves I spread the grout over half the ball pushing it down between the mosaic pieces and allowed it to dry for 15 minutes.
Then I ran a damp sponge over the gems to get the vast majority of the grout off the TOPS of the gems (you leave it in the grooves and sides though).
If you let the grout dry completely on the tops of the gems, it will be very hard to get off later.
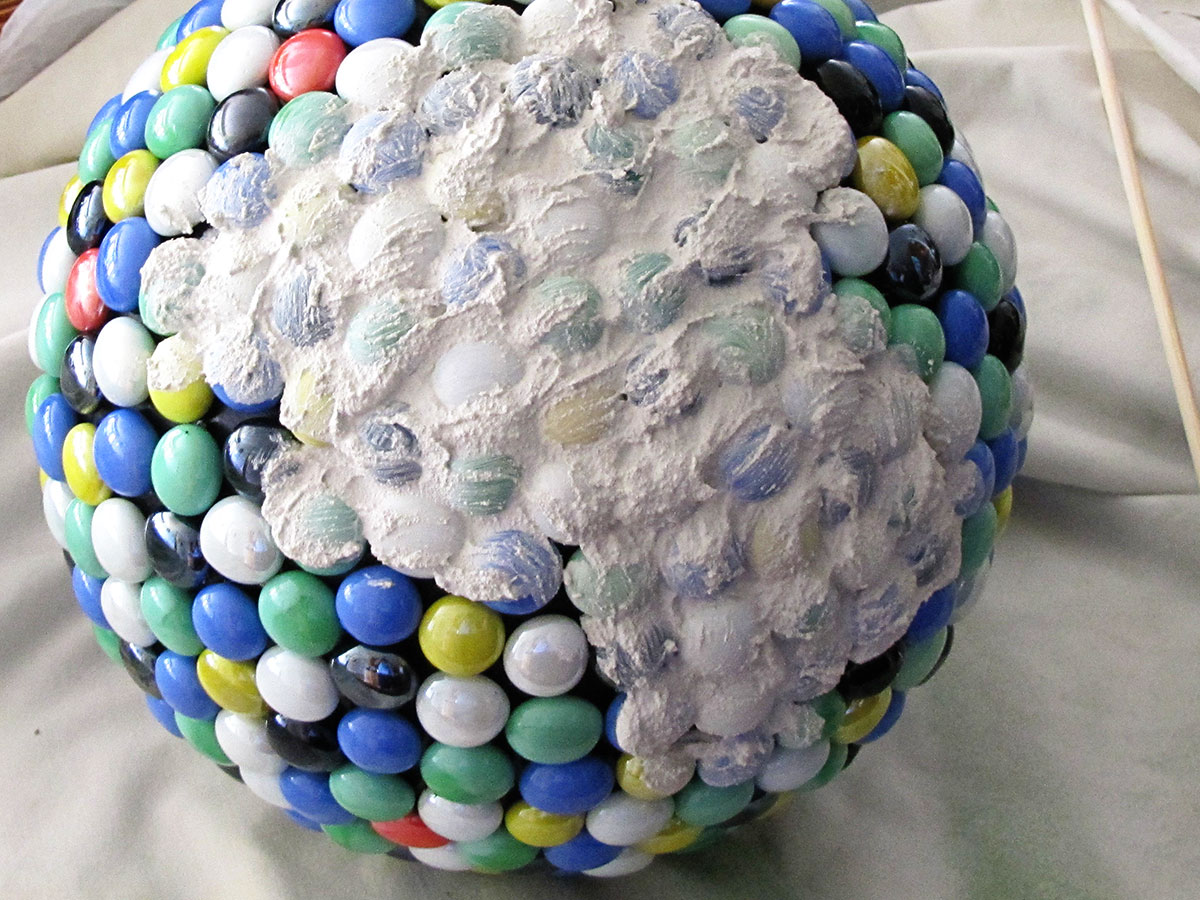
When the grout was completely dried, I used a clean dry cloth to polish off any haziness caused by the slight grout residue.
Then I flipped the ball over and grouted the rest using the same technique.
Follow the directions on your bottle of grout sealer to seal the grout against the outdoor elements. Most likely your sealer will tell you to spray it on, allow it to dry and buff it off the top of the stones.
And then it was good to go outside in the garden.
Things To Make Bowling Ball Art With:
- Pennies
- Mosaic Tiles or Gems
- Broken China
- Small Rocks
- Sea Shells
- Mirror Pieces
- Glass Gems of any kind that are flat on the back
- Heck, you can just paint them (I've seen some cute ladybugs and bees)
Printable Tutorial
Mosaic Bowling Ball Garden Art
Supplies
- 1 Bowling Ball
- 6 Bags Mosaic Flat Gems
- 1 Container Jennifer's Mosaics White Powder Grout
- Sand Paper or Sanding Block
- Sponge, Soft Brush or Paper Towels
- Disposable Gloves
- 1 Tube GE Advanced Silicone Window & Door Sealant - Clear
- 1 Spray Bottle Grout Sealer for Bathroom & Shower Tiles
Instructions
- Fill in the finger holes by wadding up paper towels and stuffing them down into the holes filling them about ⅔rd of the way. Fill the rest in with the caulking.
- Using the sandpaper rough the ball up a little just to give it a better tooth to grab the glue.
- Put a dollop of your GE Advanced Silicone onto the back of each "gem" and glue them onto the bowling ball one by one. They should be touching each other.
- You can glue the gems onto roughly half the ball, wait for those to set up and then turn the ball over and glue the gems onto the other half. You can set your ball on top of a mixing bowl to keep it from rolling around.
- Using disposable gloves I spread the grout over half the ball pushing it down between the mosaic pieces and allowed it to dry for 15 minutes.
- Run a damp sponge over the gems to get the vast majority of the grout off the TOPS of the gems (you leave it in the grooves and sides though). A soft brush or paper towels will also work.If you let the grout dry completely on the tops of the gems, it will be very hard to get off later.
- Flip the ball over and grout the rest using the same technique.
- When the grout has completely dried, use a clean dry cloth to polish off any haziness caused by the slight grout residue.
- Follow the directions on your bottle of grout sealer to seal the grout against the outdoor elements (most likely your sealer will tell you to spray it on, allow it to dry and buff off the tops of the gems).
Notes
- Make sure you are using a silicone window and door sealant so it is made to hold up to anything from rain to snow and summer heat to winter cold.
- Make sure your grout specifically says it is for indoor & OUTDOOR use. Not all grouts are.
Thrift Store Decor Team Projects
Now let's go see what the other Thrift Store Decor Team members are up to today!
Black Matte Spray Painted Lantern - Domestically Speaking
DIY Chandelier Planter - My Repurposed Life
Succulent Crock Planter - Petticoat Junktion
DIY Upcycled Bar Cabinet - Our Southern Home
DIY Pressed Flower Art - My Uncommon Slice of Suburbia
Herb Themed Rustic Garden Stepladder - Organized Clutter
Patriotic Serving Tray - Reinvented Delaware
Upcycled Garden Pot - Shop At Blu
Mosaic Bowling Ball Yard Art - House Of Hawthornes (that's me)

Sue at Blu
Pam you know I love this with the blue stones! What a great surprise to tuck beneath some bushes. Poor Bud and his huge fingers! Pinned!
Carlene @ Organized Clutter
I love it Pam! I think more than the penny one and I loved that one too.
Gail Wilson
I love bowling ball projects! Yours is fabulous, but I doubt I have the patience for this type. 🙂
The last ones I made, all I did was shine them up with spray sealer. They had pretty swirls of colors, not plain black.
Great job lady!
pinned!
gail
Christy @ Our Southern Home
This truly was a labor of love! It looks fabulous. I also like that the weight of it keeps in place in the garden.
Lynn LippsLipps
I decoupage one and put the colorful stone on made a snowman head and have one on the basement to go not sure what I am doing with it I saw a cute pumpkin one with a little mouse coming out of the holes really cute they are addictive my husband rolls his eye oh no not another one lol
Pam Kessler
They are aren't they! The pumpkin one sounds cute. I'll have to search for it on Pinterest (everything's on Pinterest I think)!
Susan Pries
pries.Hi Pam, I love what you did so don't think it looks bad, because I love it. I almost gave up trying to find someone that had grouted a gem ball. I'm using a round glass vase and gluing the Jem's to that. But they don't cove the vase everywhere so needed a hit if it was even possible to put it outside. So thanks it was worth the read. I also just saw a blog using neon food coloring and mod podge file and swirling it inside the glass. Not sure which one I will choose but it's fun trying ☺️.
[email protected]
Beej Hanson
I made 2 balls... One of them has hairline cracks all over... Want to make more but didn't like the grout part... Going to find something else to use instead of grout... I made mine putting pictures I have taken and edited on back of glass pieces...
Would like to share pictures of the one's I did... How do I do that?
Vickey lee
My mom gave me my dads bowling ball recently his name “Bud” engraved on it. So when I found your pin it gave me a little flutter in my heart remembering my dad. I want to do something with my dads. Only thing I don’t want to cover up his name. Any suggestions?
Beth Fisher
just don't cover this name. put a circle or something(heart) around the name with the baubles or pennies or whatever you use.
Katie Tahara
Can I ask, how is your bowling ball still holding up in the elements? Has an glass fallen out or grout cracked. I've been struggling with that.
Susan Raymond
This is such a great idea. Both gazing balls are so unique. I told one of my grandsons that we will be garage selling it yhis week and msking a couple of these. Again, thank you.
Jeanie Hevener
Haha! I love it! That is the prettiest bowling ball ever! You are so creative.
nelda
I'm STILL saving up Pennies for my bowling ball project!
Nancy
I think your yard art is adorable!
Anonymous
Thanks to your penny ball I went out and baught three bowling Balls at GW. I am making a bumbling bee out of one, cover the second with marbles and I am saving 5 cent coins for number three!
Anonymous
me and my grandkids have done a few of these. lots of fun and great memories. one that we made has a little ceramic frog sitting on top. its my favorie. the memories with my grandbabies was priceless!!!!!
Mixed Kreations
This is really cool. I could do this. And it looks so pretty in the garden. I don't have a bowling ball but I will have to keep an eye out for one. Maybe I could find one at goodwill. Thank you for sharing this wonderful project. Pinning!
Linda @ Mixed Kreations