

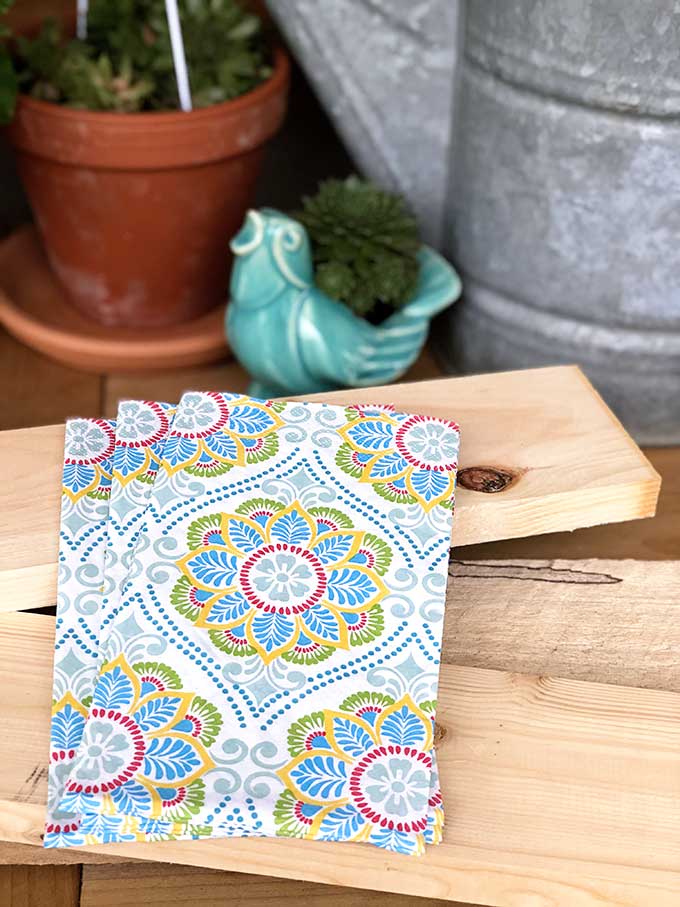
I've been wanting to try this decoupage paper napkin on wood method for a few years, so when I found some napkins at the thrift store I decided to give it a go by making a wall mounted coat rack.
I'm calling it boho style because the napkin pattern gives me that free-wheeling, eclectic, colorful boho vibe.

How To Make A Wall Mounted Coat Rack: Boho Style
Supplies:
For the basic wall mounted coat rack:
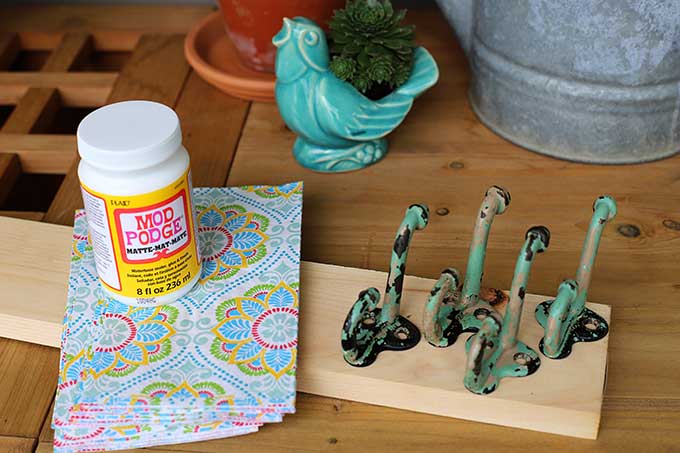
- 1 in. x 4 in. x 3.25 in. Common Board Bed Slat (Spruce/Pine/Fir)
- 4-5 Coat Hooks (mine are vintage, but you can buy new ones at Home Depot HERE)
- Screws (for the hooks if they do not come with screws already) - I used #8 x ¾ in. flat head Phillips screws
- Wall anchors and screws or command adhesive strips (to attached to wall)
- Drill or Screwdriver
- Measuring tape
- Razor blade knife
- Rust-Oleum Stain Clear Enamel Sealer (very optional)
If you want to go all Boho on your coat rack:
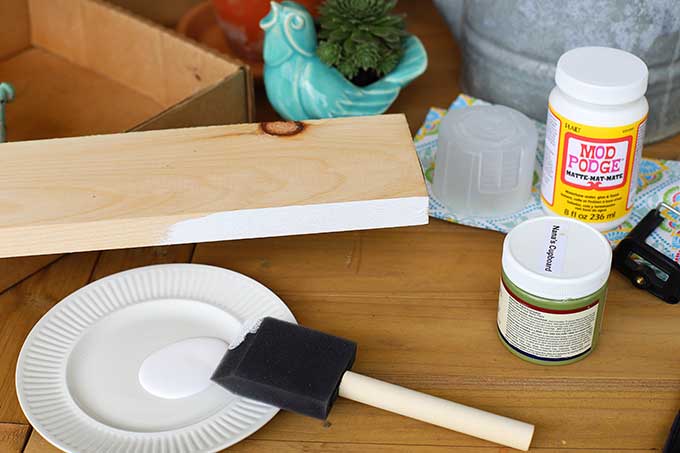
- Mod Podge in Matte Finish
- Paintbrush or foam roller
- Paper napkins
- Saran Wrap (optional, but it sure comes in handy)
- Sander (optional)
- Paint or stain (optional)
Instructions:
Gather your supplies. I used vintage coat hooks I had found at a barn sale, but you can purchase new hooks or find older ones at your local Habitat Restore.
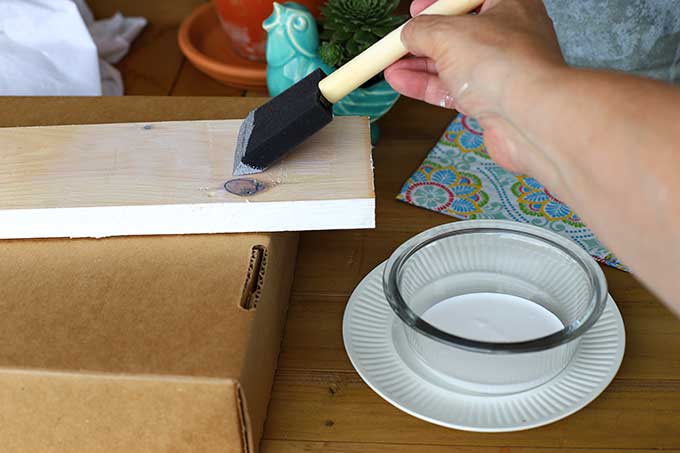
Paint or stain the edges of the board that will not be covered in paper.
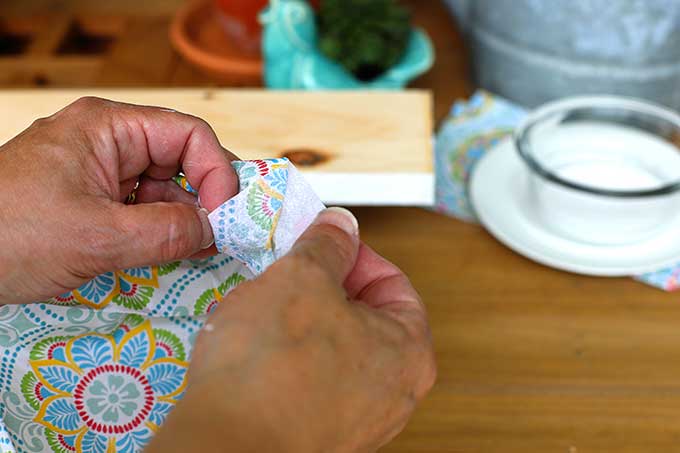
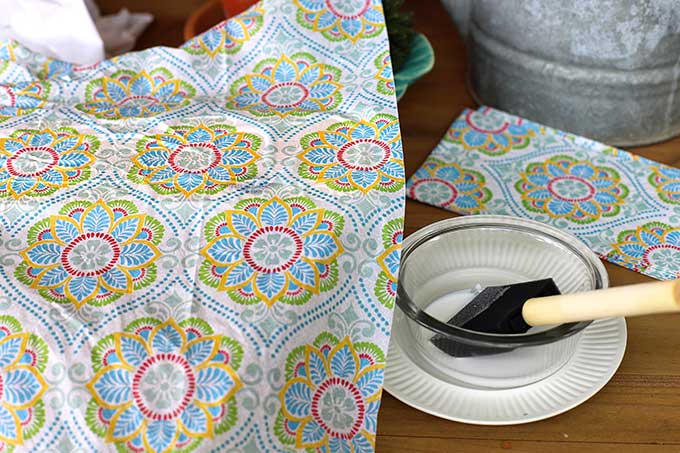
Separate your 2 or 3 ply napkins.
You may pick up your napkin and think oh, there's nothing to separate here, but the napkins are probably at least 2-ply if not 3-ply.
Just take you finger nail and work the corner open and then slowly (very slowly) peel apart into separate ply.
Apply a heavy coat of Mod Podge to the top surface of your wood.
Place your napkin on the face of the board. You can move it around slightly, but try to get it as close to where you want it to land as possible.
Huge crafting tip coming up!!!
Take a piece of your plastic wrap and lay it on top of the napkin and press down. You can glide your hands over the plastic wrap to even out any unwanted creases.
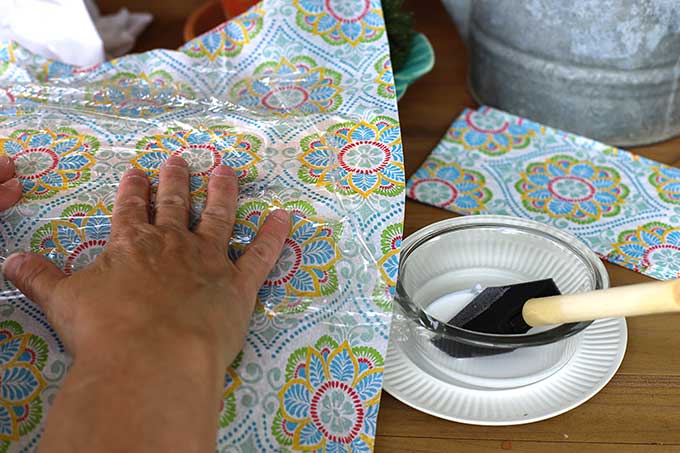
Yeah! No more sticky fingers and ripped paper!
For the look I was going for, creases were not a deal breaker though.
After the Mod Podge dries, trim away the overhang with a razor blade knife.
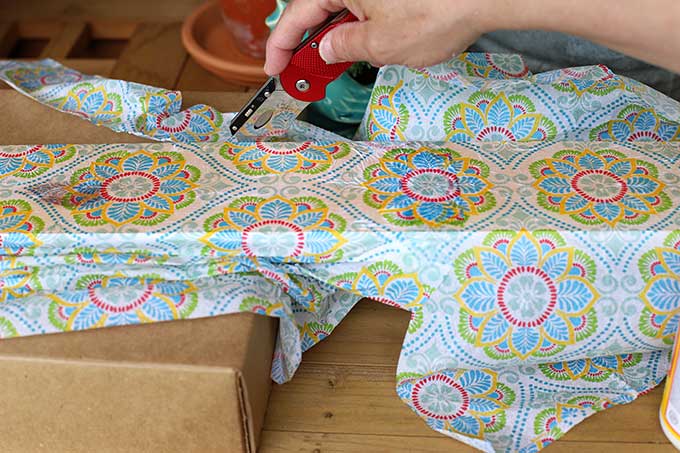
It really is a two handed job, but one hand had to press the camera shutter.
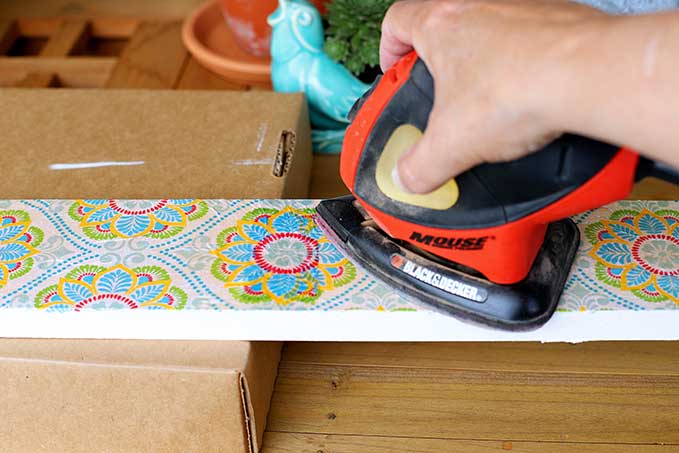
At this point you can sand the surface a bit to give it a more worn appearance.
This is totally a judgement call on your part. Since I was going for an old warn piece of wallpaper look, I decided sanding would be the way to go.
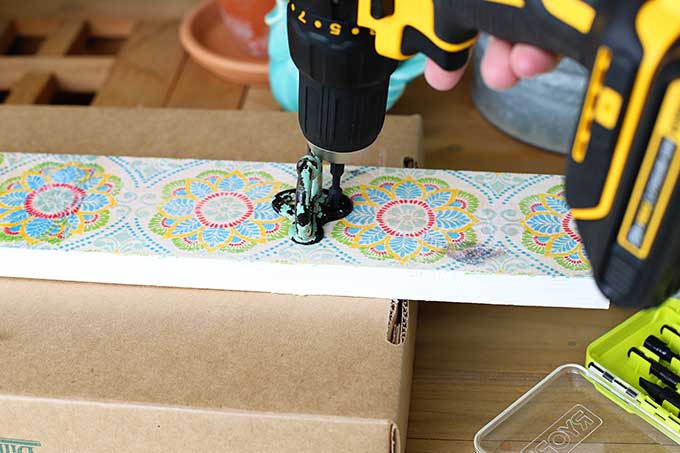
Space your coat hooks out evenly on the surface of the board and attach the hooks with screws.
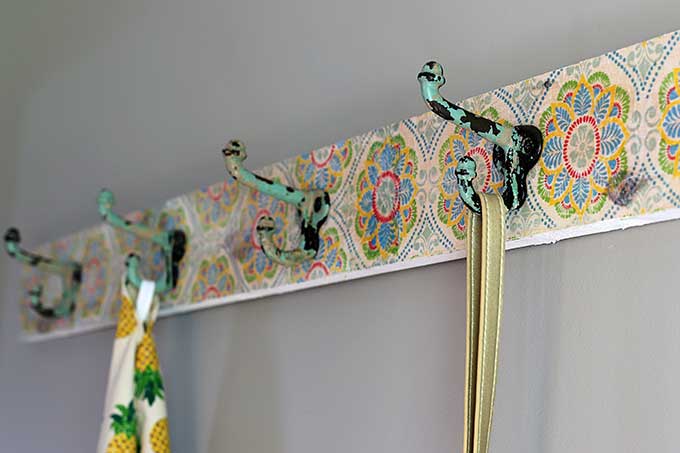
You can attach your coat rack to the wall using screws with anchor bolts or if it's just going to be for looks you can use Command strips.
You might wonder why you would have a coat rack just for looks? I use mine for home decor items rather than actual jackets since it's just feet from the hall coat closet.
And believe me, I've had more than one person come in my house and try to hang their heavy winter coat on my "coat rack".
Edited at 7:20am the next morning - Ixnay on the Command strips. I woke up this morning to the coat rack being a floor rack. Going with screws in the wall this time!
OK, I'm going to add this part, but please be careful here.
Since my hardware was vintage and pretty chippy (and I wanted to keep it that way - I loved that kind of look) , I decided to coat it with a couple coats of a clear enamel sealer to keep the chippy paint from flaking off all the time.
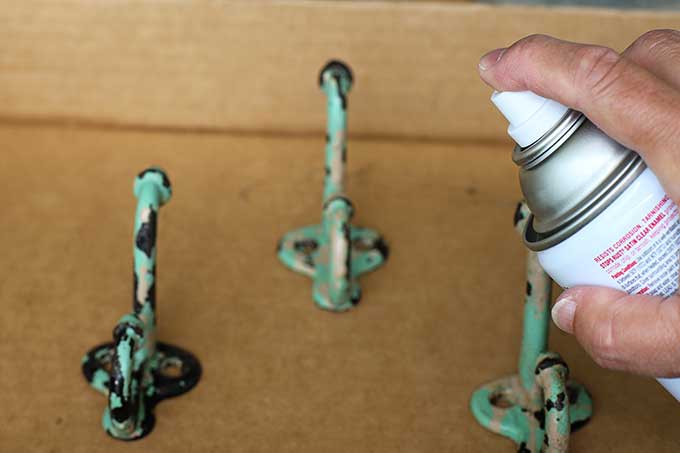
I loved the chippy black, green and tan paint look, but I didn't want to have to deal with tiny little black, green and tan chips all over my floor.
If you are unsure if your vintage hardware contains lead or not, please check the EPA website for information about safely dealing with lead based paints. This process is only for sealing chippy non-lead based paints. Lead paint is nothing to take lightly.

OK now that I got that off my chest, good things are coming your way because it's Thrift Store Decor Team Wednesday!!!

Run on over and see what the other gals are up to this month!
Thrift Store Decor Team
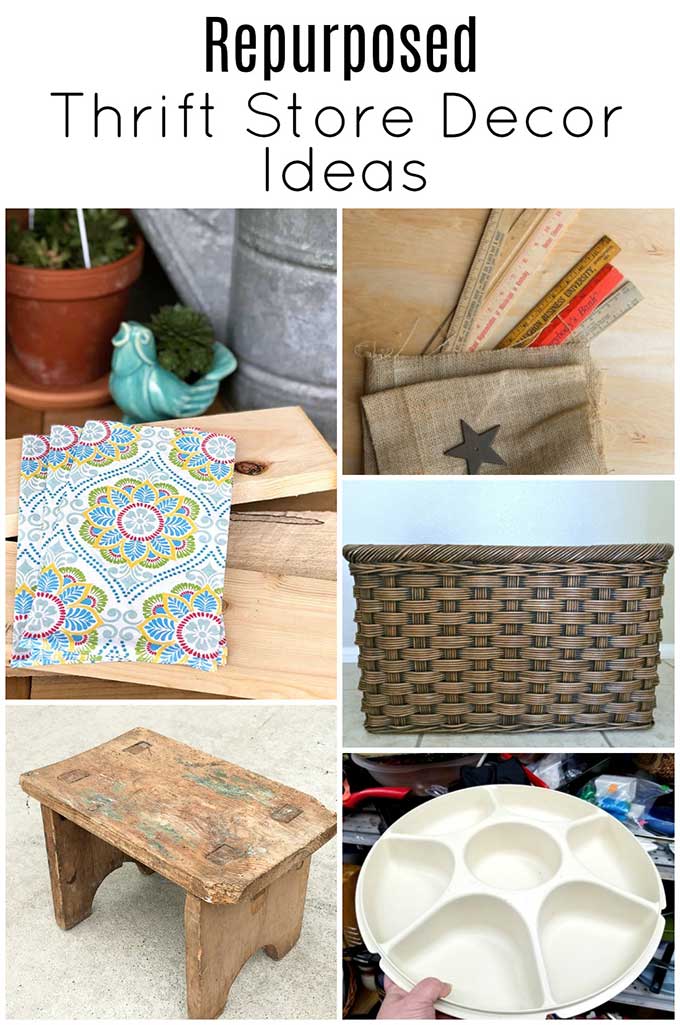
My Repurposed Life - Small Stool Makeover
Petticoat Junktion - Wooden Ruler Flag
Refresh Restyle - DIY Go Jump In A Lake Sign
Our Southern Home - Striped Stool Makeover
My Uncommon Slice Of Suburbia - Farmhouse Basket Makeover
Sadie Seasongoods - Vintage Industrial Style Rotating Hardware Bin
House Of Hawthornes (that's me) - DIY Wall Mounted Coat Rack: Boho Style
Diana Lopes
What a novel idea. Thanks for the DIY guide on making a coat rack!
Pam
Hmm, I can't tell if you're having a bad day and being snarky or if you're leaving a nice comment :), but the real tutorial is on how to use paper napkins to get the look. How to screw in coat hooks is an added bonus lol.
Karyl
Love this! I do have one question: did you seal the napkins after they were placed and dried on the board?
Pam
I did not, but you certainly could. The napkins are so thin, the Mod Podge soaked through them, so when they dried they are hardened. I think if it was on a horizontal surface I definitely would though!
Maria
So pretty! I am in love with this! I love decoupage.or mod podge!
Nancy
Clever. Love the pattern of the napkins!
Christy @ Our Southern Home
This is a super cute idea!! I haven't decoupaged in a while. You've got ideas spinning in my head!
Mazie
I've used Thanksgiving and Christmas napkins to make coasters for gifts. Like your idea of using plastic wrap to avoid sticky fingers. Love your napkins!
Kristin salazar
This is really cute! I love the colors and pattern of the napkins, what a great project!
Linda @ Itsy Bits And Pieces
I love how this turned out, Pam! I've been saving cool napkins for awhile to try a decoupage project...I love yours!
Pam
Last year when I was decluttering I donated a bunch of my unopened napkin packs to Goodwill. About the only thing I have ever donated that I missed afterwards!
girlfrimwva
looks wonderful! especially love your vintage hooks and the napkins you used!
Pam
Thank you! I got so excited when I found those hooks!
Karen Steinmann
You can use this napkin technique on candles also. Did this in classes years ago. Changes the plain candle into a piece of art.
Pam
OK, off to look for the candles on Pinterest!
Pam
Those ARE cute!!! I need to try that this weekend!
Debra
Such a great idea! I would never have thought of using napkins!