

I've always had a love affair with Hudson Bay point blankets.
They're those striped blankets you see so often in vintage camp and cabin decor.
Unfortunately, my wallet does not allow me to have my own fun, colorful blanket, so I decided to mimic the Hudson Bay design on a set of coasters.
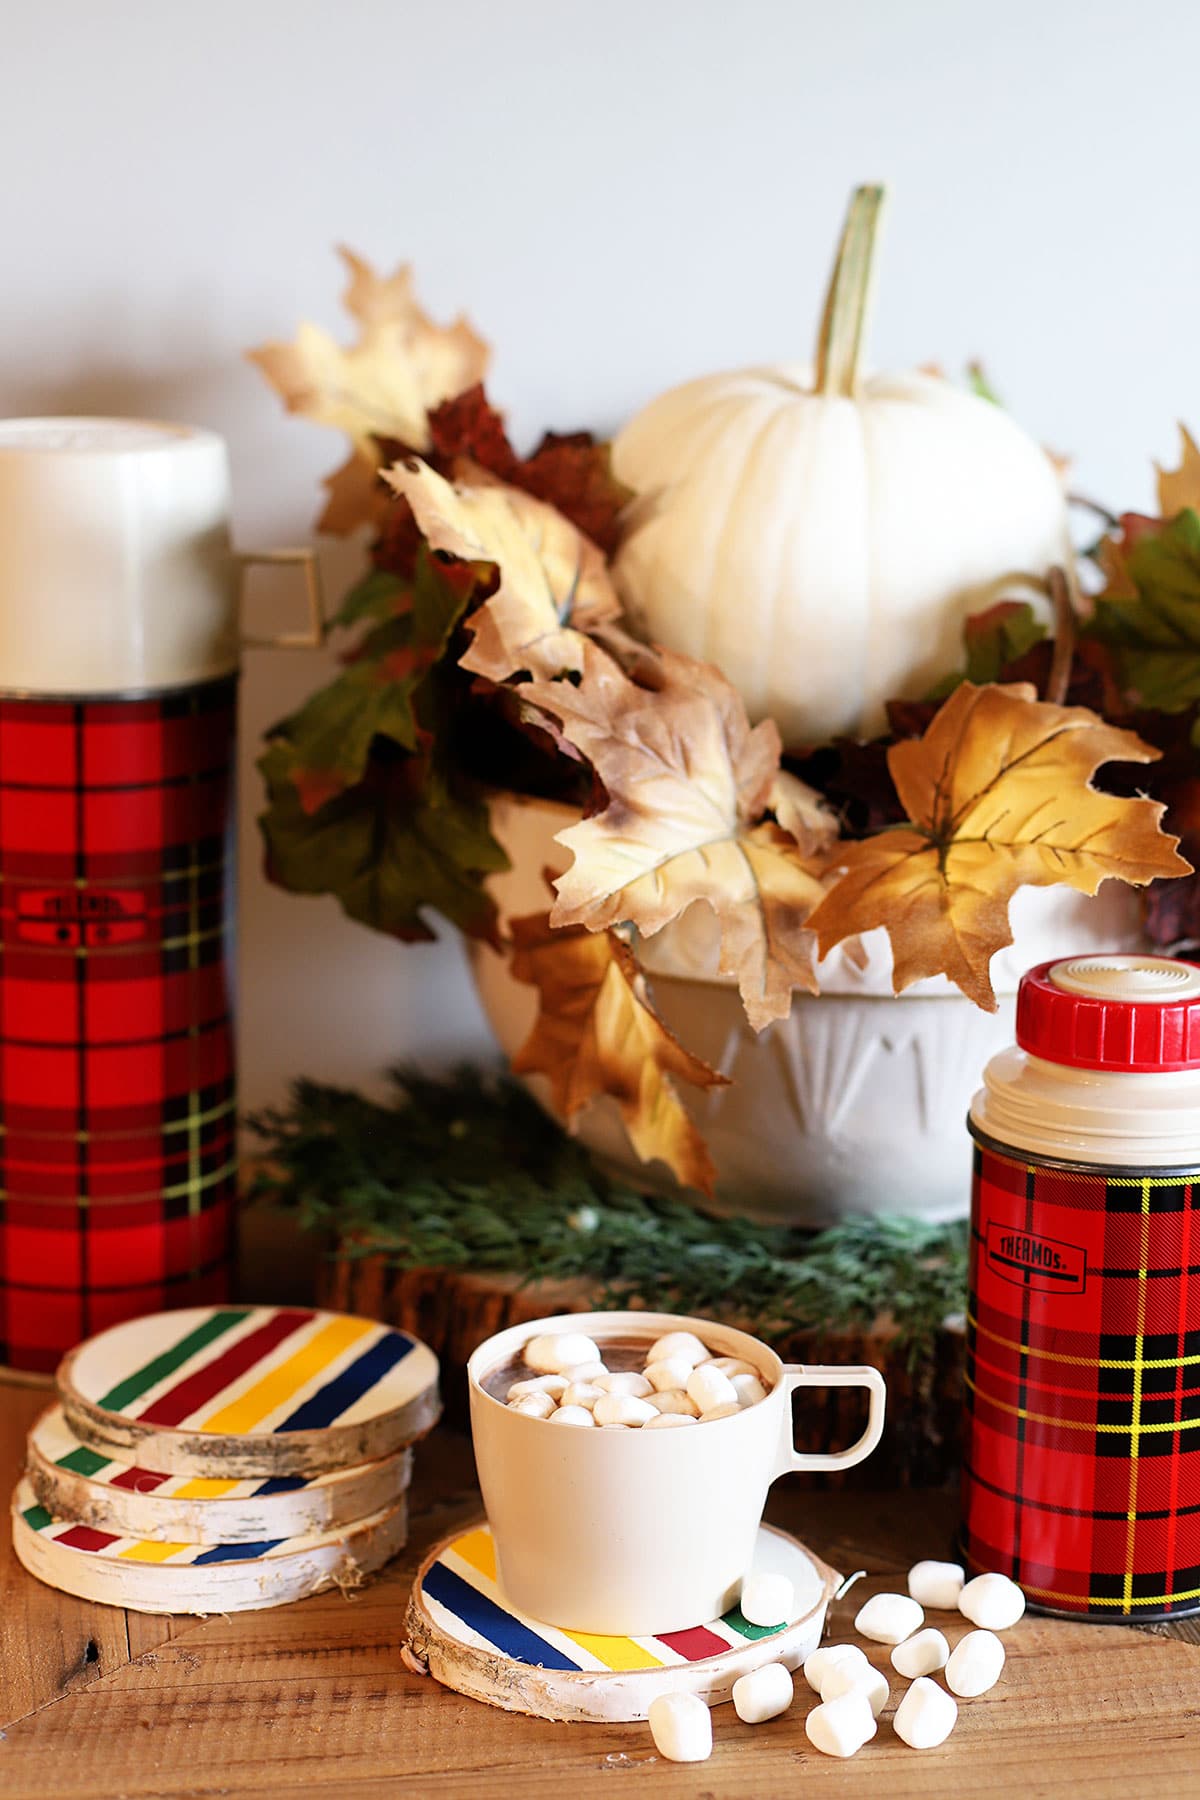
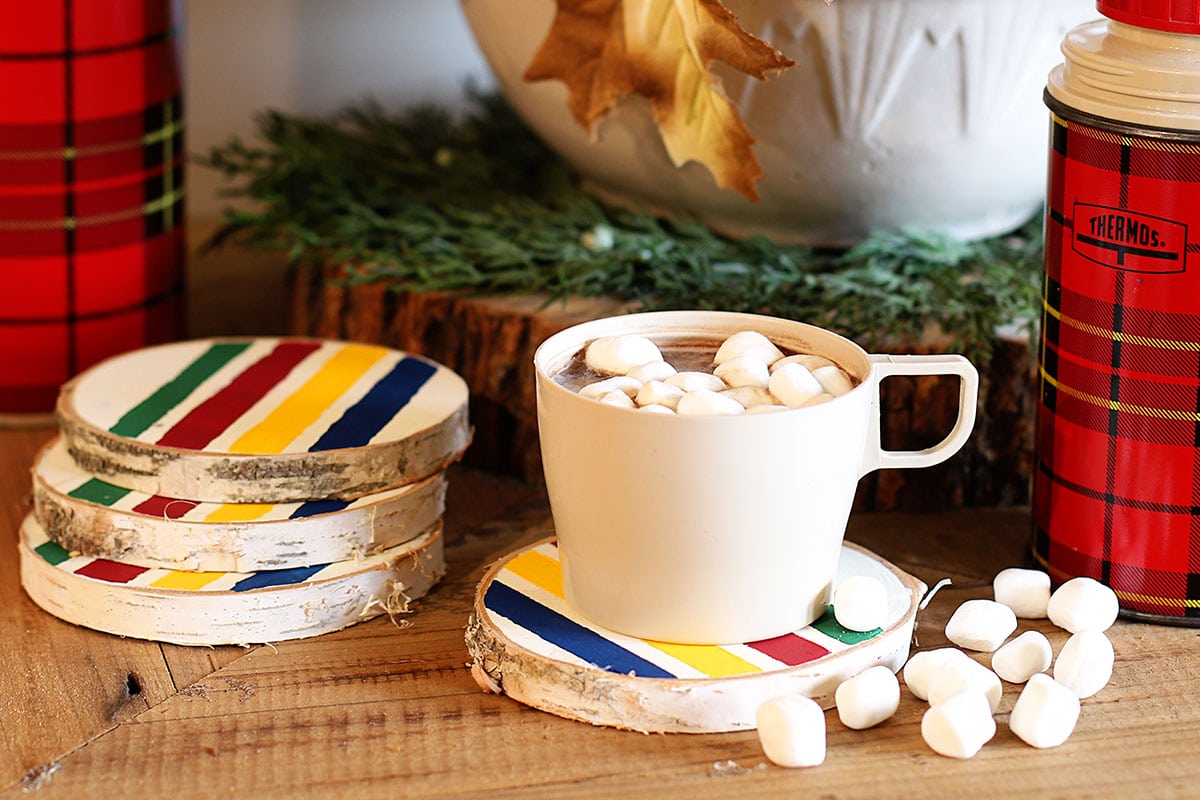
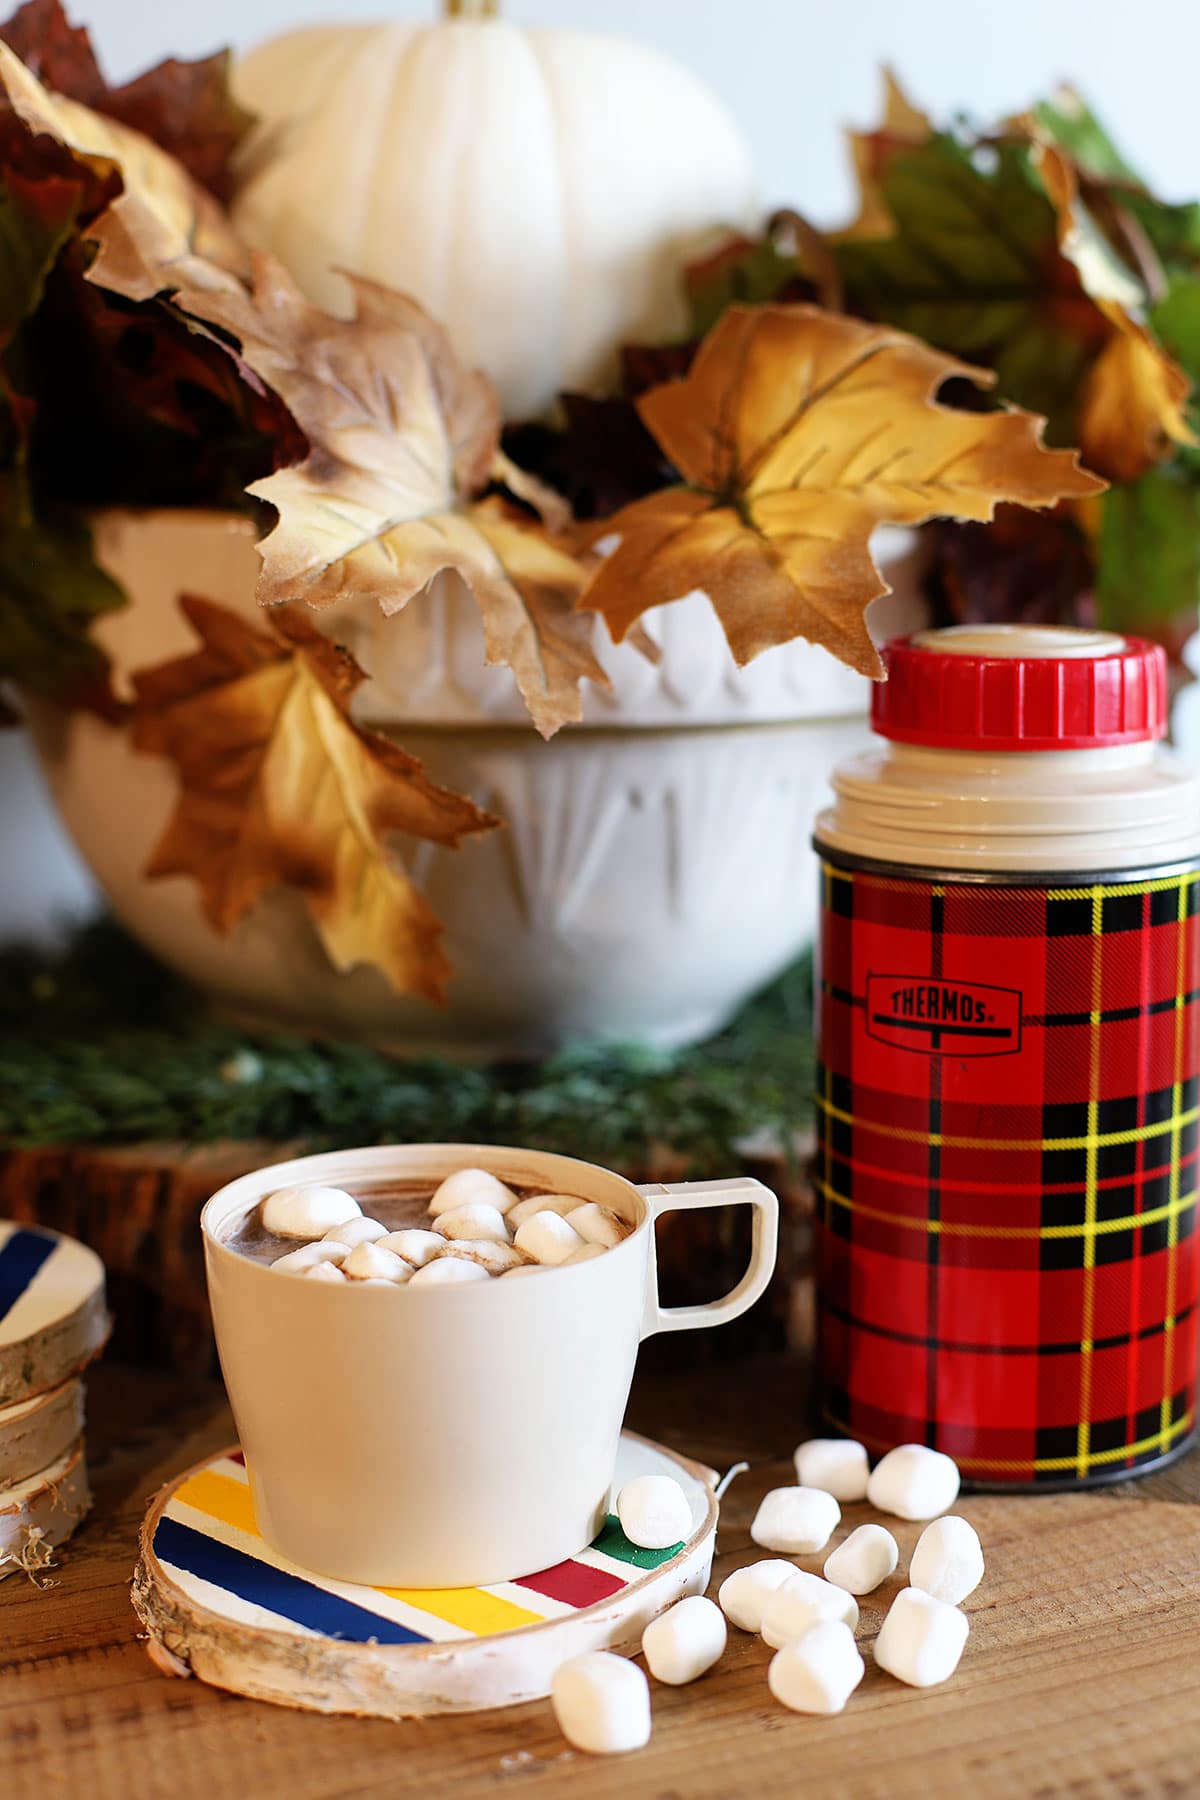
They fit in so well with my thermos collection, if I may say so myself!
If you want to make your own, I'll show you how:
Birch Coasters Inspired By Hudson Bay Blankets
(This post contains some affiliate links for your convenience. You can read my full disclosure policy here.)
Supplies:
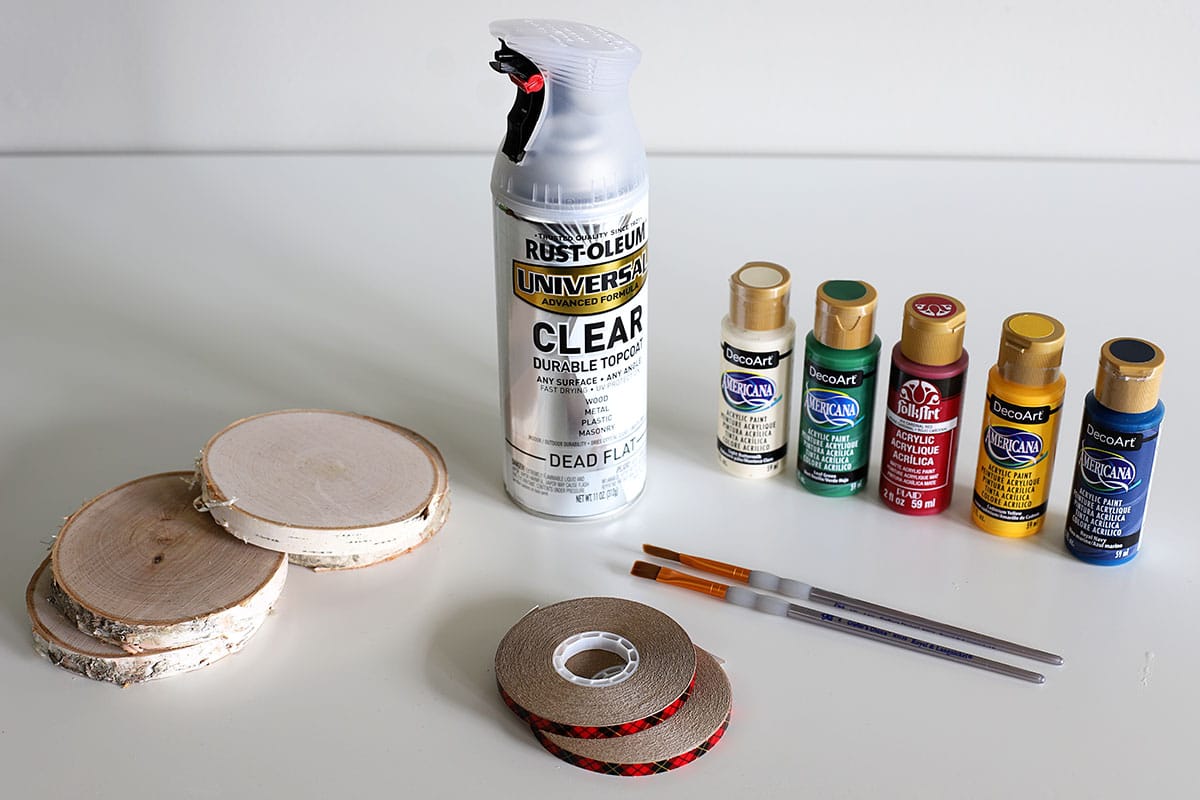
- Birch Wood slices (these are the ones I bought at Michael's)
- DecoArt Americana Acrylic Paint - Leaf Green
- DecoArt Americana Acrylic Paint - Light Buttermilk
- FolkArt Plaid Acrylic Paint - Cardinal Red*
- DecoArt Americana Acrylic Paint - Cadmium Yellow
- DecoArt Americana Acrylic Paint - Royal Navy
- Sealer - I used Rust-Oleum Universal Advanced Formula Clear Durable Topcoat in Dead Flat
- Paint Brushes
- Tape - the tape in the photo above is Scotch Advanced Tape Glider Rolls ½" wide, which is a doubled sided tape used for scrapbooking (I just saw the pretty plaid design on the outside and grabbed it without reading the package). You should use a ¼" painter's tape (no cute plaid packaging, but still a better choice).
*OK, I have to talk about The Great Craft Paint Shortage Of 2020. I wanted to use all the same brand paint, but all the 2020 weirdness happening has caused an odd shortage of toilet paper, hand sanitizer and, of all things, craft paint. Why craft paint? I have no idea! But since I couldn't find a bottle of red DecoArt anywhere on planet earth, the red is an old bottle of craft paint I had on hand.
Tutorial:
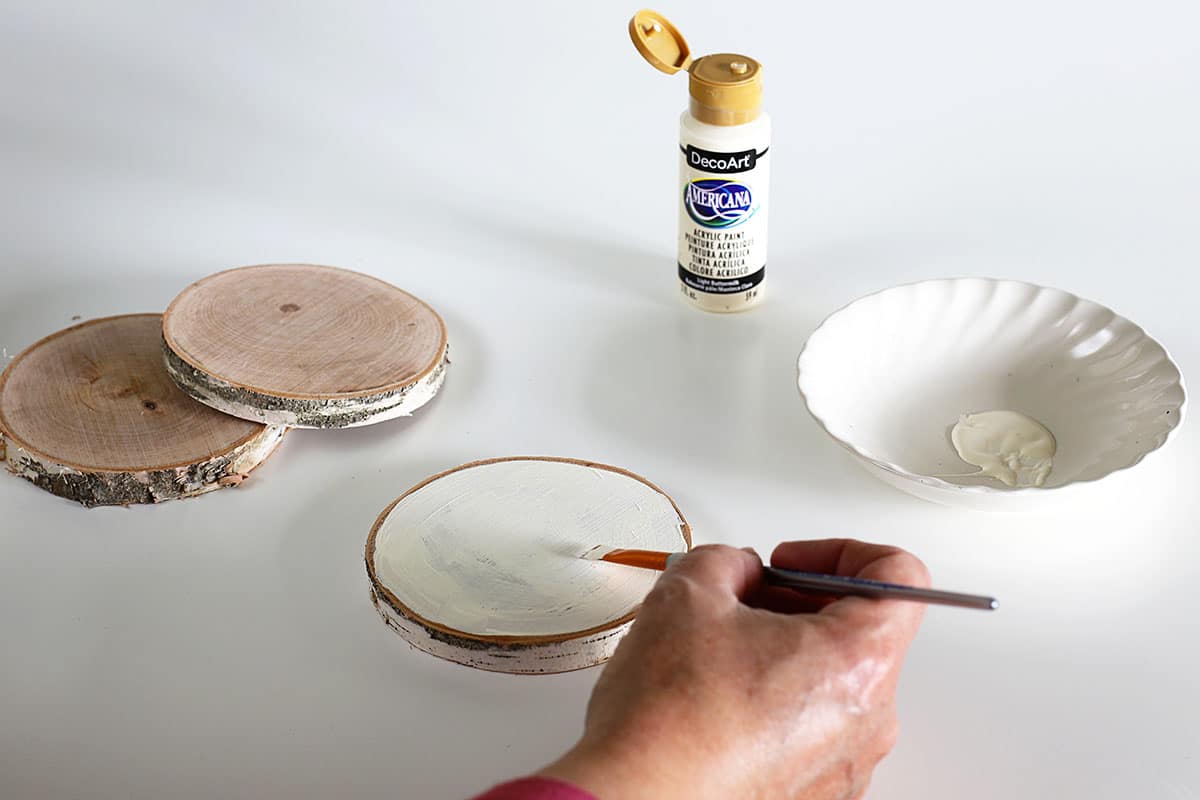
Paint your base coat of white onto the slices.
Go around the outside leaving just a bit of the bark showing on the top edges (basically painting the exposed wood and leaving the outer bark ring as is).
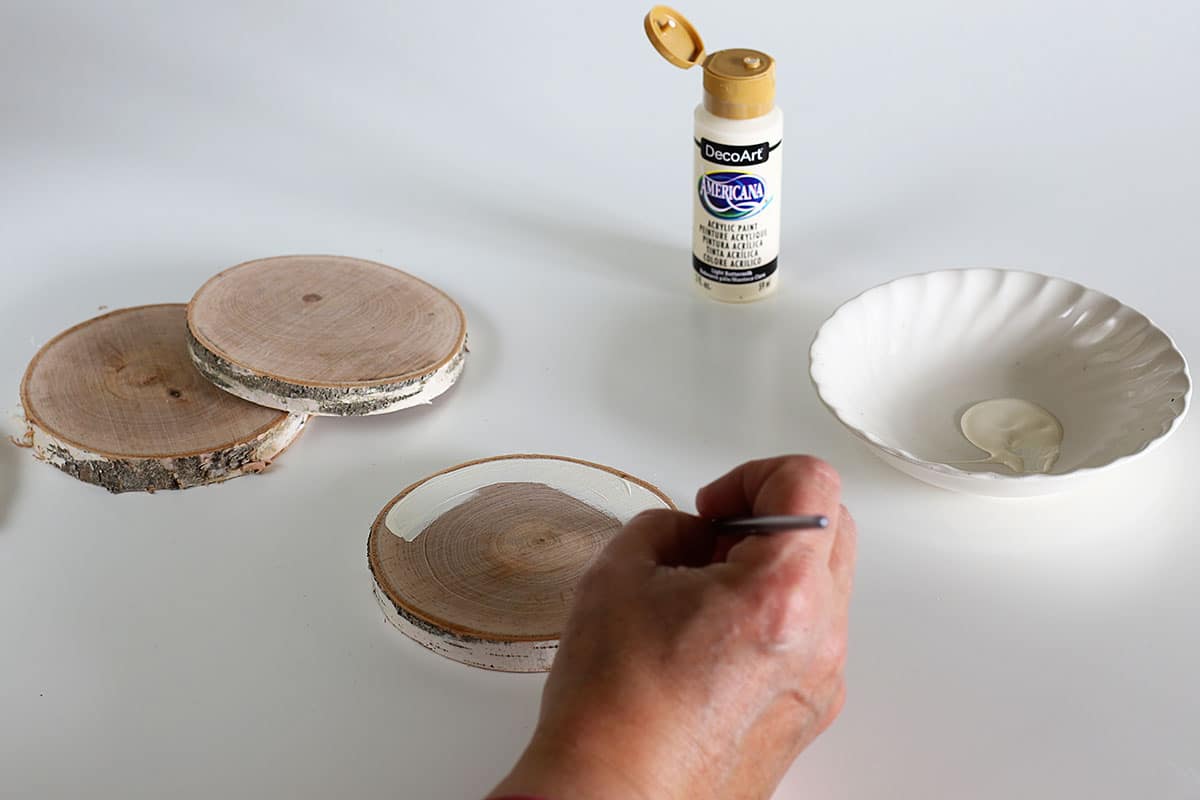
And fill in the middle. I used 2 coats of the white to cover fully.
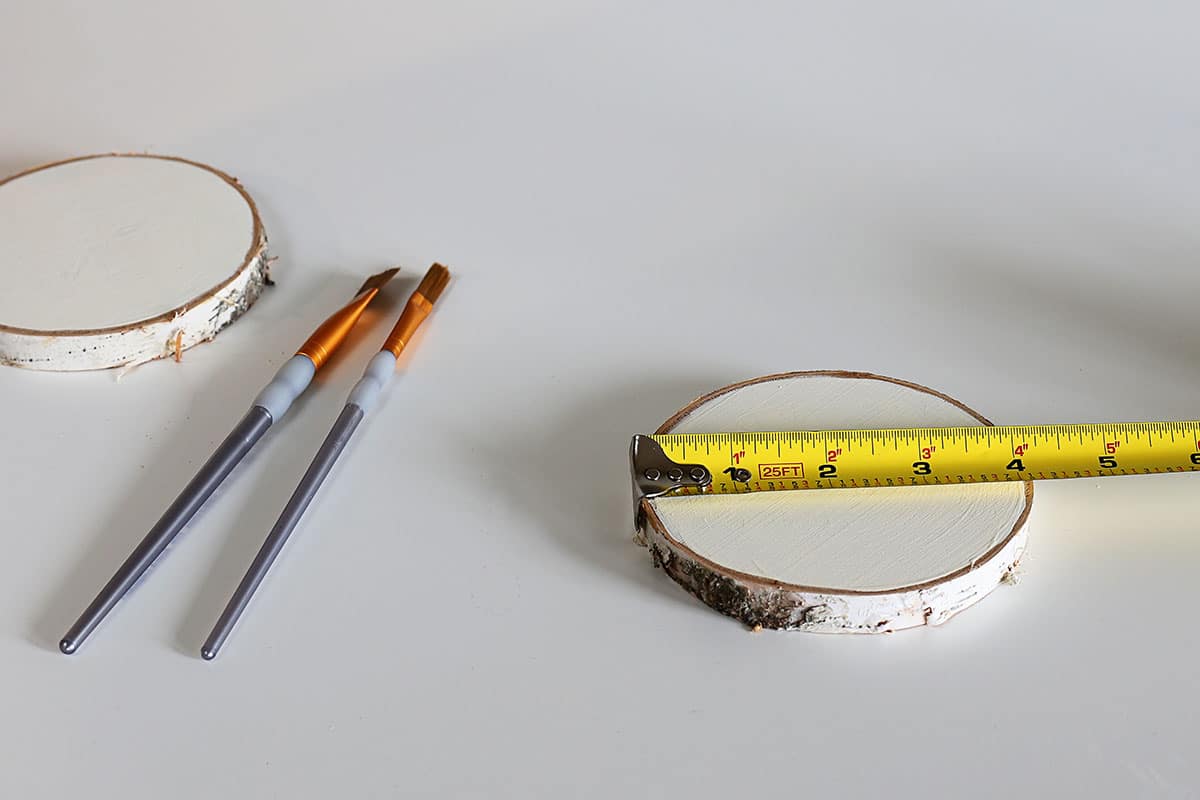
Now you need to decide where to put the tape in order to make 4 rows of stripes.
If your slice is 4" wide like mine were, it's fairly easy.
In order to mimic the blankets, I chose to have a bit more white showing on one side. The blankets are predominately white with the stripes on the bottom.
So here's how it works out.
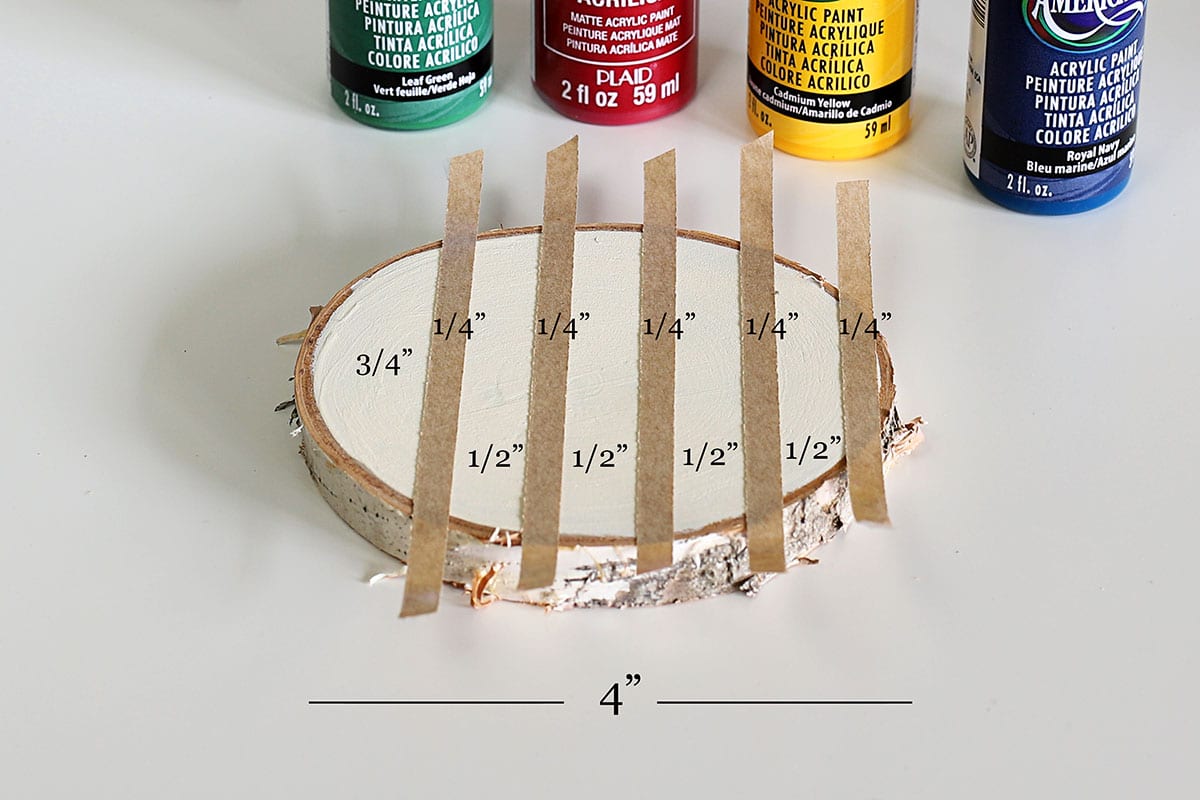
Or I made a pdf chart you can print out if you want to have that right beside you as you tape and paint!
When you put your tape strips down, you can use a credit card to run over the edges to make sure the tape is firmly in place. This will assure a crisp paint line.
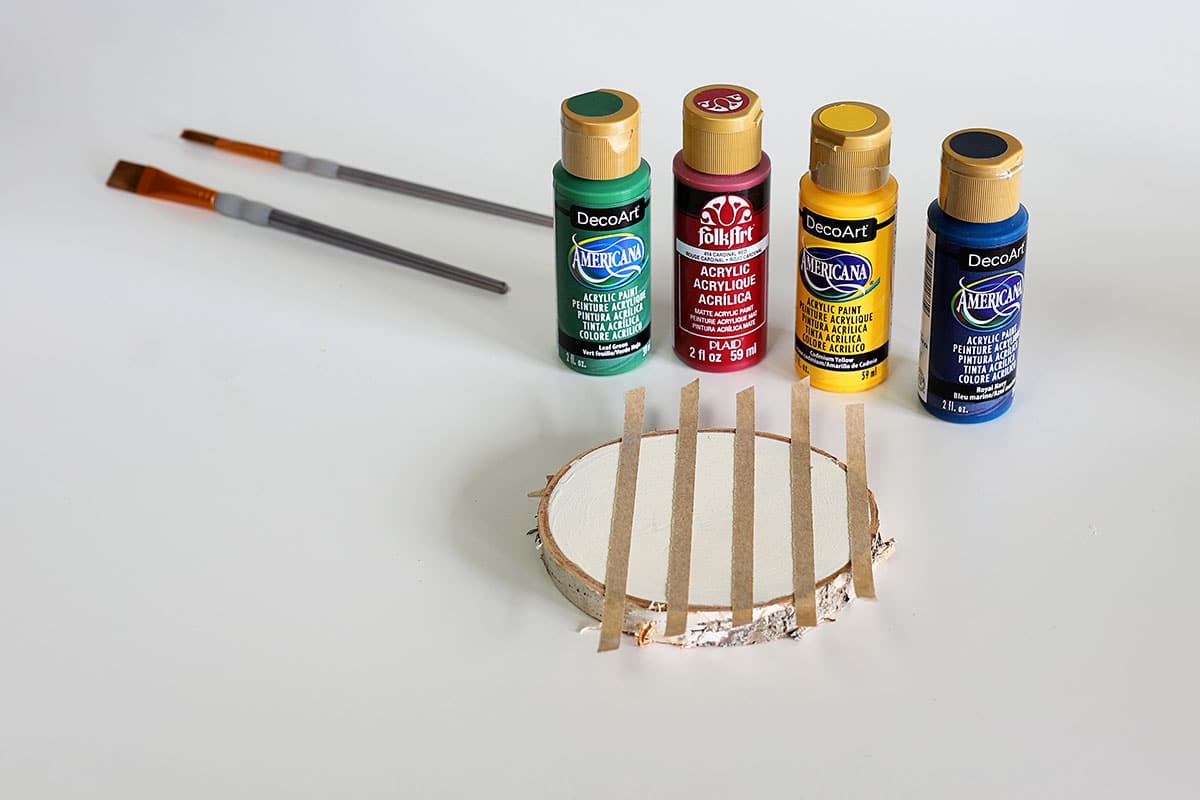
Now comes the fun part, painting your Hudson Bay colors.
The blankets traditionally have green, red, yellow and blue stripes at the bottom of the blankets in that order.
So don't go all willy-nilly and throw the yellow before the green or anything. We're trying not to tempt fate any more than necessary this year!
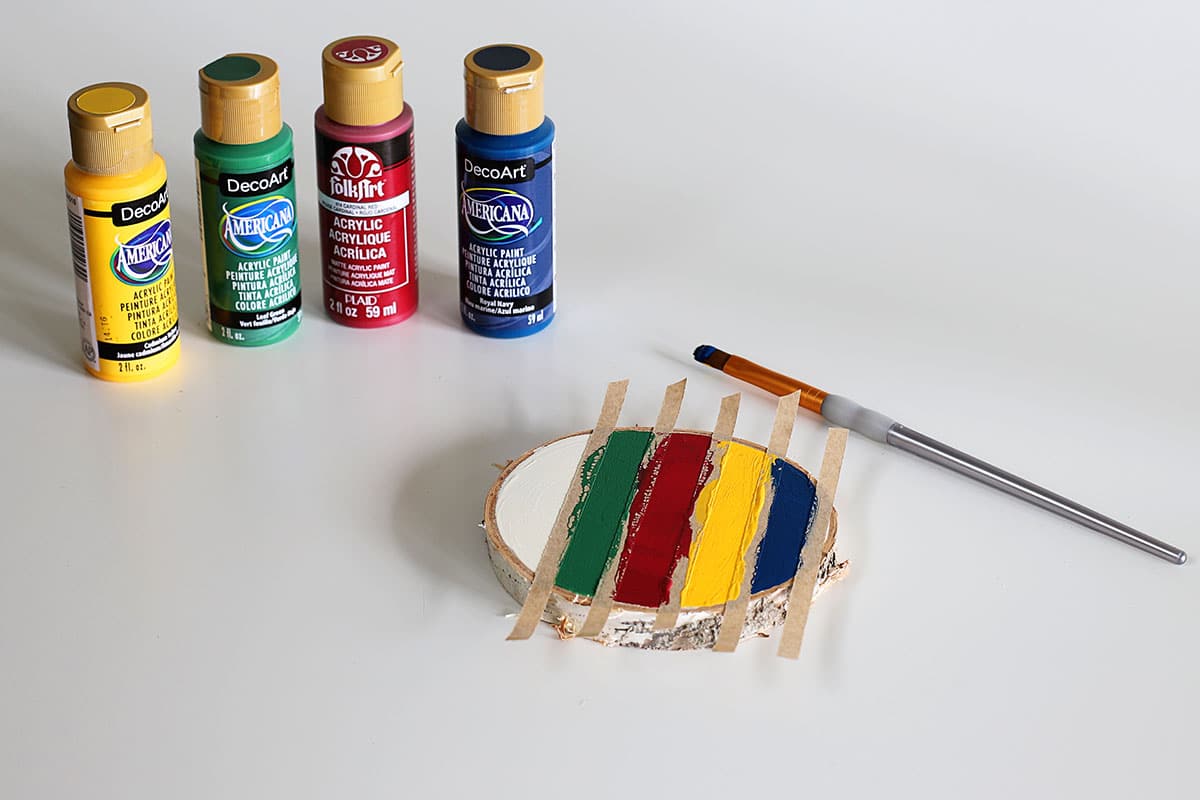
I did 2 coats on each color, then removed the tape.
After the paint has thoroughly dried, put a sealer on the coasters so the water condensation won't make your colors run.
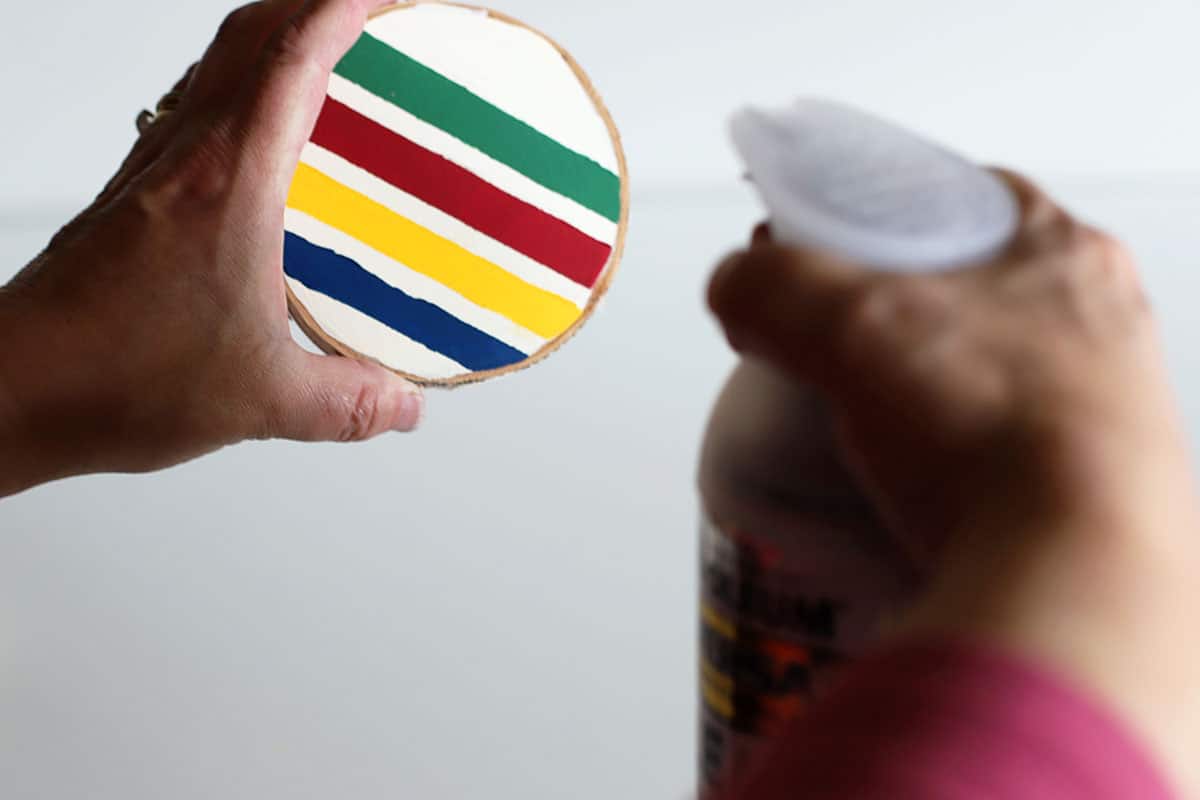
Let that dry.
You are now ready to grab a cup of cocoa and enjoy your coasters.
Need more Hudson Bay Blanket crafty goodness? I found a few fun projects for you from around the internet.
Hudson Bay Quilt Pattern & Tutorial by Skirt As Top
DIY Hudson Bay Dishware by Sadie Seasongoods
Painted Hudson Bay Blanket Inspired Pumpkins by Heathered Nest
![]()

Check out the web story version of this article HERE.
Debra Oliver
super cute!!!! yeh, what is it about craft paint??
Pam Kessler
I should have taken a photo at Michael's! It used to be an entire aisle of all different brands of craft paint. They had maybe 20 bottles left. It remined me of the toilet paper aisles back in April 🙂
Merri Jo
Pam, I love these! I am going to make a few sets for our lake house! I’ve made & painted a few wood buoys in this pattern, but I hadn’t thought of coasters.
Pam Kessler
I just fell down the rabbit hole of HBC crafts! People are crocheting gnomes and all sorts of stuff in their colors!
Kari Wagner Hoban
I LOVE THESE!! 🙂
Pam Kessler
Thank you!
Melinda J Tucker
These are so cute , I think i might try this thanks so much !!
Linda @ Itsy Bits And Pieces
These are so fun, Pam! Thanks for sharing! Pinning!