I've been on a little bit of a plant buying kick recently and I was needing some planters that would be worthy of my new babies and kick my plant cred up a bit.
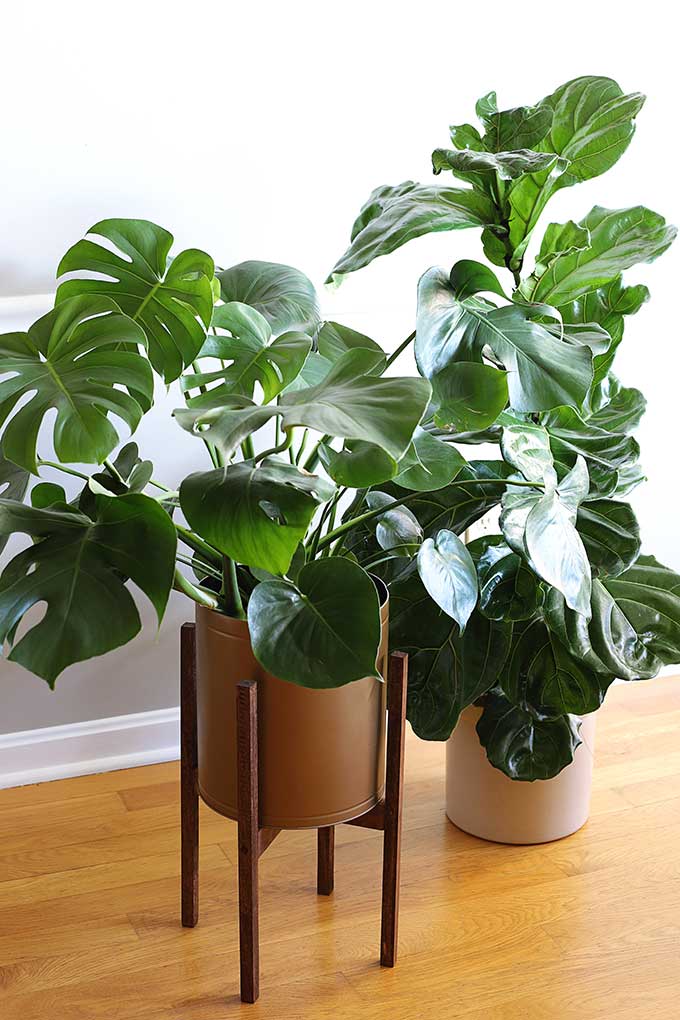
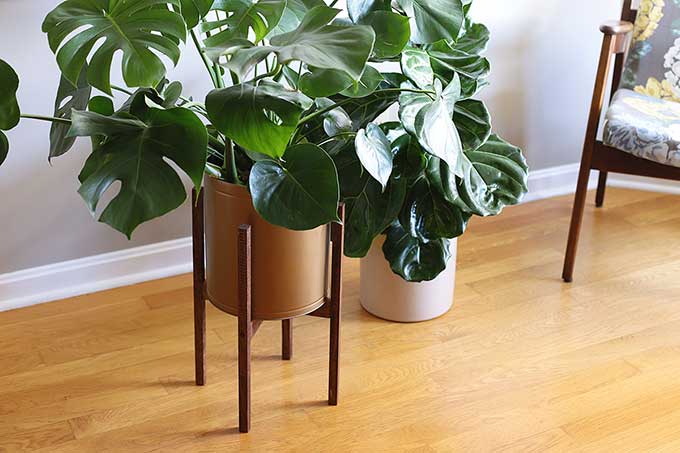
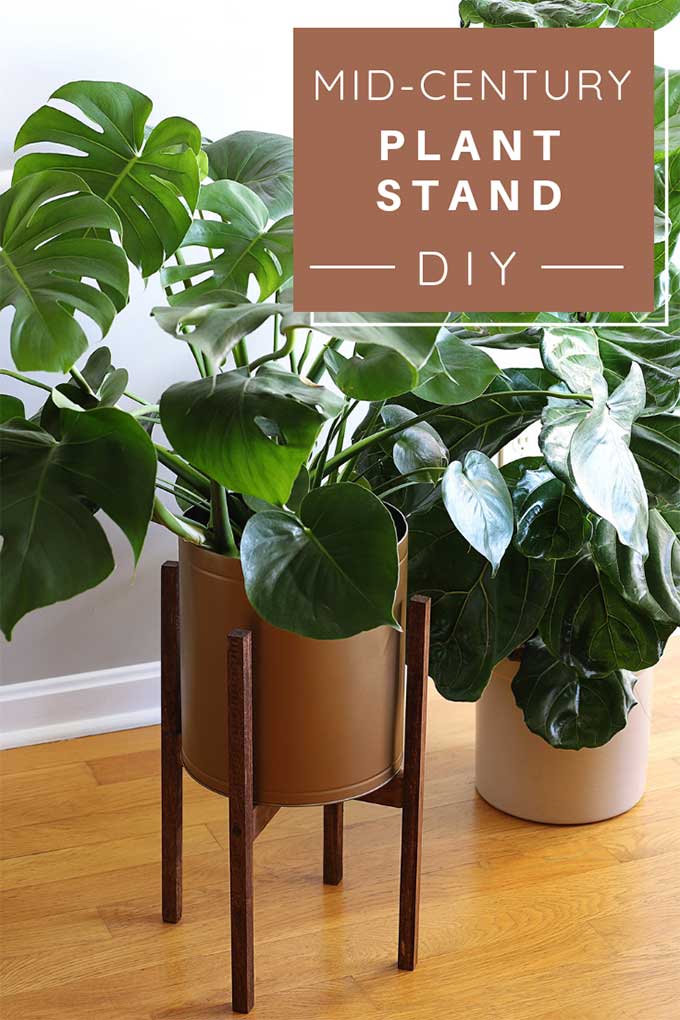
And I feel like these wooden mid century plant stands are a nice way to do just that!
Although my house is not 100% mid-century modern decor-wise, I do love a good piece of mid-century mixed in with my other vintage items for a more modern vintage look. If that's a thing.
Now, you can see these types of plant stands being sold by West Elm, but honestly this thrift store loving girl is not going to be paying those kind of prices for something so easy to DIY.
No way, no how, just not going to happen.
So I decided to make my own and take you along for the process.
On a scale of 1-10 for woodworking projects (1 being pretty darn easy), I think this would be a 1.25.
As long as you can use a saw, hold a screwdriver and squeeze a bottle of glue you are SET.
(This post contains some affiliate links for your convenience. You can read my full disclosure policy here.)
How To Make A Mid Century Plant Stand
Supplies
- 1 - 1" x 2" x 6ft select pine board
- 2 - ¾" x 36" Square dowels
- 4 - flat topped wood plugs (optional)
- wood glue
- 4 screws
- Screwdriver
- drill or drill press
- wood chisel
- saw
- sandpaper
- wood stain
- paint brush and clean rag for staining
- large planter
Please use appropriate safety precautions, eye protection and gloves when using power tools and stain.
Instructions
Planters with straight sides work best for this project.
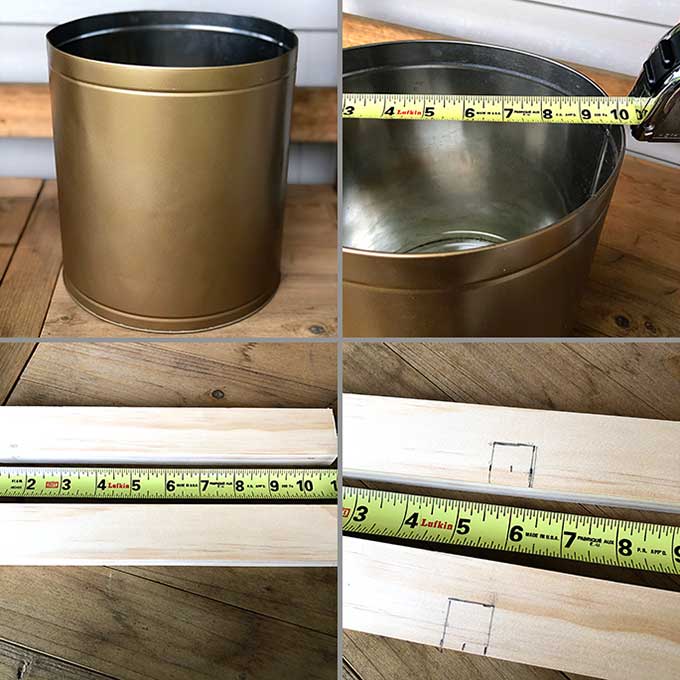
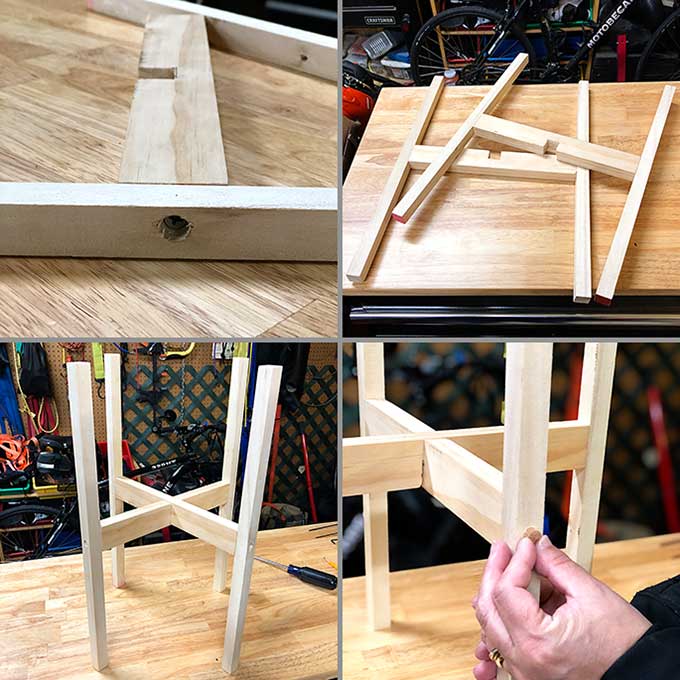
To make the "ledge" the planter will set on, measure the diameter of your pot and add one inch. This is the length you will be cutting your 1 x 2 x 6 ft board into. You need two of these pieces cut.
Using a ruler, measure to the middle of these boards and draw out a ¾" square on each board.
Now would be a good time to discuss Nominal vs Actual size of wood. Nominal is what a piece of wood is commonly referred to as (e.g., a 1 x 2 or a 2 x 4) and actual size is what it actually measures as (e.g., a 1 x 2 measures as .75" x 1.5" or in the case of a 2 x 4 it measures as 1.5" x 3.5"). Confusing yes, and even more confusing when a piece of wood has a price tag on it that shows the actual measurements and the store shelf shows the nominal measurement.
Whatever, just don't freak out when you see the size advertised differently on the store shelf.
And the reason I'm mentioning it right now is that by cutting a ¾" square in your wood you are cutting halfway through the 2" side which is really 1.5"!
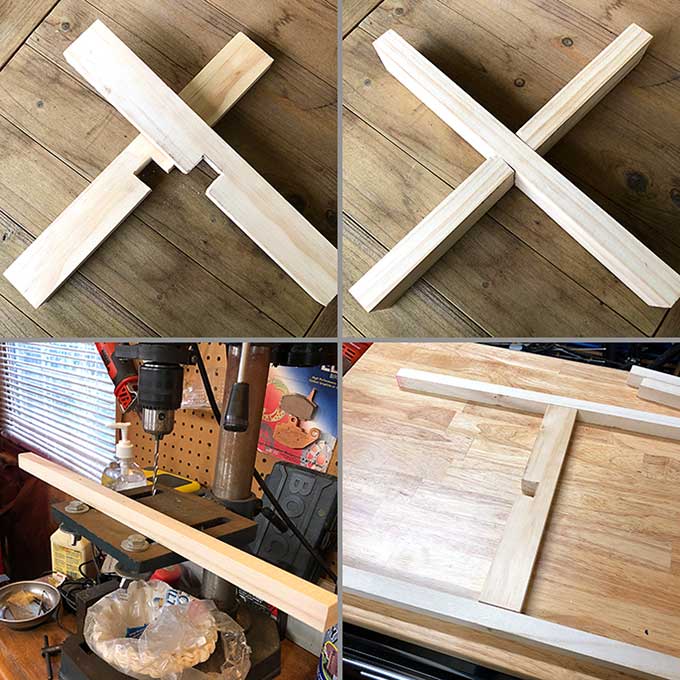
I used a jig saw to make a few straight cuts into the little square I wanted removed and then used a chisel to knock out the rest.
Lay the two pieces into one another. They should fit snugly without too much play and the top should be level.
If your cut was not 100% accurate you may need to sand a little to get them to line up evenly.
Cut your square dowels in half lengthwise, so your 2 dowels become your 4 legs. Each leg will be 18" long.
Drill a pilot hole through the center of each leg and put the ledge part between two legs.
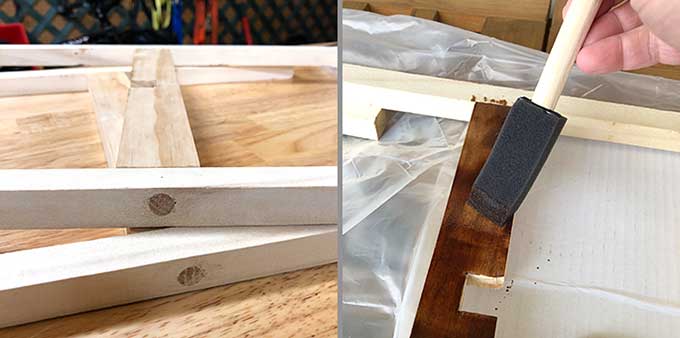
If you want to install the wood plugs, you would countersink the screws using a drill bit that is the same width as the plug. You need to drill just deep enough so the plug will fit in flush.
You do not have to countersink the screw though. I just wanted a more seamless look.
Put glue between the legs and the shelf pieces and screw them together.
Do this with the other set of legs and you will have two different pieces you can put together to make your plant stand.
I did not glue my two halves of the plant stand together. You could, but I liked the idea of it being able to be taken apart for storage if needed.
Push your wood plugs firmly into the screw holes. These should line up evenly with the surface of your boards and will be fairly invisible when you apply your stain.
Sand lightly and then stain your plant stand.
I chose an English Chestnut colored Penetrating Stain. You just put it on with a brush or clean rag, wait 5-15 minutes and wipe off the excess.
Don't forget, you can shop online at Home Depot and have the items all ready for you to pick up. Saves you from wandering down the aisles looking for this and that or waiting for your online order to arrive via UPS!
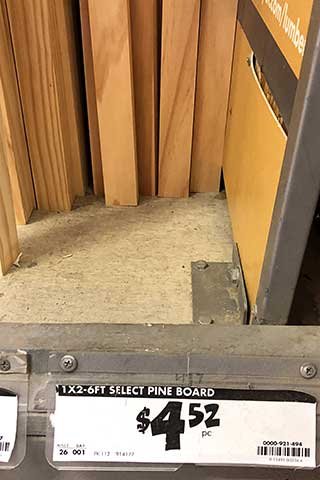
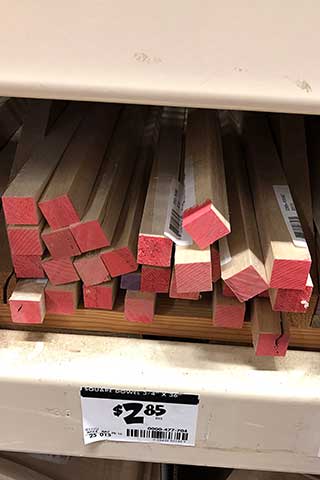
If you are picking up your wood in person and want to look for it on the shelves, it's in the wood section and the aisle and bay numbers will vary by store. This is what it looked like on the shelves.
The pine boards are standing up vertically and the square dowels are laying down on a narrow shelf. They are color coded according to diameter (see the little purple one in there playing hide and seek from his buddies).
And do you remember the whole Nominal vs Actual thing we discussed earlier? Right there on the shelf tag!
OK, now since today is Thrift Store Decor Team day, you're probably wondering how the heck is this an thrift store upcycle project, Pam?
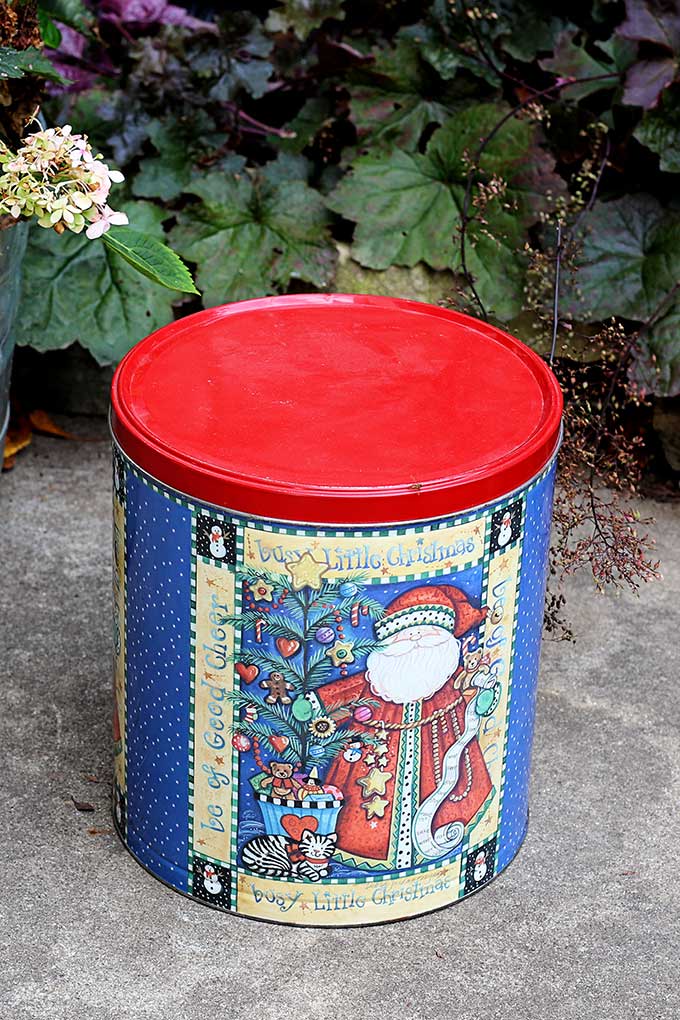
See the gold planter? Yep, a popcorn tin from the thrift store.
I know there's going to be somebody upset I spray painted a lovely 1980's popcorn tin, but I don't think Santa will mind!
BTW, I'm not going to do a tutorial on how I upcycled it because it's basically
- Go to the thrift store and pick up a popcorn tin (why do people donate those things?)
- Spray paint it gold
- Add a pot liner to the bottom of it and plop your favorite split-leaf philodendron named Phil into it
Aren't all philodendron, whether split leaf or not, called Phil?
Check out the web story version of this article HERE.
Since today is Thrift Store Decor Team Day, saunter on over and see what everyone else is doing this month! I hear there might be some more hardcore repurposing going on!
Thrift Store Decor Team
Refresh Restyle - DIY Serving Tray Makeover
Domestically Speaking - Winter Wonderland Gumball Machine
My Repurposed Life - Pedestal Bowl Stipple Paint Technique
Petticoat Junktion - Bird Cage Winter Snow Scene
Our Southern Home - DIY Jouex Noel Sign
My Uncommon Slice Of Suburbia - Table Makeover
Sadie Seasongoods - Laundry Room Decor And Lost Sock Holder
House Of Hawthornes - Mid-Century Plant Stand DIY (that's me)




Donna
Thank you for the DIY! I have wanted one of these stands for years, but I always balk at the price. Enjoy your day! 😉