

Sometimes when you find two iconic pieces of vintage furniture that are broken or missing some pieces it's OK to combine them into one very functional piece.
Sure, you'd like to restore both to their previous glory, but sometimes you just can't.
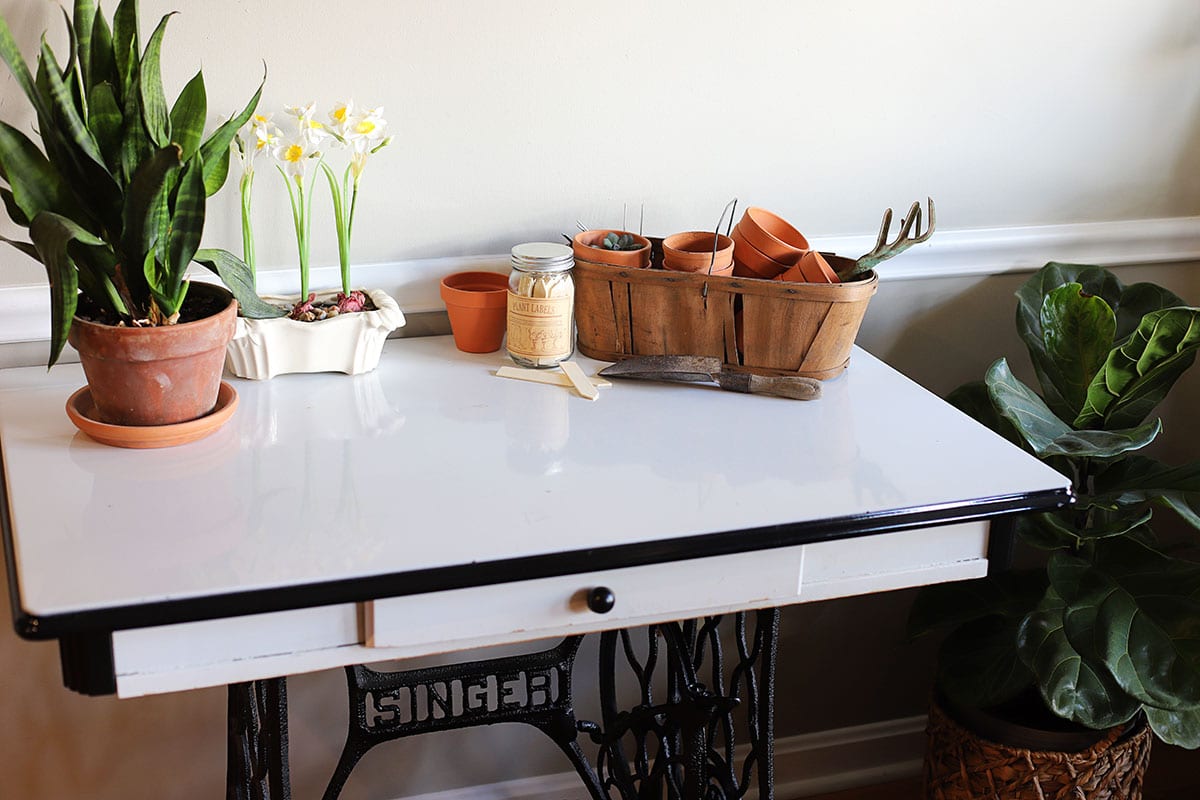
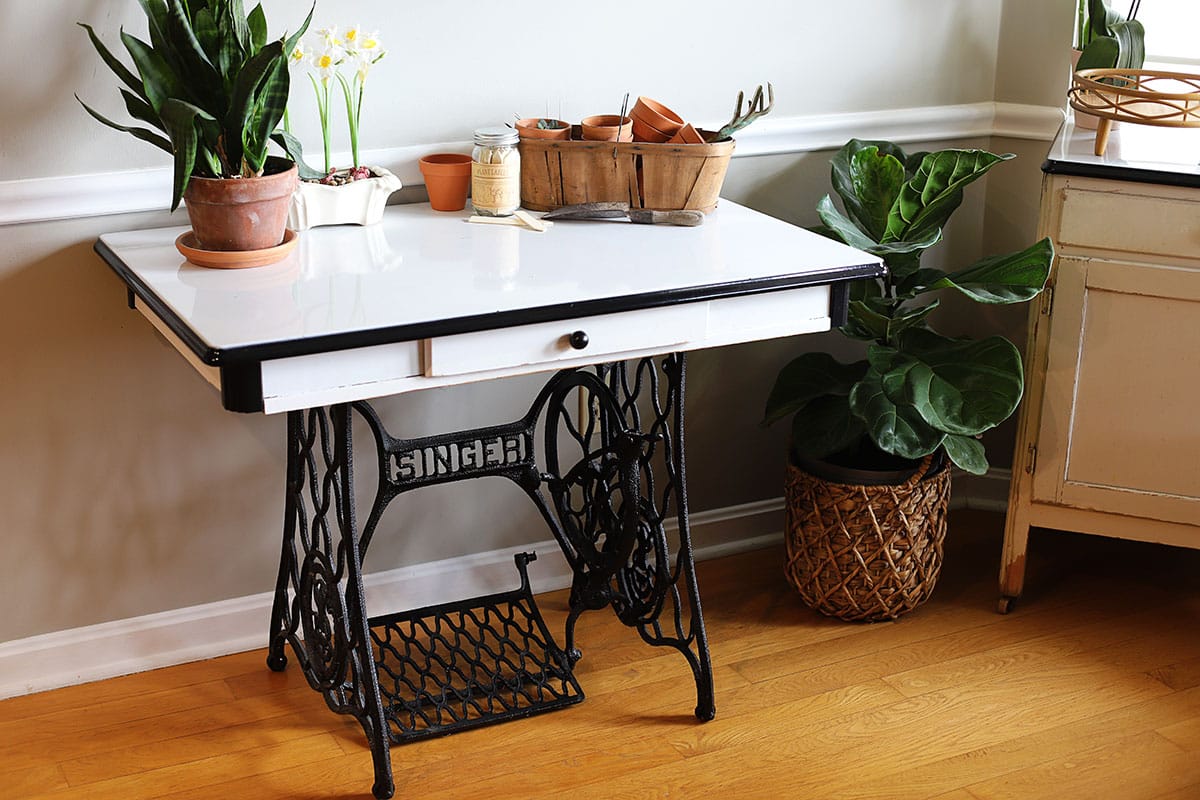
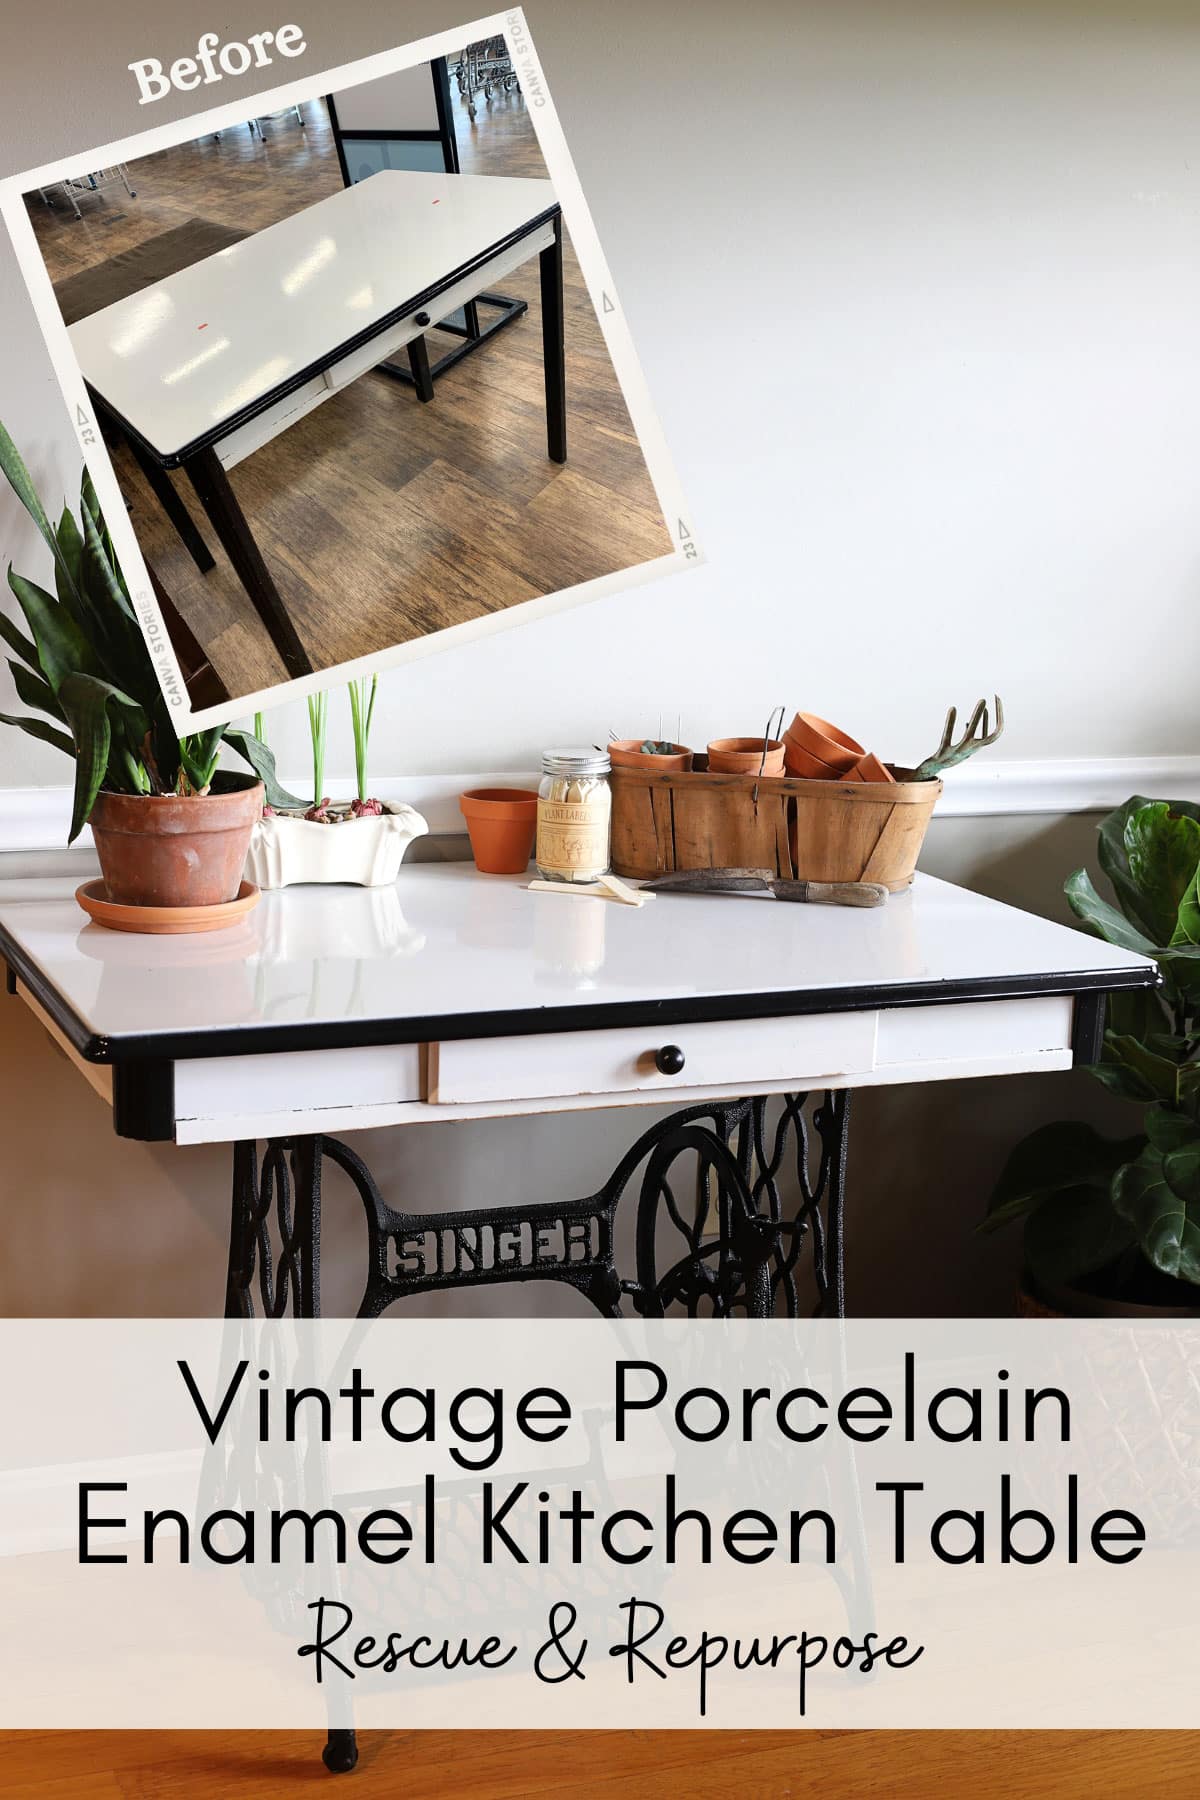
Today I'm showing you an eco-friendly upcycling project that breathes new life into an old Singer sewing machine base and a retro enamel-topped kitchen table - saving them both from the landfill and becoming quite the statement piece.
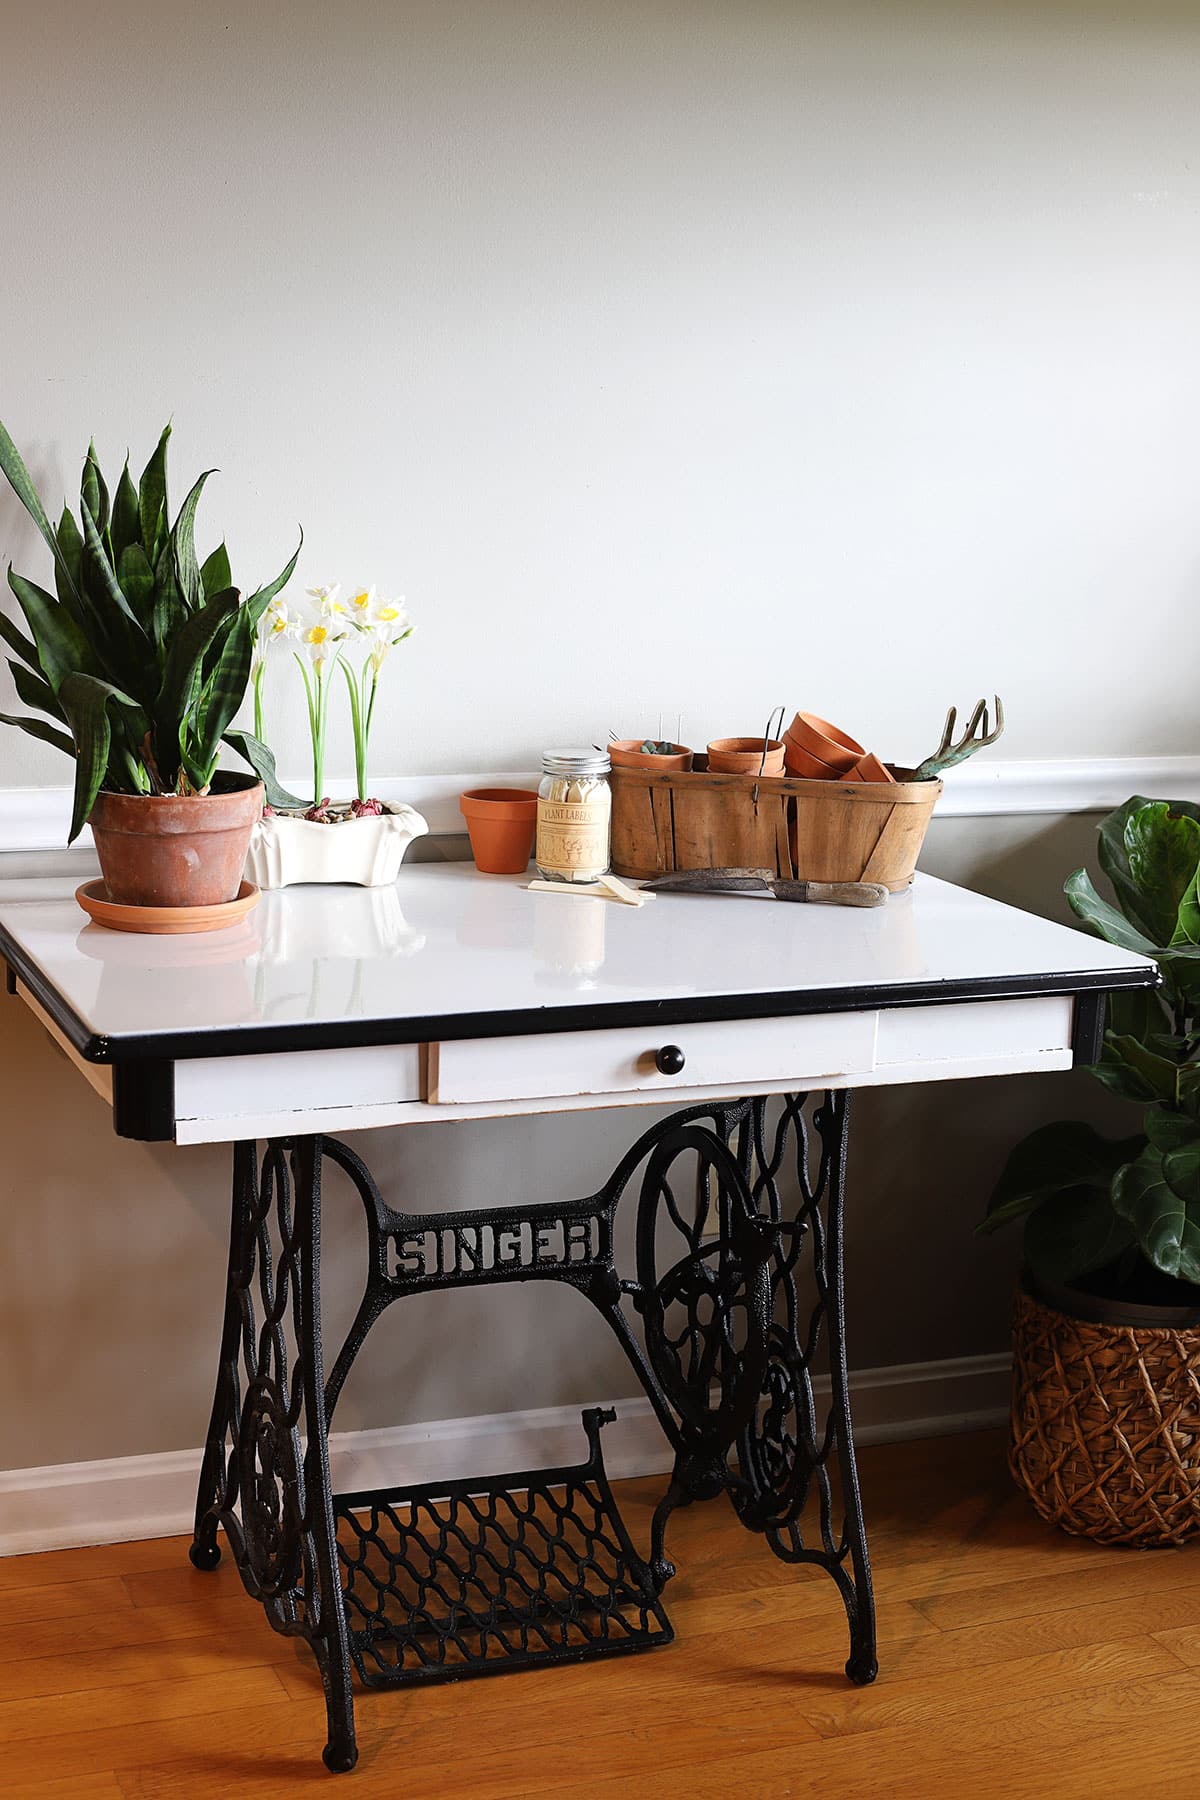
Table Of Contents
✨ BTW, today is Thrift Store Decor Wednesday, so make sure you hang around to the end of the post to see the rest of the team's thrift store repurposes for the month!
The Backstory Of These Two Pieces
Porcelain Enamel Kitchen Table
I have a local thrift store I like to pop into often. It's located right next to the Goodwill Outlet (The Bins, as they're also known) and they tend to have more vintage items than other Goodwill Stores around here. My theory is they relocate some of the better outlet store items to this store to give them a better chance of finding a new home rather than staying in the helter-skelter world of the Bins.
So last week when I stopped into this thrift store I ran across this vintage porcelain enamel kitchen table. I looked it over and it was rough. Very rough. The top was in great shape and the drawer worked just fine, but the legs were a mess.
One leg was wobbly and barely holding on (I had to prop it up for this photo). A back leg had a huge split down ¾ of the leg. And in general, it looked like a dog had been using one of the other legs as a chew toy.
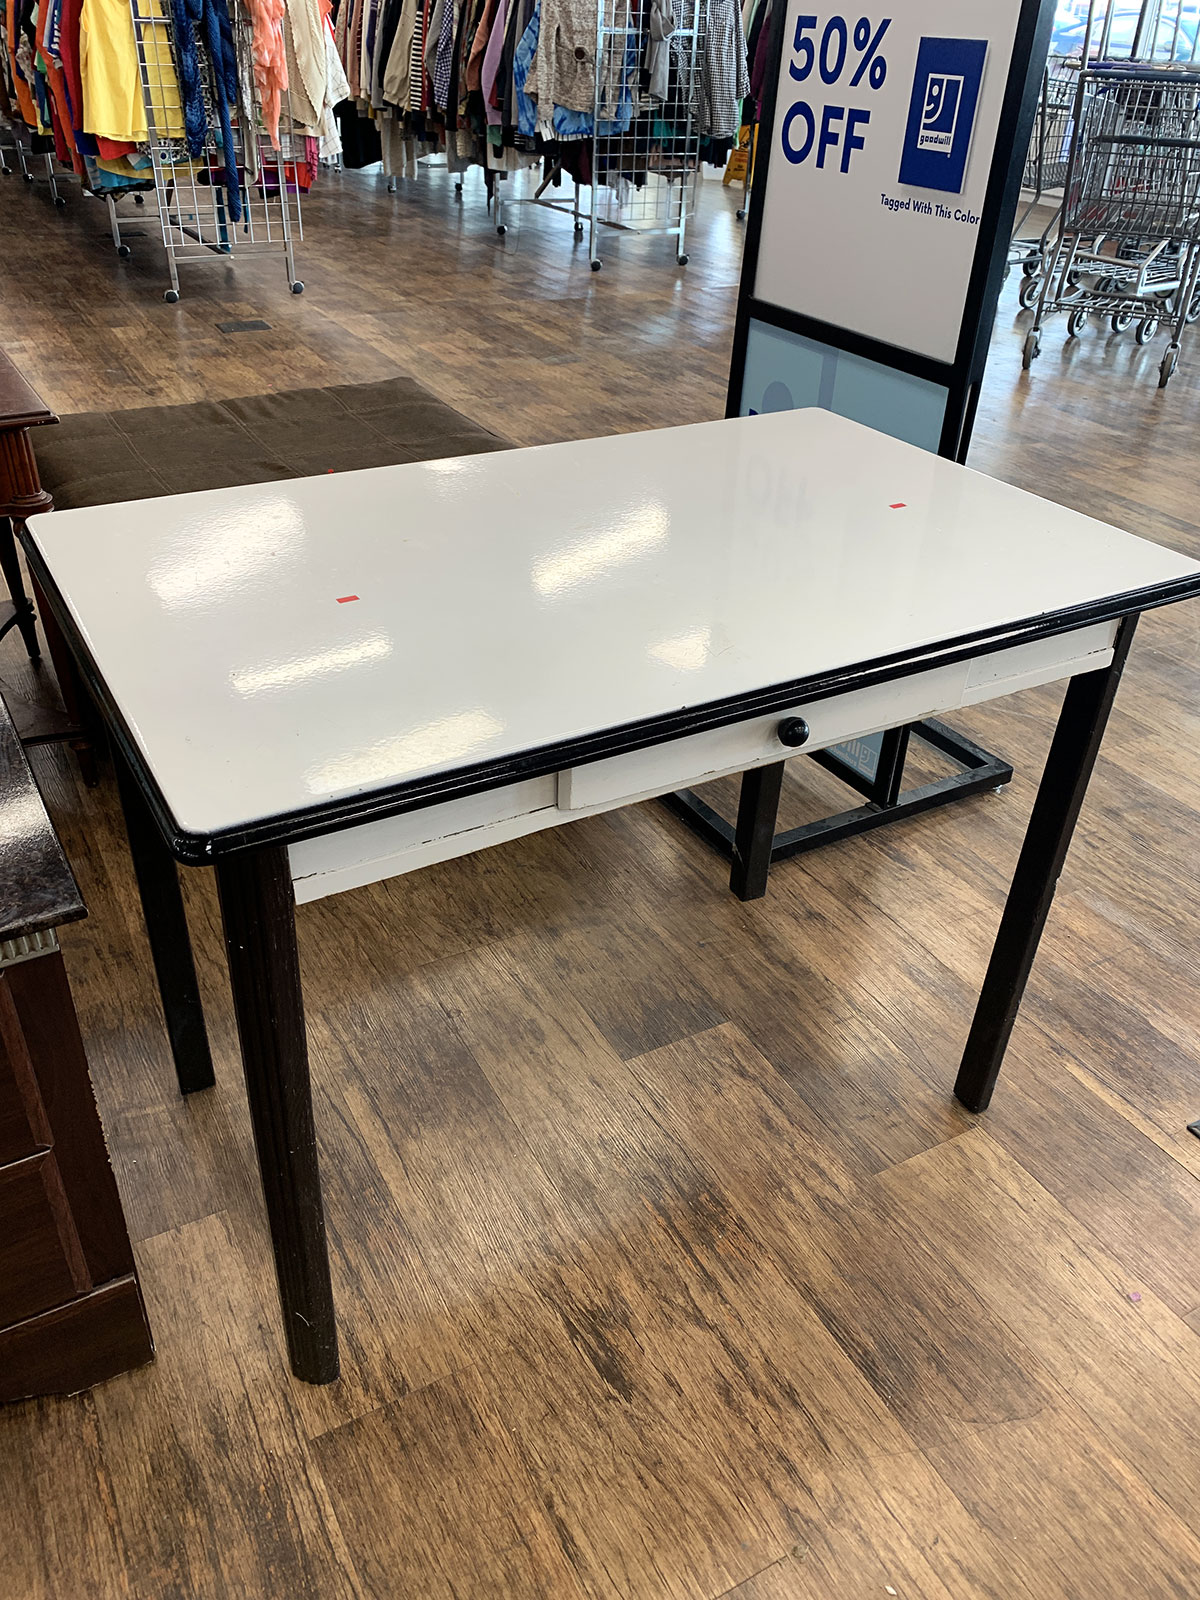
But it's a retro kitchen table with a fairly good porcelain enamel top!
Sad to say those tops haven't always aged well. I rarely find a clean, rust-free table top, so if you find a good top you pretty much have to save it somehow.
That's the rules, folks.
If you've been here a while you'll remember I wrote an article on How To Update A Vintage Enamel Top Table where I updated the table that used to live in my mom's basement. This thrift store one didn't even need an updating tabletop-wise.
So even though I had a similar style table at home, I loaded this one into my van and took it home because I had an idea!
Cast Iron Singer Sewing Machine Base
I wanted to marry this tabletop with a vintage Singer sewing machine base I already had in my garage.
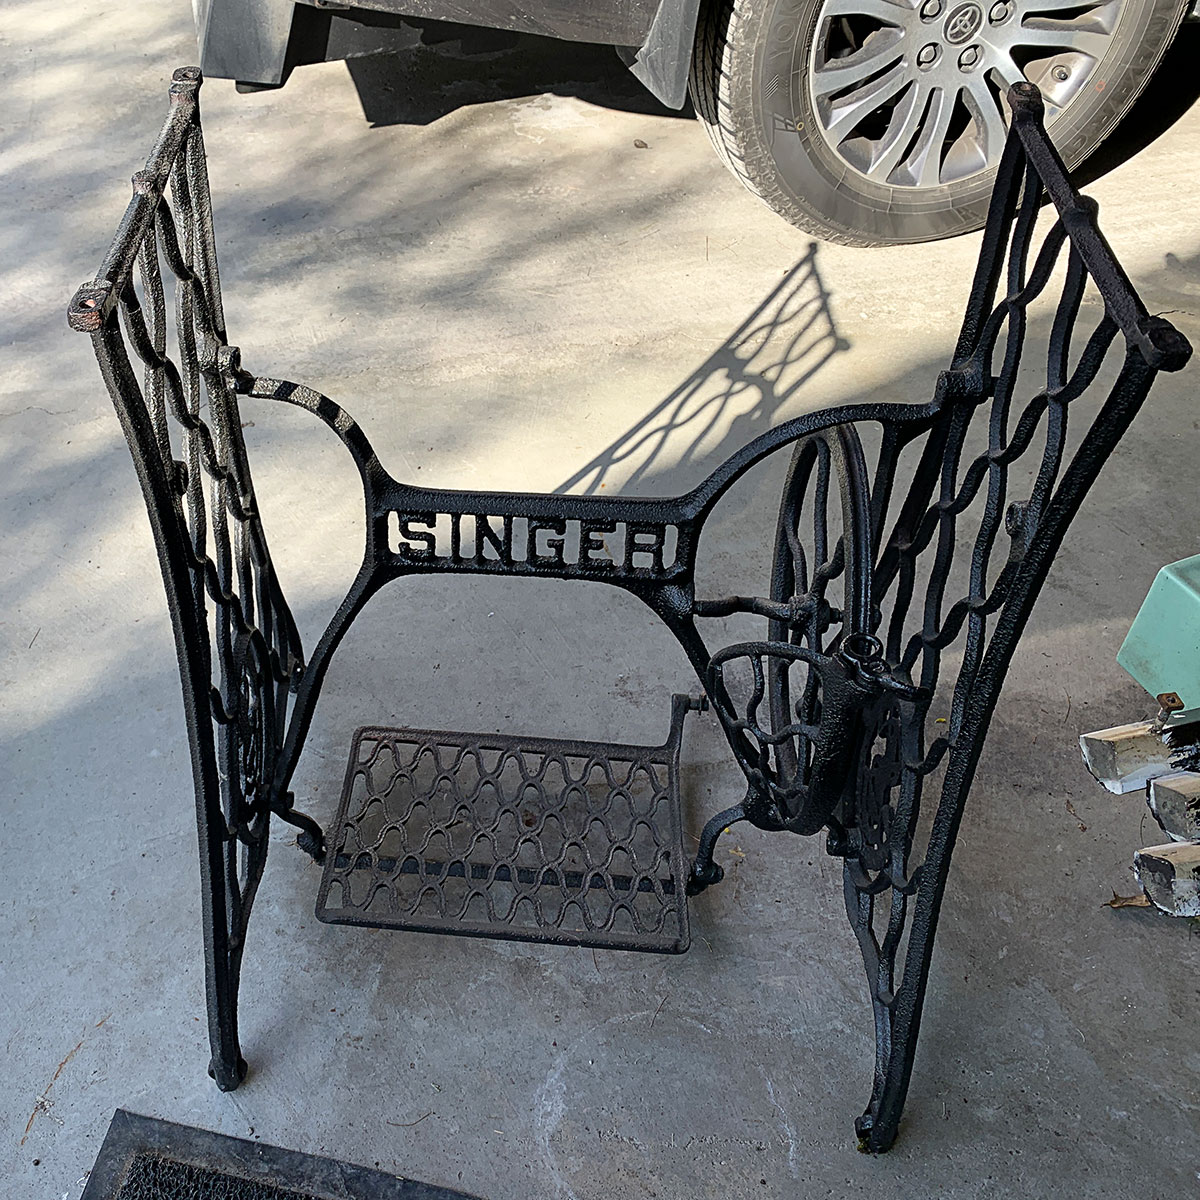
I bought the cast iron base at my town's city-wide yard sale back in the spring of 2023. It was just the base - no top, no drawers and no sewing machine.
The lady just wanted the thing off her porch and for $5 I was happy to take it off her hands (although my knees weren't so happy once I started lugging it down the steps). This thing probably weighs 50 pounds.
It sat in my garage for months and months awaiting inspiration. Finally, I had my inspiration!
And this is how I married the two pieces together! Marrying just refers to taking one piece of furniture and adding another piece of furniture to it to create something new. I did something similar when I pieced together my hutch in the living room.
Salvaging A Vintage Porcelain Enamel Kitchen Table
Supplies
- Table
- Sewing Machine Base
- Miter or Table Saw
- 1 - 1"x6" piece Pine Board
- 4 Screws - 1 ¼" long
- Black paint (optional)
- Open End Wrench or Pliers (optional)
Step By Step Instructions
This is where I feel a little silly typing out the steps because they aren't in the least bit hard. It is such an easy project!
But just in case you want to try to make one of your own, here we go:
Time needed: 1 hour
- Unscrew Legs & Mark Length For Cutting
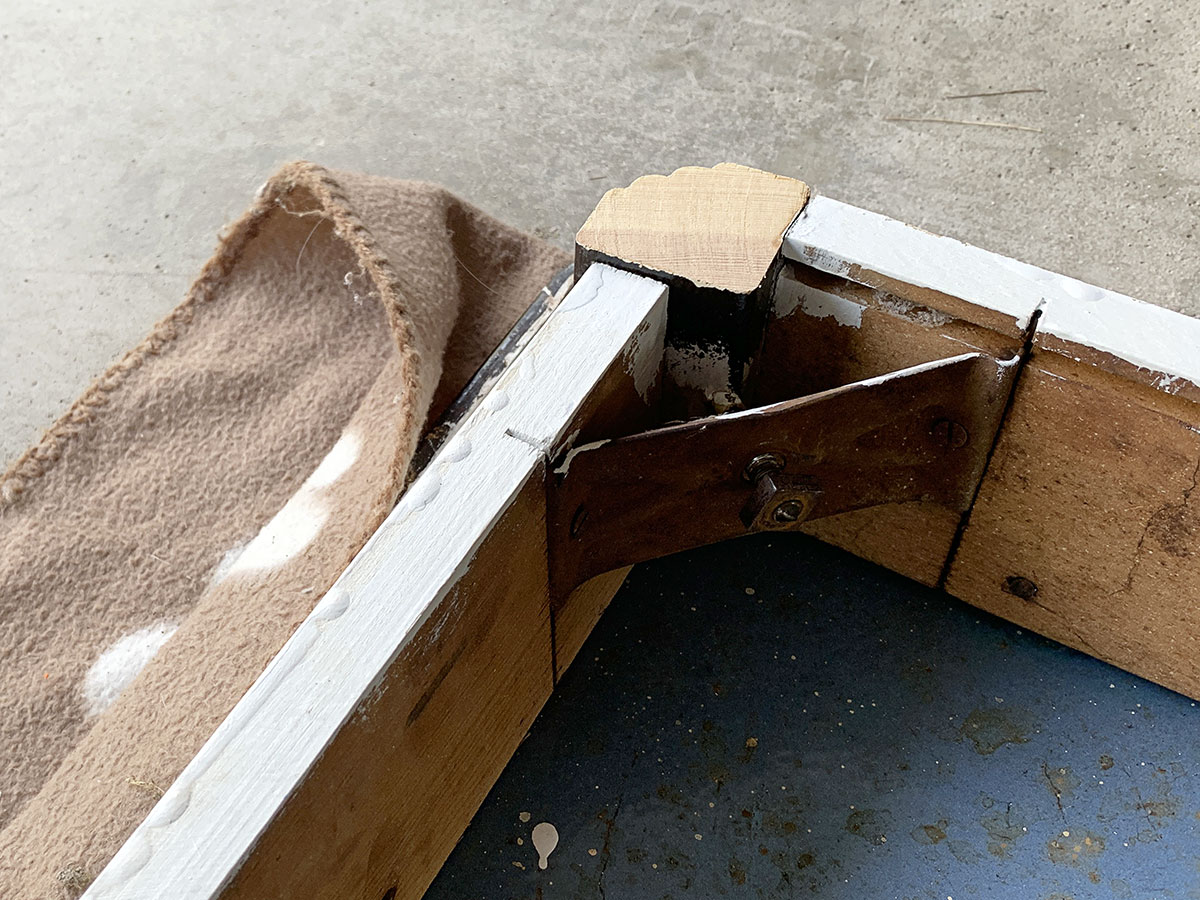
Flip the table over and mark a line where the side of the tabletop will meet up with the legs. You will be cutting the legs off to be even with the top (see arrow below).
I originally thought I would just remove the legs and be done, but without the legs the corners have odd-looking empty spaces. Cutting off the legs gives it a much more finished look.
Unscrew the table legs (see circle below). Most of these types of porcelain tables have a similar system for attaching the legs (a bolt permanently attached to the leg which slides through a metal brace and then is tightened up with a nut. Chances are you can unscrew the leg nuts with just your fingertips (if not you can use an open end wrench or pliers).
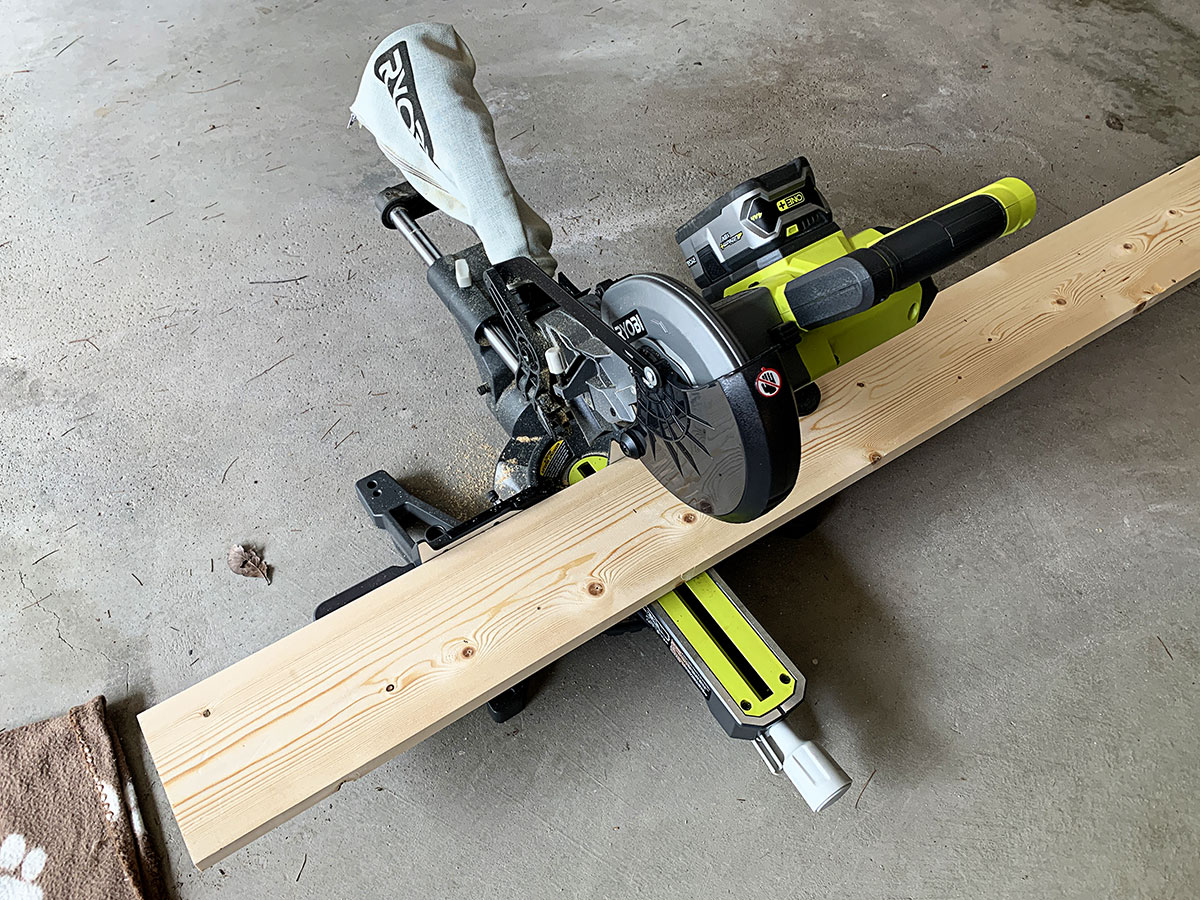
- Cut Down Table Legs
Cut the table legs to be even with the height of the tabletop.
- Reattach Leg Pieces
Screw the legs back into the tabletop.
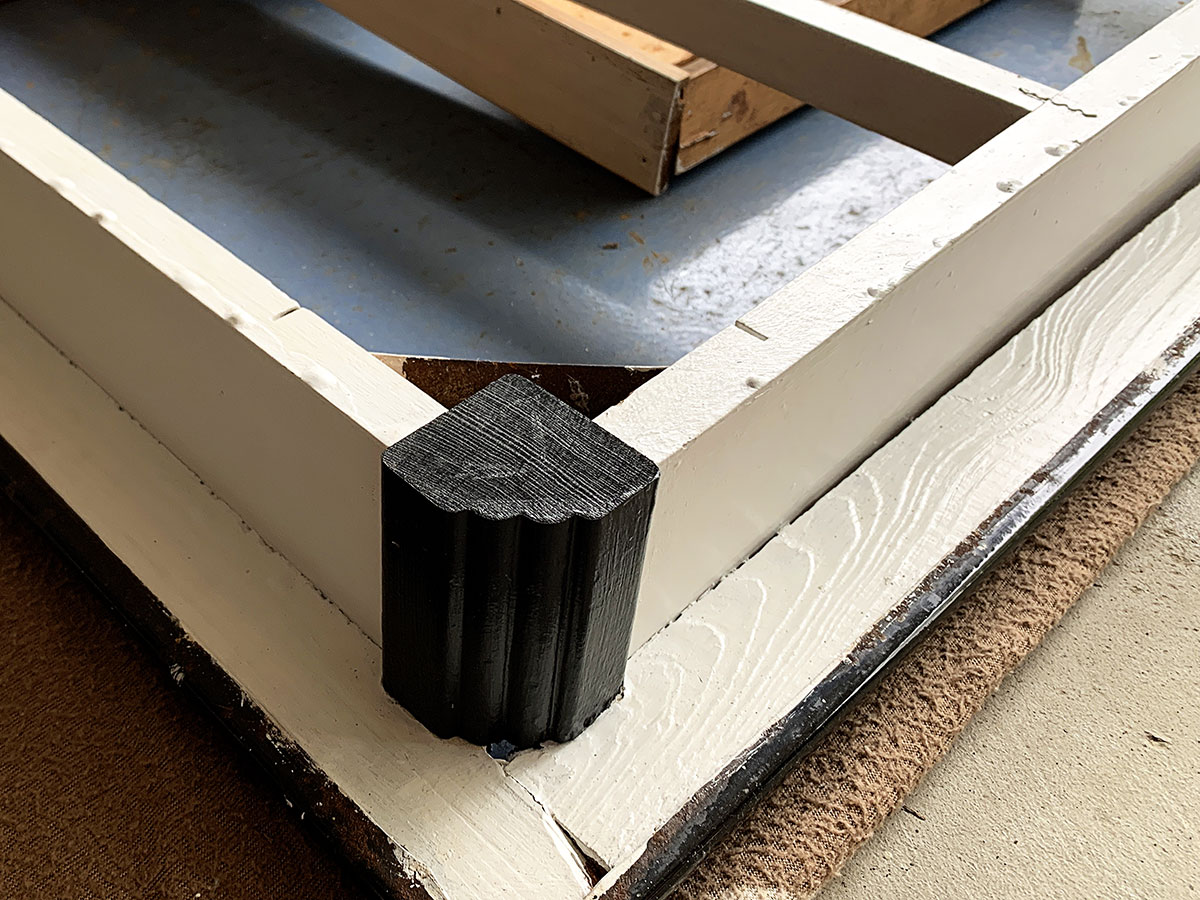
- Paint The Bottom Of "Legs" (Optional)
I painted the bottom of the legs with black paint because I didn't want raw wood sticking out.
In reality, you would have to crawl under the table to see the raw wood, but I knew it was going to bug me if I didn't paint it. - Cut Board For Added Support For Tabletop
Since the top portion of the cast iron stand has pre-drilled holes in it where the original sewing machine top was screwed (which I forgot to take photos of), I wanted to attach the new top the same way.
Additionally, I didn't want the porcelain to sit directly on the back of the porcelain since I was concerned the hard edges of the cast iron would eventually make a dent in the tabletop.
So to make support boards that will sit between the cast iron and the tabletop, I measured the width of the table and cut two support boards from the 1x6 board - in my case the boards were cut to 17.5" long. - Attach Support Boards
I sat the tabletop upside down on the floor and added the wood then the cast iron stand.
Using screws, I screwed the stand into the wood being careful not to screw all the way from the wood into the tabletop. The 1 ¼" long screws were just long enough to grab the wood without poking through the other side.
- NOTE:
I did not attach the base and the tabletop together. The main reason is that the base is VERY heavy and to move it easily from room to room, I felt it better to have a top that I can easily remove.
The wooden bracing on the bottom fits closely on either side of the drawer making for a tight fit for the tabletop. It doesn't move around and isn't "tippy". But it does allow it to be lifted off when necessary.


How To Use This Table
- Potting Bench
- Computer Desk
- Living Room End Table
- Entryway Table
- Even A Kitchen Table for 1-2 people
Now let's pop over to the other Thrift Store Decor Team's sites and see what they've been up to this month!
Thrift Store Decor Team Projects
Mid-Century Modern Wall Decor from a Collage Frame - Sadie Seasongoods
Paint A Wood Mirror - Petticoat Junktion
Decoupage Wastebasket Makeover - Our Southern Home
DIY Wood Candle Holders from Old Finials - My Uncommon Slice of Suburbia
Upcycle Your Garden Pots With Paint - Shop At Blu
Simple Small Table Makeover - My Repurposed Life
Thrift Store Hinged Box Spring Makeover - Organized Clutter
Cane Wrapped Vase - Domestically Speaking
Salvaging A Vintage Porcelain Enamel Kitchen Table - House of Hawthornes (that's me)

Heather
Love this, I’m like you I still paint what can not be seen - we know it’s there
Kristin salazar
WOW it's as thought they were meant to be together! Love this!
Leslie D. Schmidt
What a fabulous end product, Pam! It's so gorgeous. It makes me feel very nostalgic. My grandmother had one of these tables in her kitchen. I thought it was cool then, 50 years ago. She also had an old Singer treadle machine with a base like this one. The older I get, the more I am drawn to vintage and antique furnishings and accessories.
Thanks for the trip down memory lane!
Gail
Pam!
Wowsers! This is gorgeous. You did an awesome job marrying the two pieces together.
Pinned!
Gail
Christy Little | Our Southern Home
I am having a total case of regrets now after selling my sewing machine base a couple of years ago. This is such a fabulous marrying of 2 pieces!! Love it!
Maryann
I love the combo of the tabletop and the sewing base... so clever!
Carlene
Super cool table Pam! It’s a keeper! Pinned.
Pam Kessler
Thanks! I can't stop looking at it!
Sarah @ Sadie Seasongoods
I absolutely LOVE THIS, Pam! What a great save for both pieces, and they honestly look fantastic together. I think it's a great idea to keep the top and base separate for all the reasons you listed. Makes a ton of sense to me!
Pam Kessler
So glad you liked it! It was fun making it!
Anagram
Luv it! Luv it! Luv it! I have been looking for a workspace so I can repurpose all the knick-knacks that I find on the street 😂 this is a beautiful combination.
Pam Kessler
You made my day! It turned out better than I'd imagined!
Linda @ Itsy Bits And Pieces
What a fun reuse project! Looks so great!!
Anagram
You made my day, thank you for the inspiration to keep having a visionary mind. My friends always tease me about picking up things off the streets until I show them the finished product. Continue to keep creating and posting them. Ciao