

Painting Longaberger baskets is something I've been thinking about more and more often lately.
Back in the day, I collected Longaberger baskets, but they've mostly been sitting in a storage bin in the basement for quite a while now. I brought out a few of the smaller ones and have used them to organize tea bags, taco seasoning and microwave popcorn in my pantry (OK, it's a cabinet in my kitchen, but the pantry sounds fancier). But the larger ones have stayed packed away.
They just don't seem to fit with my current decor.
Do you remember back when I used to go into long detailed (rambling?) stories about my vintage finds and DIY projects? Well, I'm going to do that here, so if you want to bypass all that you can use the Table Of Contents below to skip directly to the tutorial.
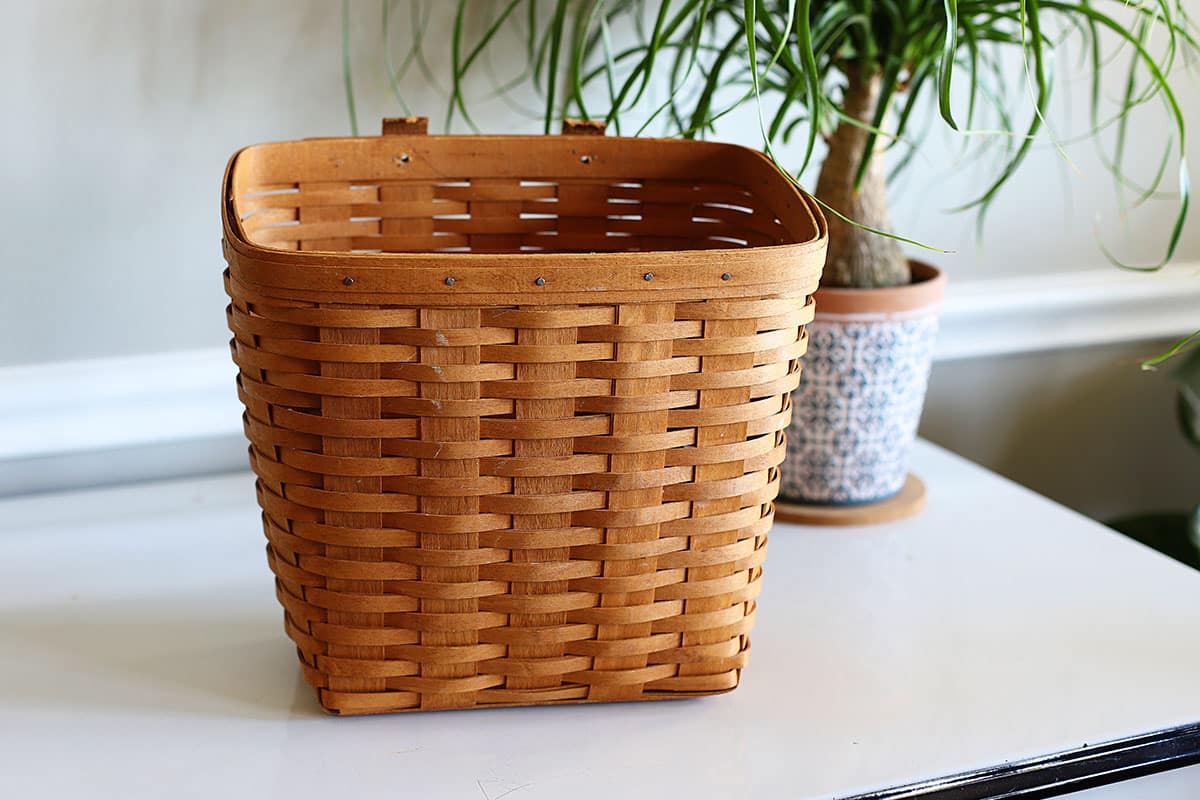
Last week I found this Longaberger basket at one of my local thrifting haunts. This basket has seen a lot in the last 30 years. I thought it would be a good basket to breath new life into with some paint.
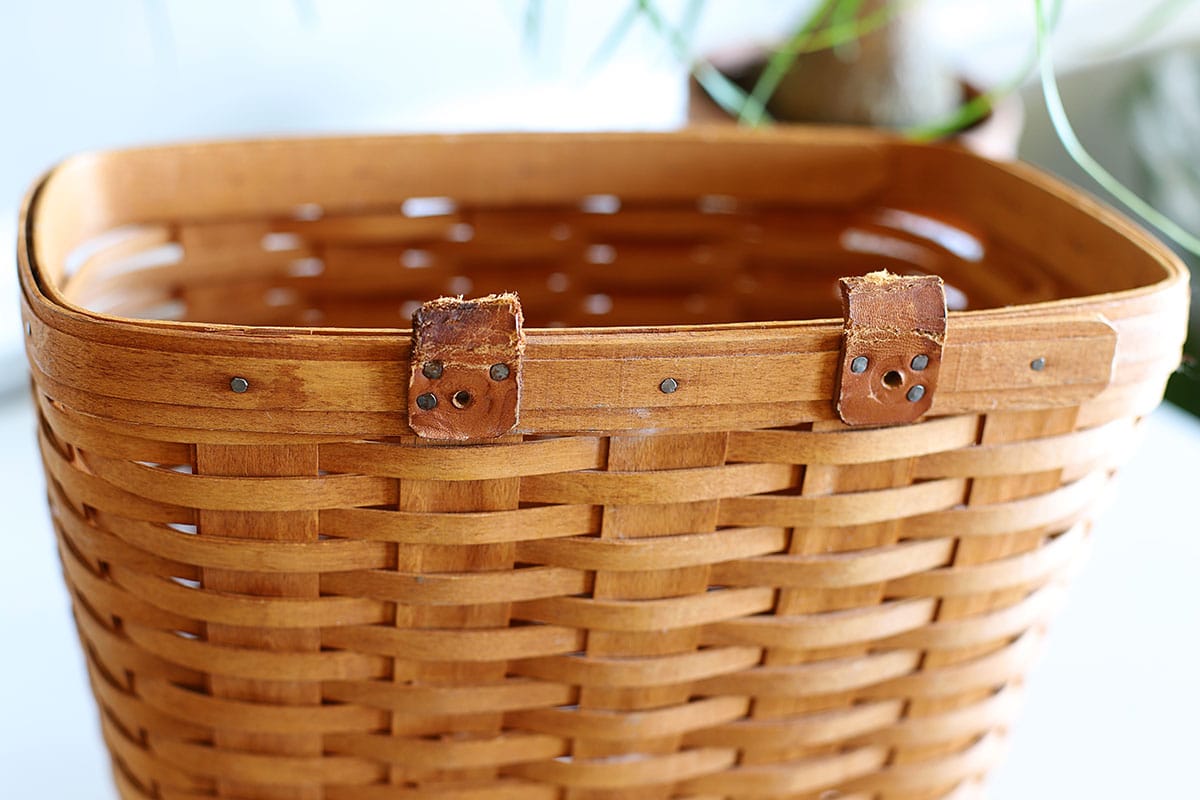
This thrift store find was the large Mail Basket. It originally had a lid on it that was attached by leather straps on the back. You could hang it on your porch and have the post office put mail or newspapers in it.
Somewhere along the way, the straps must have broken off and the lid was lost.
It also has a ton of little white dots on it which I originally joked may have been pee. Now that I know it was made to be put on the porch, stains from rain, snow or salt make so much more sense.
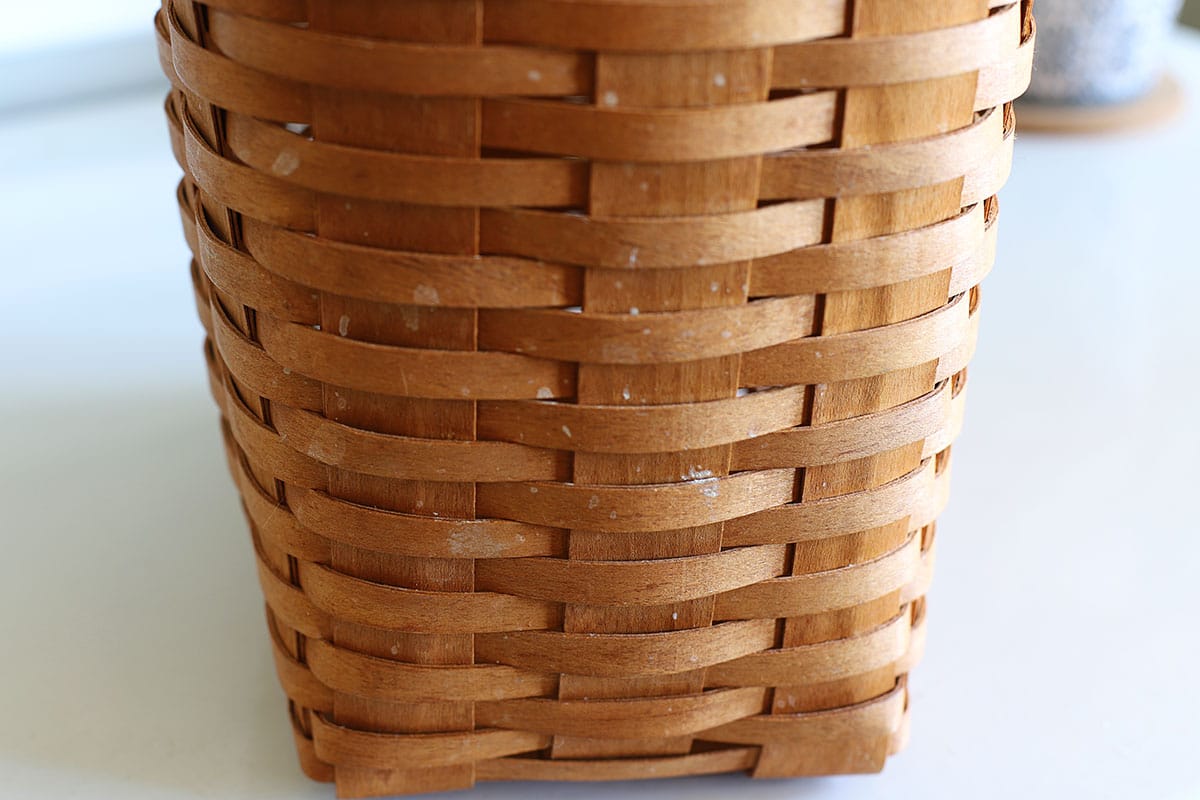
I will not be licking the stains to verify their exact origin though.
Since it was not even remotely a perfect basket, I thought it would be a prime candidate for a makeover experiment.
Step-by-Step Guide to Painting Your Longaberger Basket
Supplies
- Longaberger Basket
- Paints
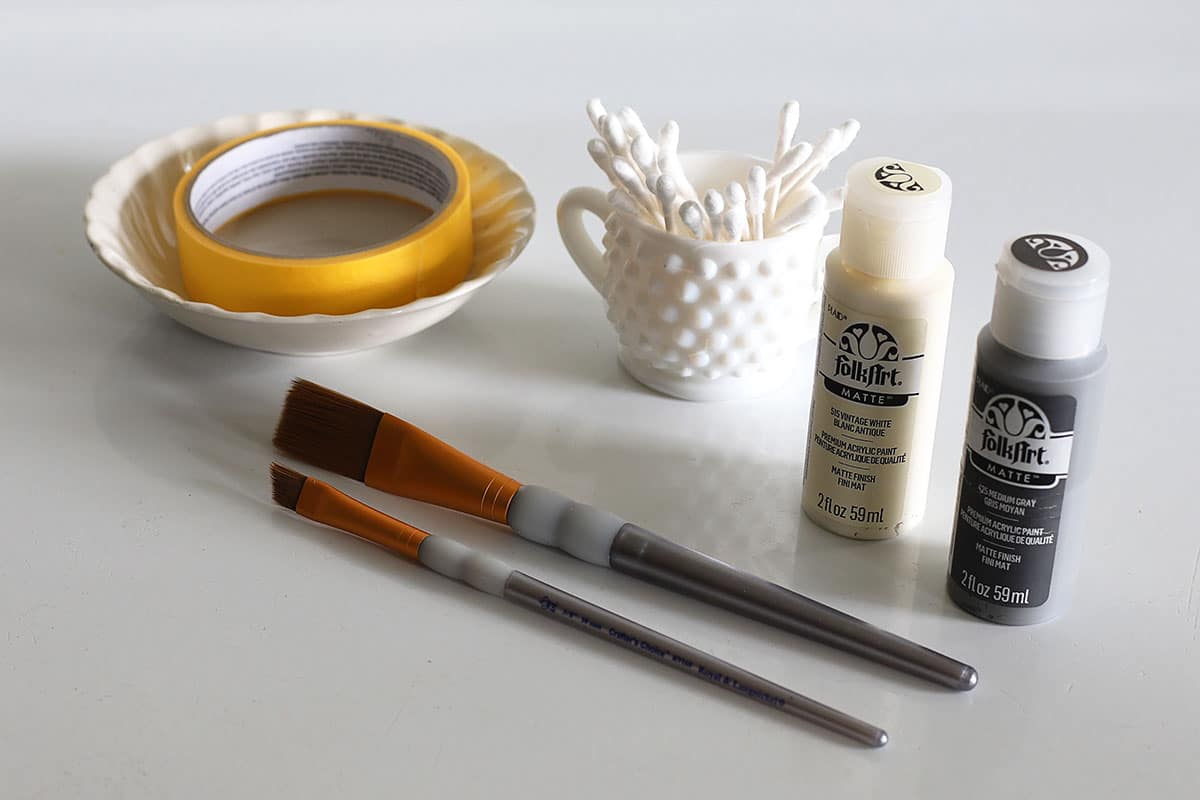
- Flat-Headed Paint Brushes For Crafting
- Painter's Tape
- Paint Palette or Dish (I use thrift store bowls)
- Dampened Q-Tips
Instructions
Time needed: 2 hours
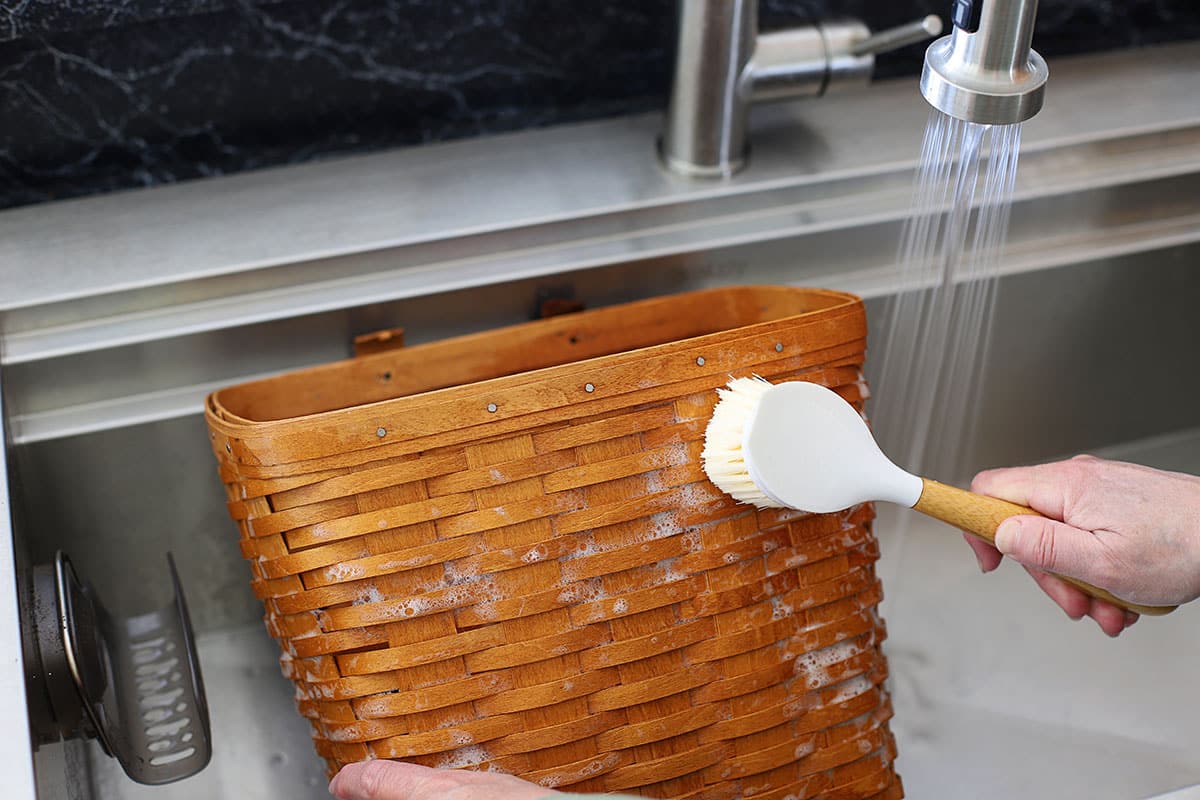
- Clean The Basket
To remove the stains, grease and grime that may have accumulated over the years I gave the basket a little bath. I first dampened the basket in the sink with slightly warm water (not hot). Then used a soft vegetable brush with Dawn dishwashing soap to lightly scrub the basket.
I followed this up with a thorough rinsing with cool water. Spoiler alert, the white stains never did come off fully.
BTW, back in the day I used to display Longaberger baskets above my kitchen cabinets. Every spring I would take them down and give them a good cleaning in the bathtub. Even though they're made with wood and it sort of goes against the grain (lol) of traditional wood care, they seem to like the additional moisture every once in a while.
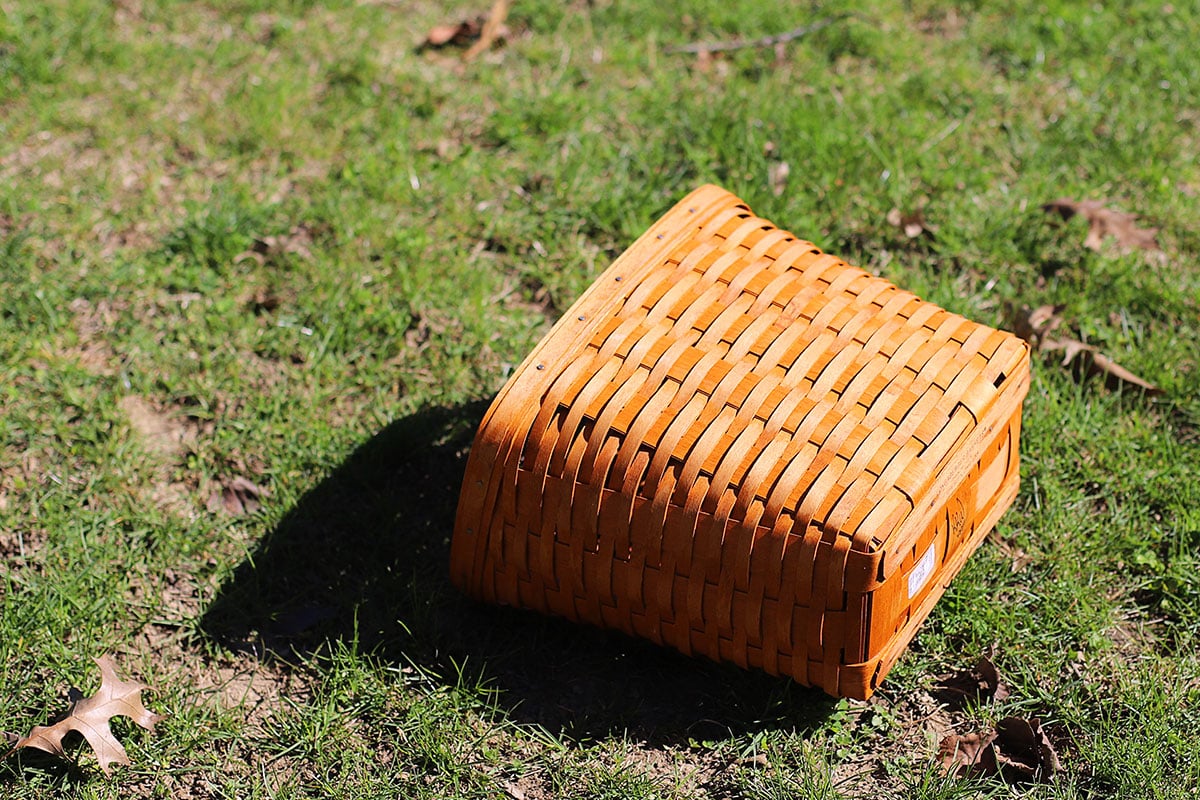
- Dry Basket
It will take a few hours to dry your basket enough so you can start painting it. I left mine lying in the sun for 3-4 hours. You can also dry it inside your house if it's not warm enough outside.
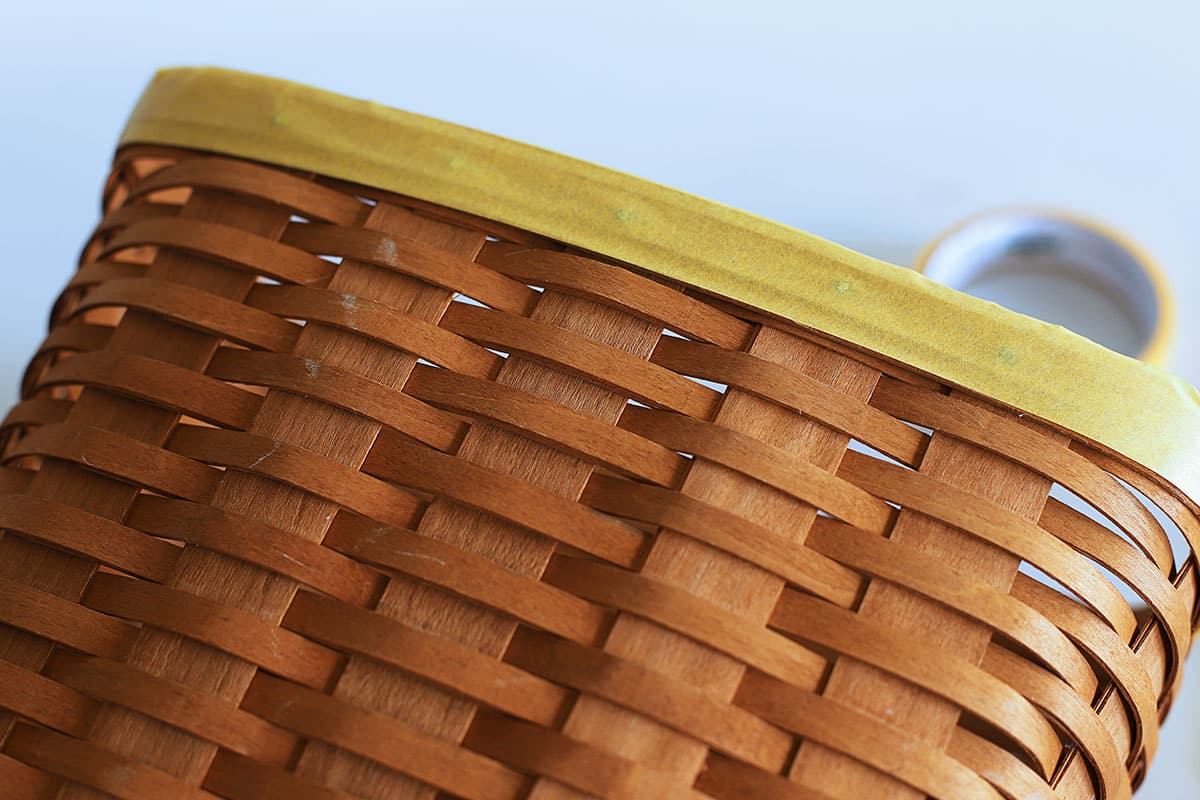
- Tape Off The Top Band
All Longaberger baskets have a top band that sort of holds the whole thing together and hides the ends of the splints. For my basket, I decided to make the top an accent for the basket. I taped it off so I didn't get my darker gray paint on it.
I used the yellow Frog Tape which is made for delicate surfaces. I was concerned the stickier painter's tapes might lift off some of the original stain color I was trying to keep in some areas. - Paint The Body
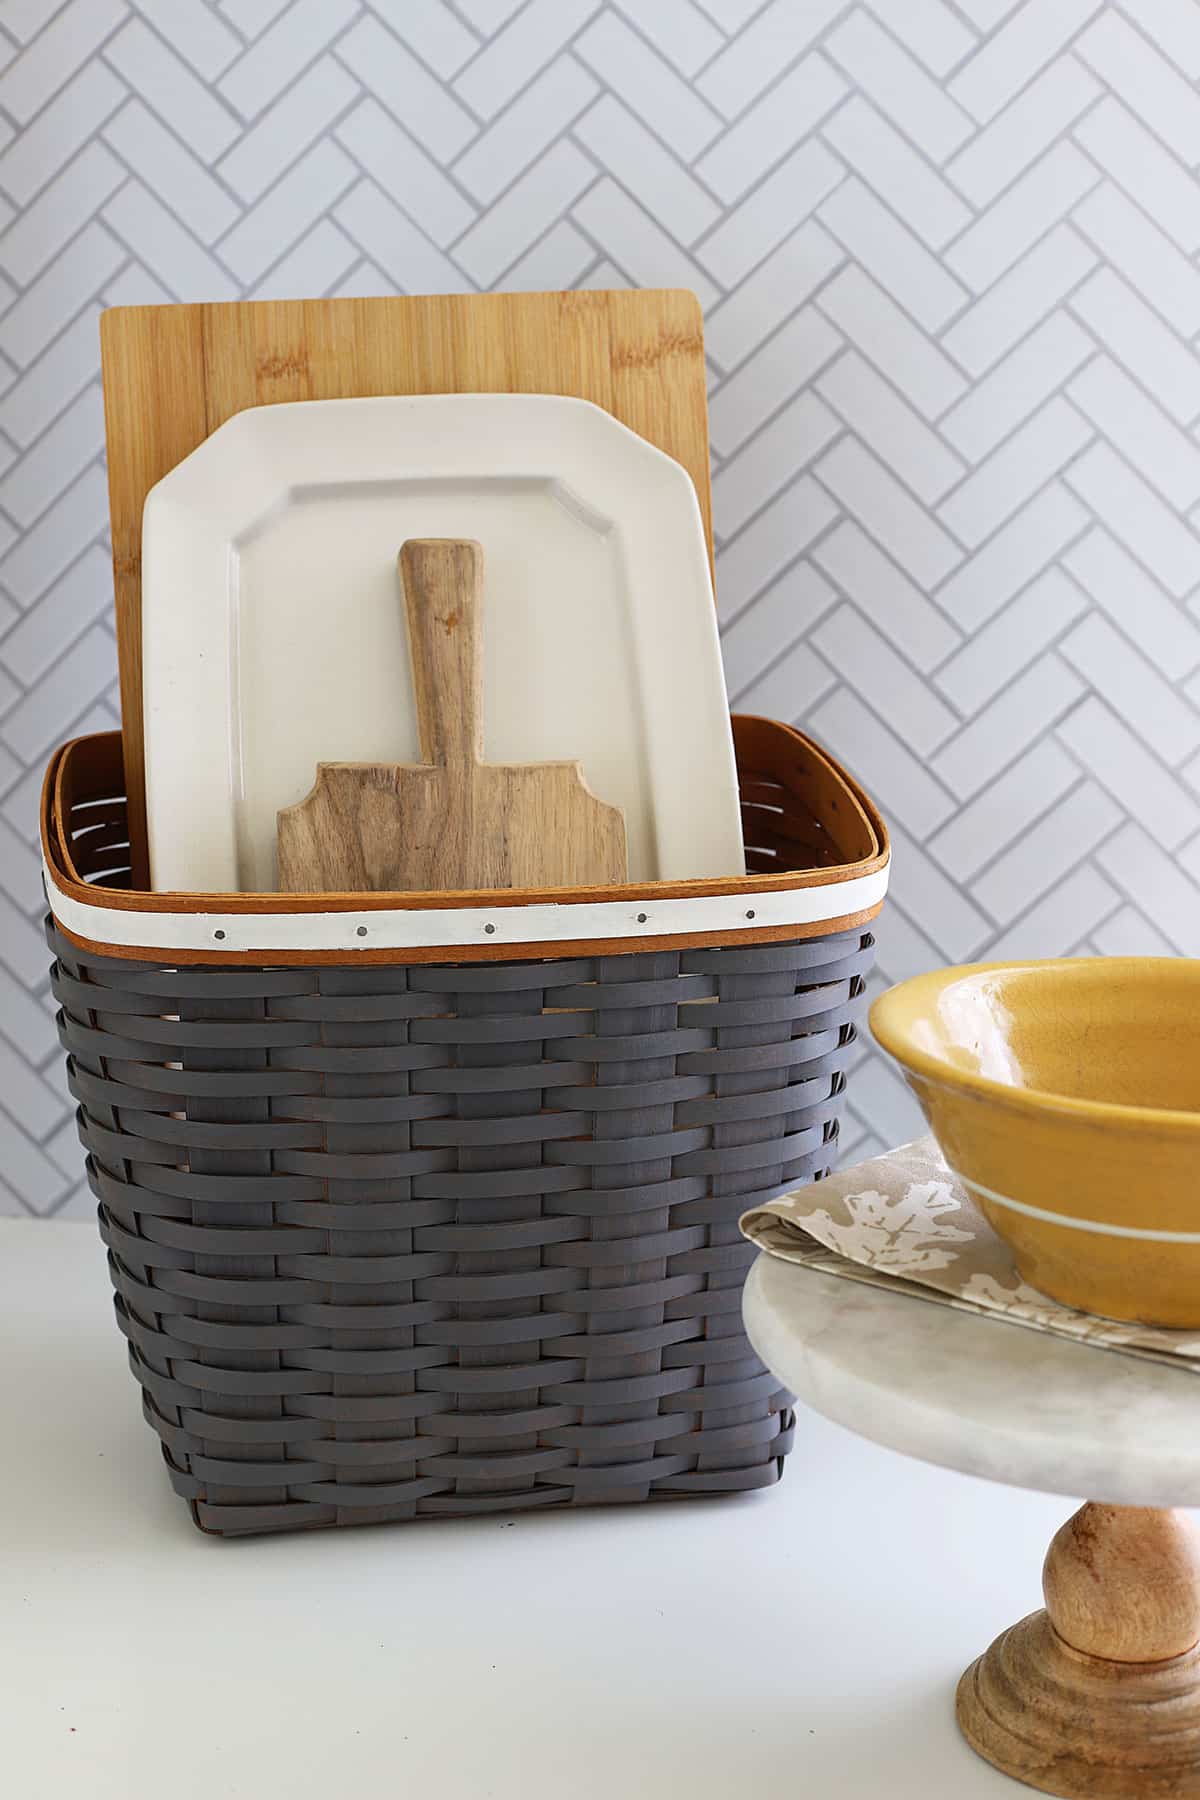
Paint the body with your main paint color. You can choose any color, but I thought a gray, brown and white color scheme would go well with my decor.
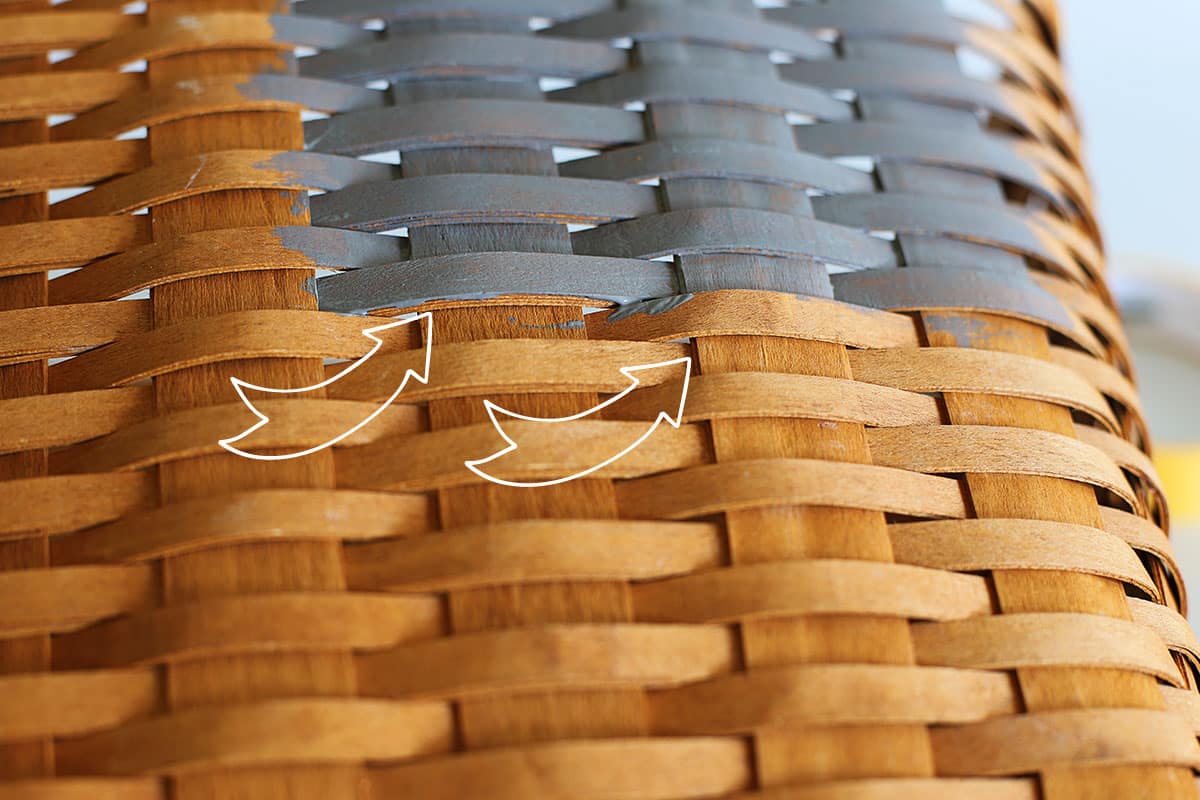
- Tips For Painting
A flat-headed paintbrush works well to paint these baskets. I used one brush slightly larger than the splints and one slightly smaller.
Make sure you "smash" the paint on the top and bottom of the horizontal splints and into the sides of the vertical splints.
I would occasionally stop and view my basket from all angles to make sure I hadn't missed a spot.
This will take time. I had estimated I could whip this basket out in 30 minutes or so. This was a larger basket so it actually took about two hours to get it all painted.
Depending on the look you are trying to achieve, you may want to put a second coat on it. My basket soaked up the first coat, so I went back and did a much quicker 2nd coat. If you want a more rustic look or lightly stained look, you wouldn't have to do the 2nd coat.
I did not paint the inside of the basket. Since I was leaving some brown stain around the top of the basket I didn't feel the need to paint the whole thing. It could also have something to do with it taking me 2 hours to finish just the outside. - Cutting Leather Staps If Needed
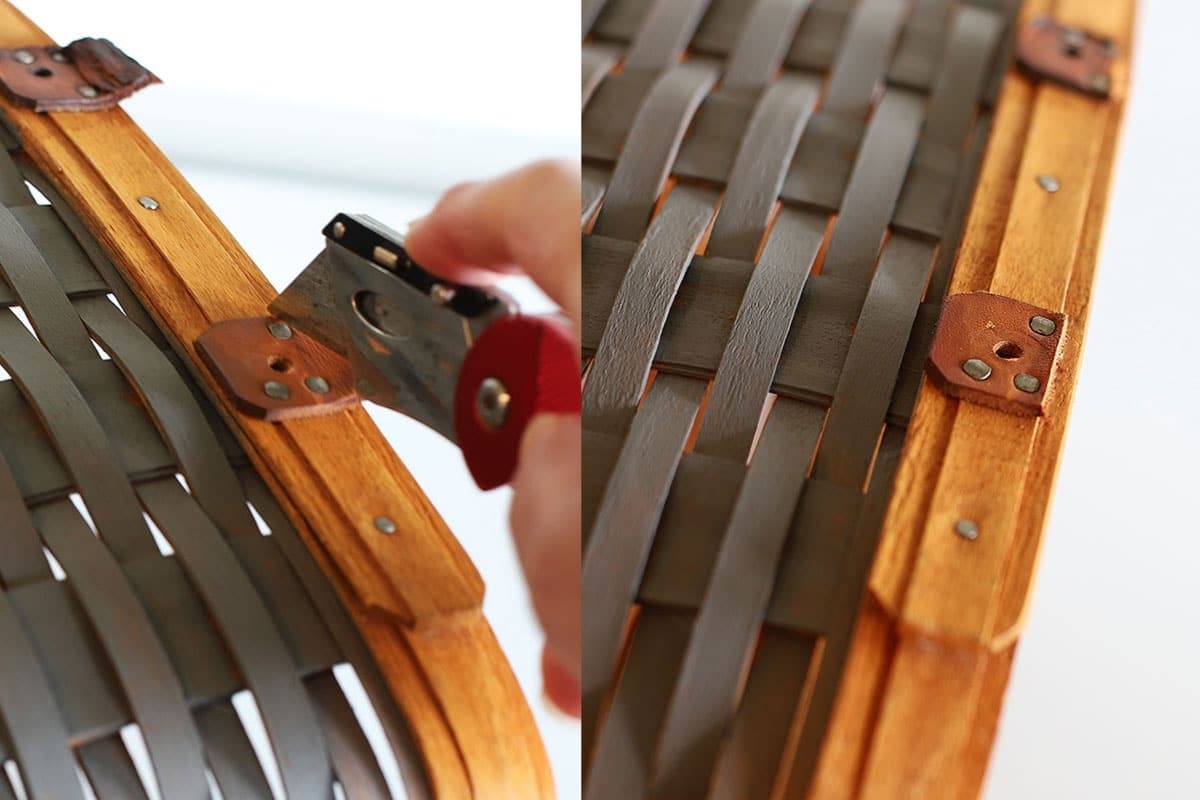
This won't be the case for all baskets, but since the leather straps were in such poor shape, I decided to cut them off closer to the edge of the basket. An X-acto knife came in handy for this.
I could have bought some replacement straps off Amazon, but at this point, I didn't even care about recreating the look of the original basket. I did not have the lid that would have come with it, so it seemed silly to go to the trouble of adding leather handles back on.
I was fine with just cutting them off. - Adding Contrast With The Top Band
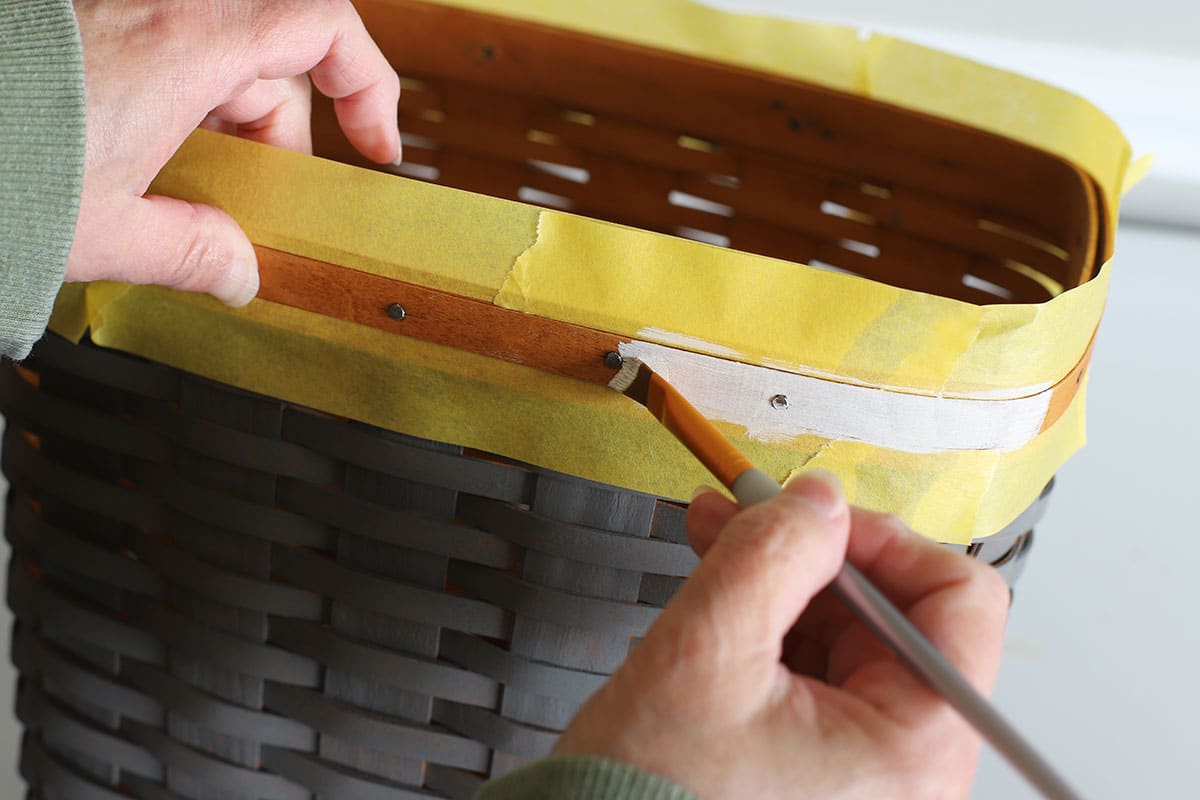
When I was at this point I could have left the entire top band in its natural wooden stain color, but I felt it needed something a bit more.
I taped off the portion of the band that was going to stay brown and just painted the small inner band off-white. - Cleaning Up The Nails
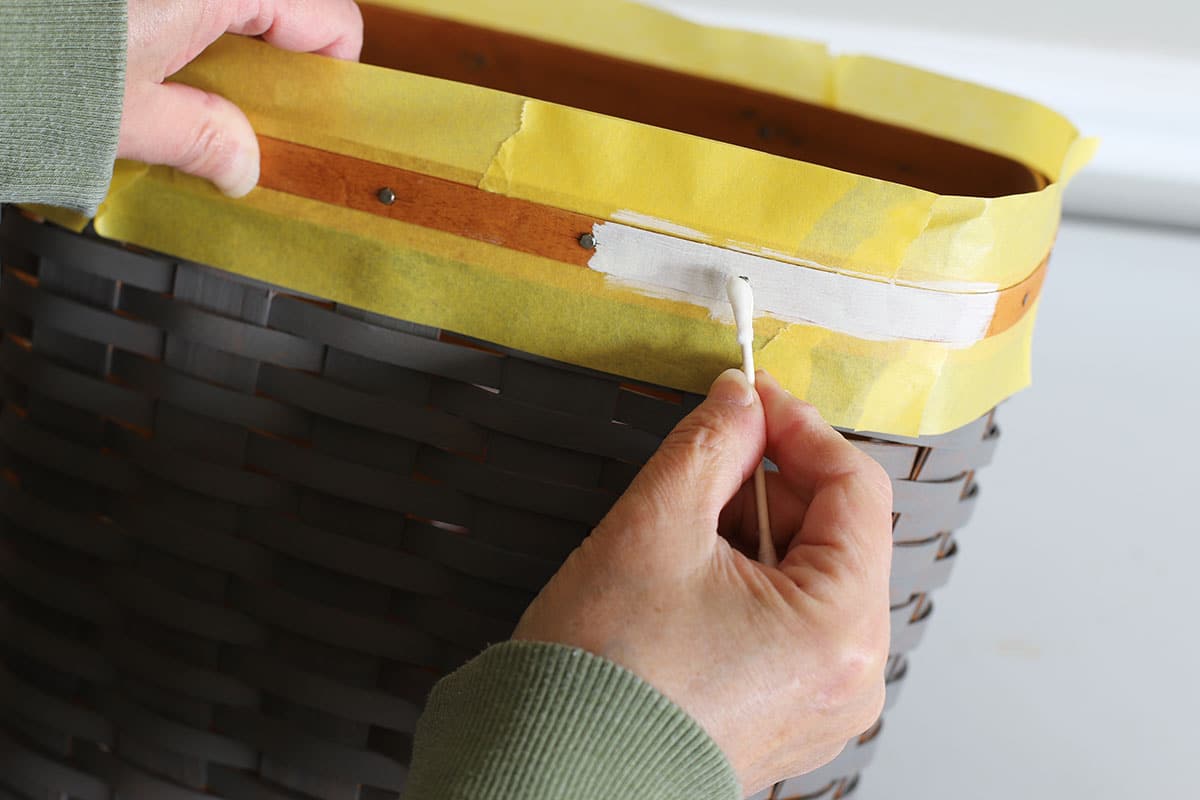
Part of the look of a Longaberger basket is the visible nails that hold the top band together. I found it easiest to just paint the top band not paying any attention to the nails and then go in and use moistened Q-tips to go over the nails to take that paint right back off.
You want to do this when the paint is still wet, so it comes off very easily.
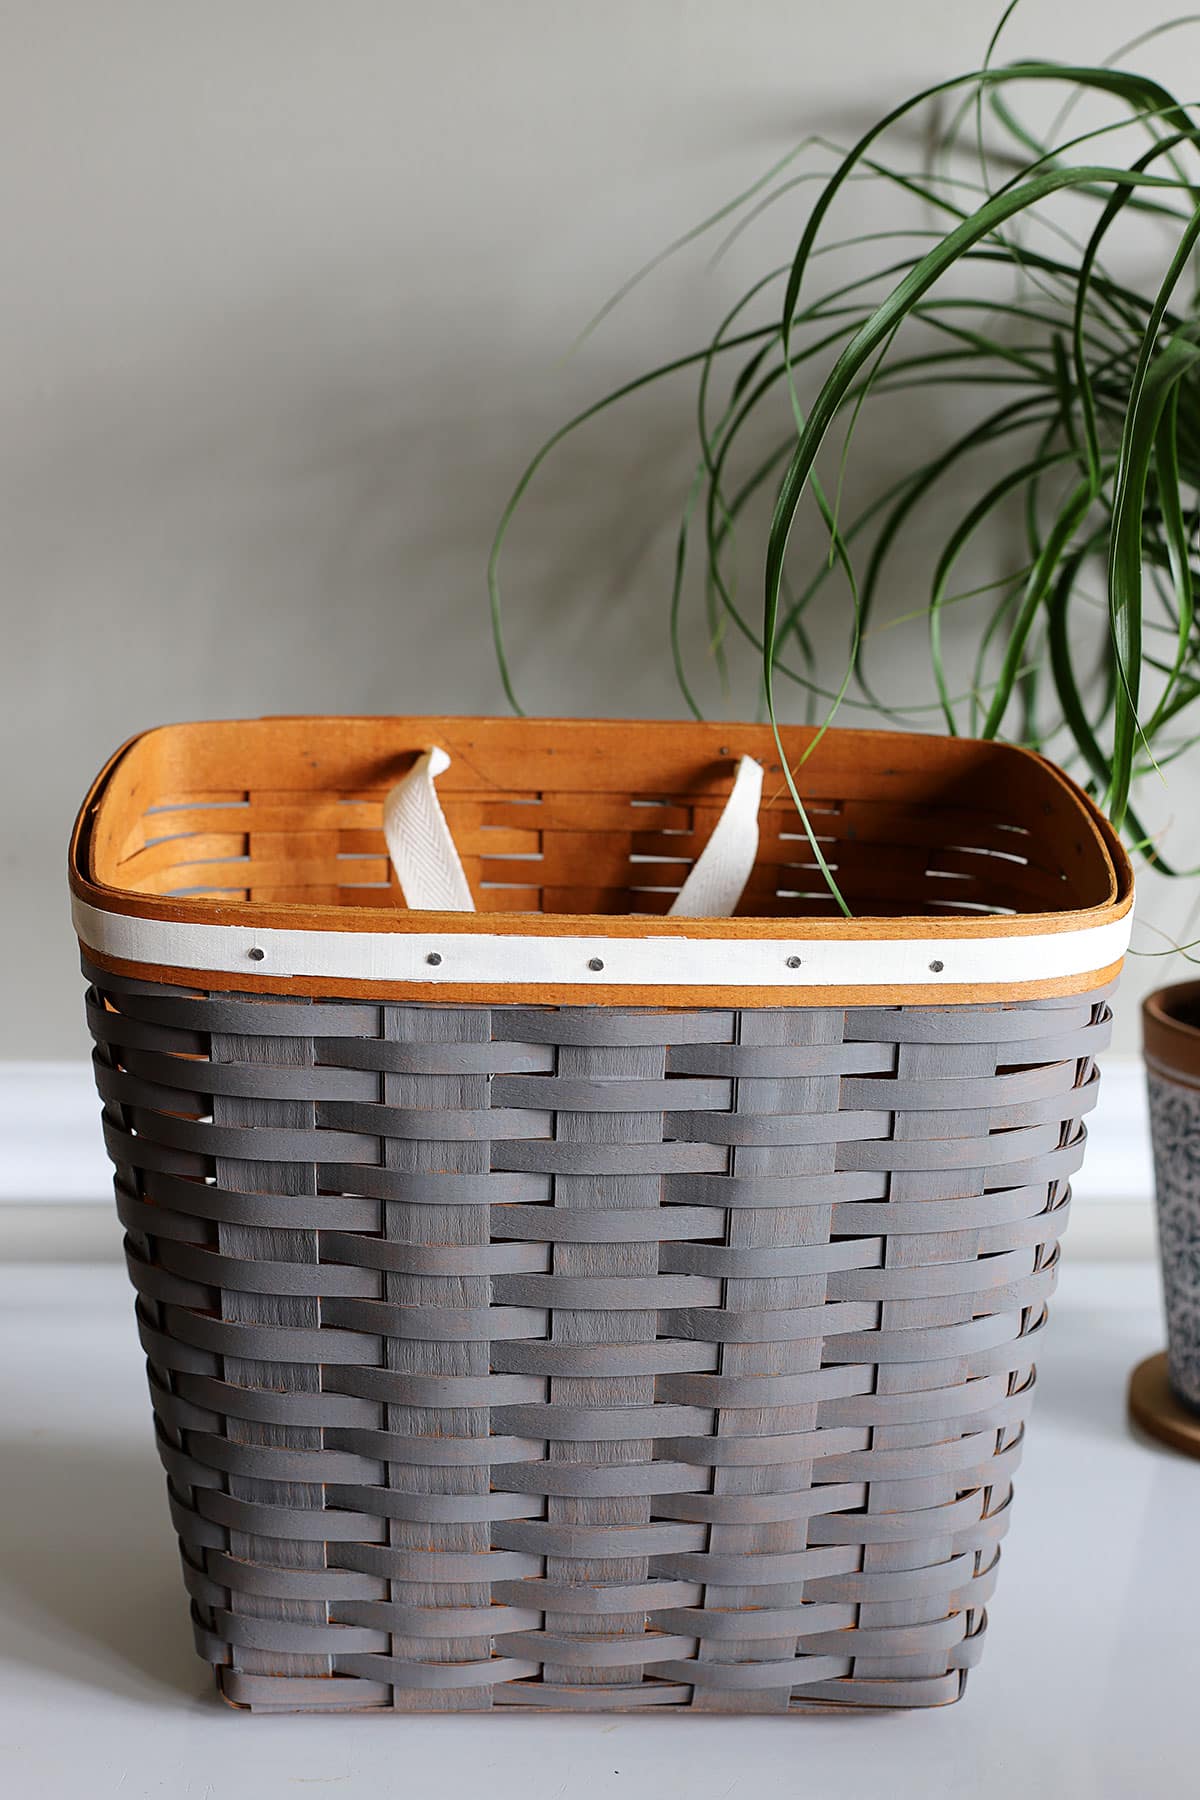
- Finishing The Project
After the paint is dry remove the Frog Tape.
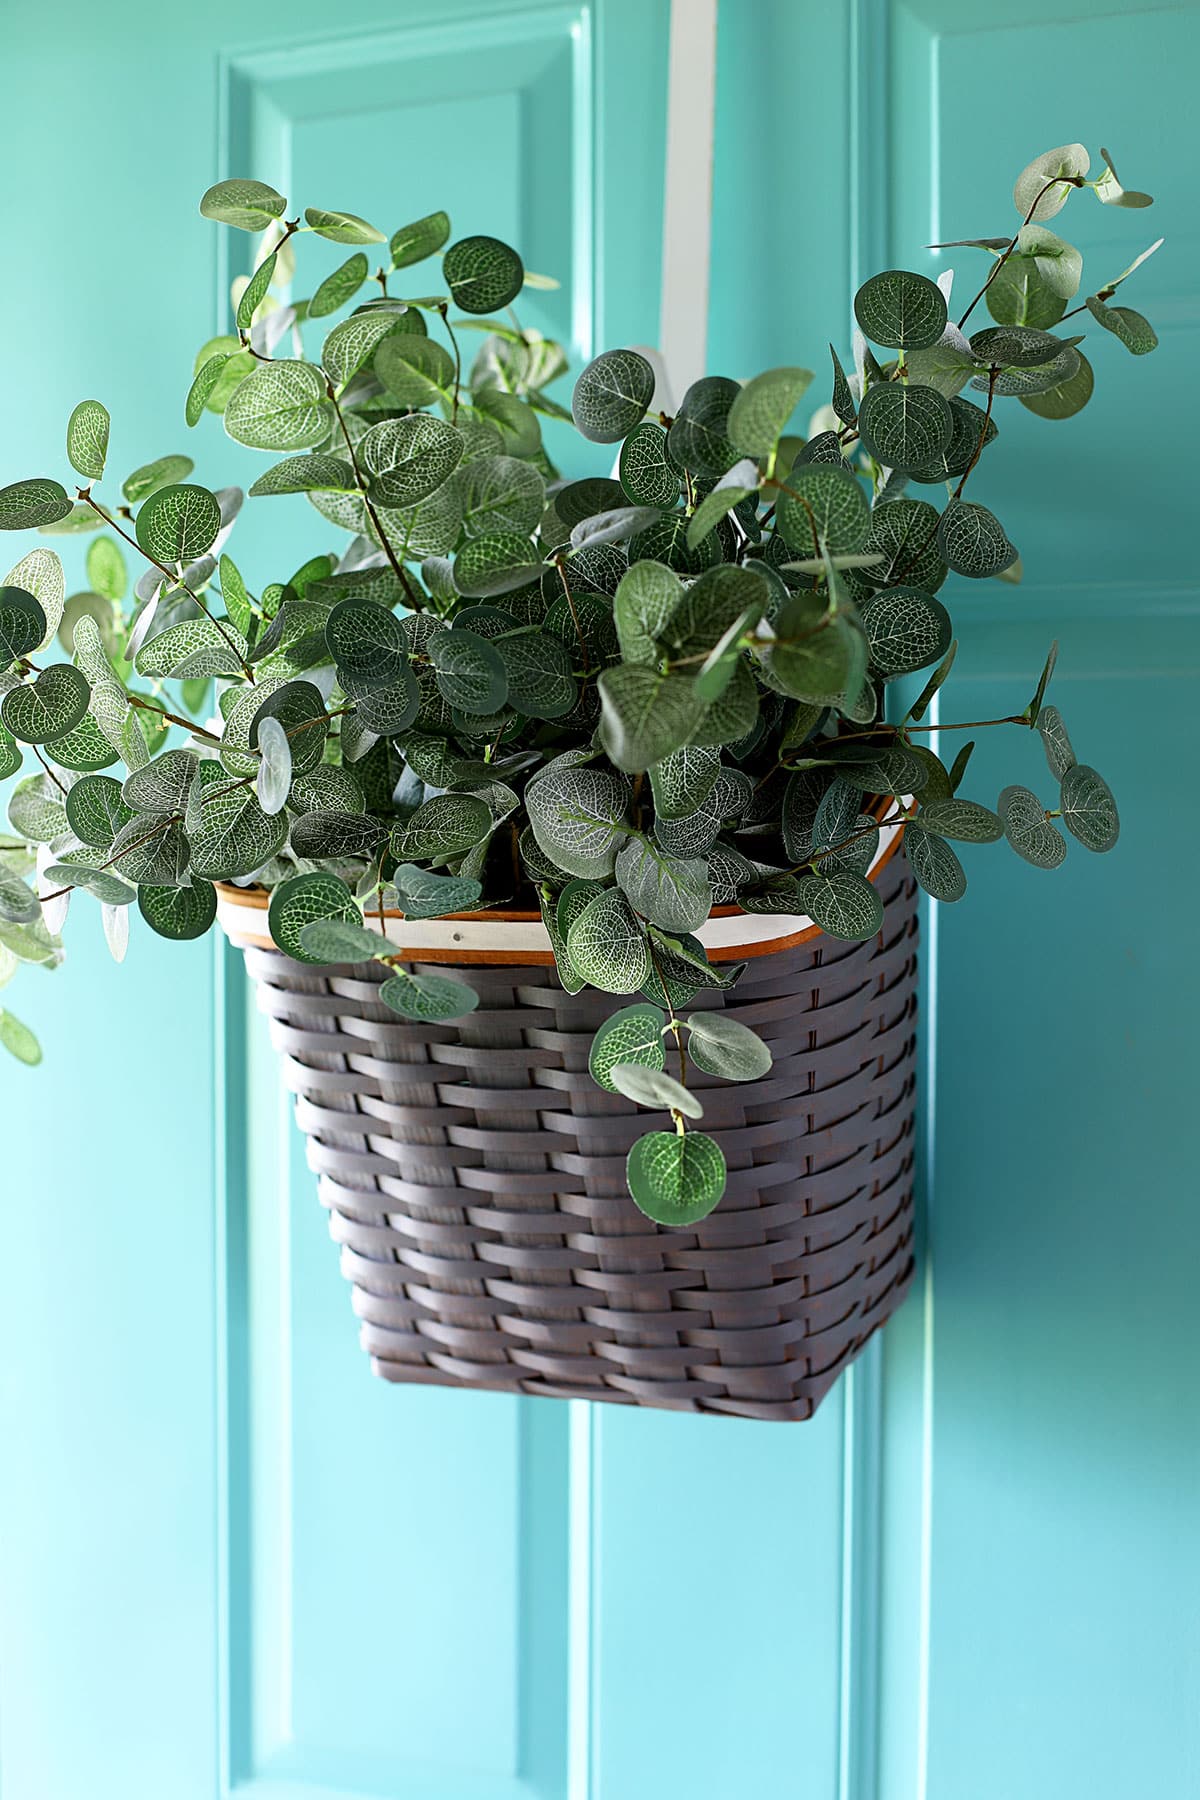
I don't have a fantastic photo of it, but at the last minute, I decided to add a piece of off-white cotton ribbon so I would be able to hang the basket if I wanted to.
I cut the ribbon to length, threaded it through the holes from where the leather loop was and tied it off on the other side.


What Kind Of Paint Is Best For Painting Longaberger Baskets?
I find either a very flat paint or chalk paint is perfect for painting these baskets. Your typical satin or glossy acrylic craft paint has a little bit too much sheen to it and gives a wooden basket a plasticky look. The flat paints look more natural on the baskets.
On this basket, I used FolkArt Matte Finish Acrylic Paints from Walmart (also found at Michael's and JoAnn's and possibly Hobby Lobby). Remember, their matte finish is a specific paint apart from their massive collection of paints, so make sure you are looking for bottles that say "matte finish" on them.
The colors I chose were #425 Medium Gray for the base of the basket and #515 Vintage White for the trim.
A chalk paint would give you the same look - FolkArt, Waverly and Rustoleum are easy to find at local craft and hardware stores. Or you could go with Annie Sloan Chalk Paint, Dixie Belle Chalk Mineral Paint, Fusion Mineral Paint or Miss Mustard Seed's Milk Paint. I'm sure there are others out there, but those are just the ones I have personally used in the past.
I chose the FolkArt bottles because they were a little over $1 each at Walmart. If you've been here before you know I'm cheap, but it is also good paint.
Brush On Paint vs Spray Paint
I'm Team Brush On all the way.
Seriously, you could get a can of matte spray paint (I believe Home Depot carries a Behr spray chalk paint now) but I don't think it would necessarily be easier to use a spray. I've painted many things with spray paint and there are ALWAYS one or two runny areas or big drips that I have to sand down and re-spray.
Brushing allows me to be more precise with my painting area and have greater control all around.
Does it take longer? Yes. Yes. And yes.
But I think you'll like the results better.
Aren't You Ruining A Priceless Collectible?
There's a huge debate about this in Longaberger Facebook groups. To paint or not to paint.
The truth is it's your basket and you can do with it what you want.
I understand people have emotional attachments to their Longaberger items and it goes way deeper than just being a basket they spent GOOD money on back in the day. Like really good money. Most Longaberger baskets retailed for at least $50 if not well over $100.
I, for one, cherish the trips I took to the Longaberger Homestead with my mother and sisters back in the late 1990s. It was fun to visit the Homestead, shop in Dresden and go to Popeye's Soda Shop.
I also had fun at the home parties so many of my friends had back then (sort of like Tupperware parties, but with wooden baskets and better food).
I get it. You love your baskets.
But if you are just storing them away in your basement, not wanting to get rid of them, but not being able to fit them into your home decor at this point in your life, what's wrong with updating them so you can use them?
And just to get into a touchy subject, they really are not that collectible anymore.
I know, don't throw your Longaberger purse at me! Their height of popularity has come and gone. The "they will only increase in value" promise (sales pitch?) at the parties just didn't come true.
I find Longaberger baskets at thrift stores and antique malls ALL THE TIME. And normally in the under $20 range. Heck, during yard sale season I've seen baskets being sold for as little as 25¢.
The basket in my tutorial was under $5 at the thrift store. Back in the day, it sold for $115.00.
They didn't hold their value.
So no, I'm not ruining a priceless collectible. I'm updating it to make it fit in more with my current home decor, so it can be used and seen and come out of the basement. Or the thrift store in this case.
I'm interested to hear your thoughts on painting these baskets? Yes or no?
Ally
I am in the same boat. Storage totes full of Longaberger baskets from the late 90's/early 2000's. I've made it a mission to revamp them one at a time. Started a FB group called Innovating with Longaberger. Have quite a group of ladies there who share this interest. 😊
Mary
How beautiful!! You have given me inspiration! I also went on thrips and to the parties. I had two family members who sold so needles to say I have a few and I can't wait to update some!!!
Darla
Thank you for your article. I purchased a ton of Longabergerbaskets back in the day. I have had them pack up for the past decade. I’m excited to give some of them a new life and paint them to match my decor. The rest I am donating to my church for a silent auction. I am disappointed that the value fell so far. An American made product with American materials.
Florence
I think it turned out really good. I wouldn't hesitate to paint one if I had it. I remember their popularity, but I just couldn't see (personally) paying over $100 for one! But that's just me...ole cheapskate here.
BTW, I like your so called rambling posts.
Gina
I'm in the camp that loves the transformation with paint. And yes, they are yours to do whatever you wish!
Caye Cooper
I love your basket in spite of the fact that I don't care for grey. It's pretty neat on this iconic basket. I have a friend who would probably swoon if she knew I would paint one. Good for you!
Leslie D. Schmidt
I never got into the Longaberger baskets, although I do love baskets. Pam, you have such a good eye and a talent for envisioning the potential of any object you find. I am always so impressed with your transformations. And your sense of humor is a delight. Thanks.
Carolyn Dinger
Myself I love the stain. Pam you did a amazing paint job on the basket. Looked great on the door. Your choice of colors were a good choice.
Joanne
I went to those same Longaberger parties! I think it makes perfect sense to bring them into your current decor style. Why let them collect dust where they serve NO purpose in "basket life". Good job!
Patricia Szybist
I thought I'd hate it, but it's great!! And I do have a stash of LB baskets, so thank you for the great tip!
Jo
I chuckled remembering my first longaberger party. They started with the berry box and I had to get up and run to the refreshment table to get a drink. Yup, a glass of wine. Went back to my seat and inquired again, still twenty four
dollars. Dang, I had three young boys at home and a husband! So, I decided baskets from flea markets and garage sales would have to work for me. Your basket looks great!
MrsSW
I've never met a basket I didn't like but for some reason the Longaberger baskets never caught my eye. I still don't think they are very attractive but I really like what you did with paint. Perhaps because I am in a "if it holds still paint it" phase.
Will you be bringing more of your baskets out of the basement to update?
Sheila
Dot
Thank you for showing how to do that. I've been wanting to paint some of my longaberger baskets to match my kitchen for a long time. Now you've inspired me for the next time I have a few hours to do a craft project. Thank you so much.