

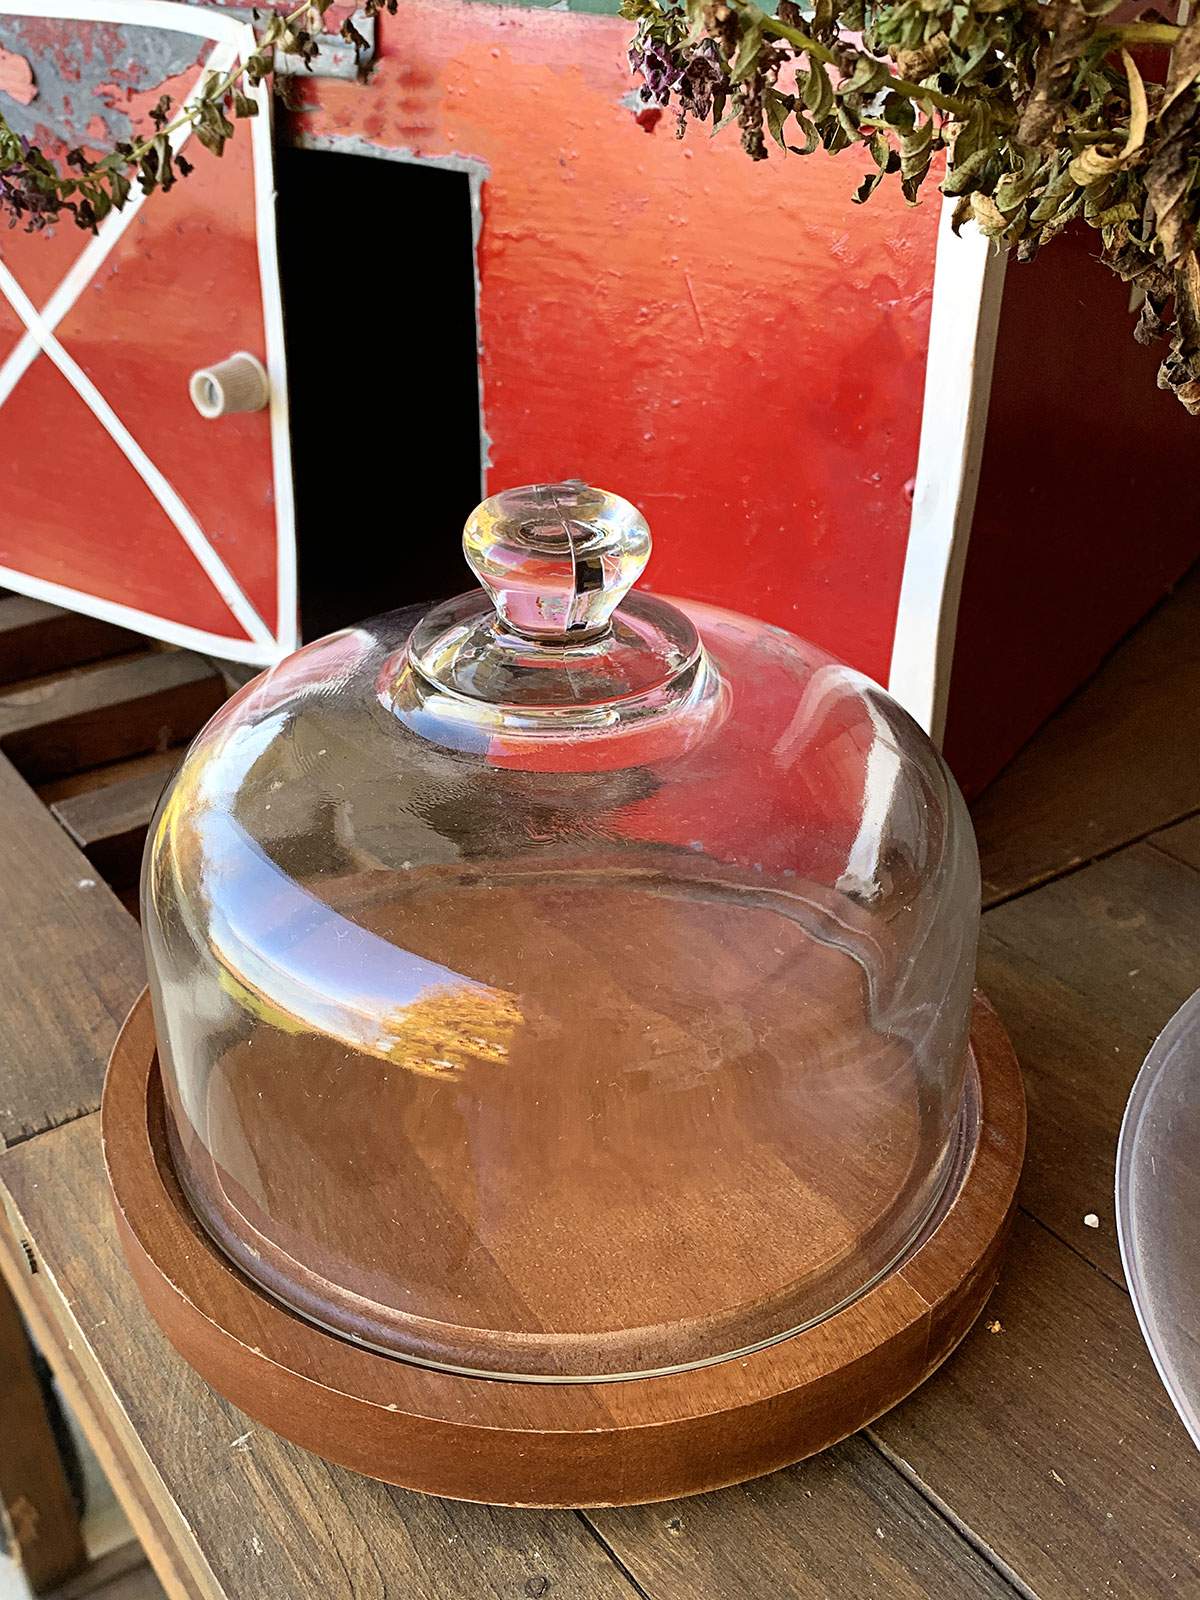
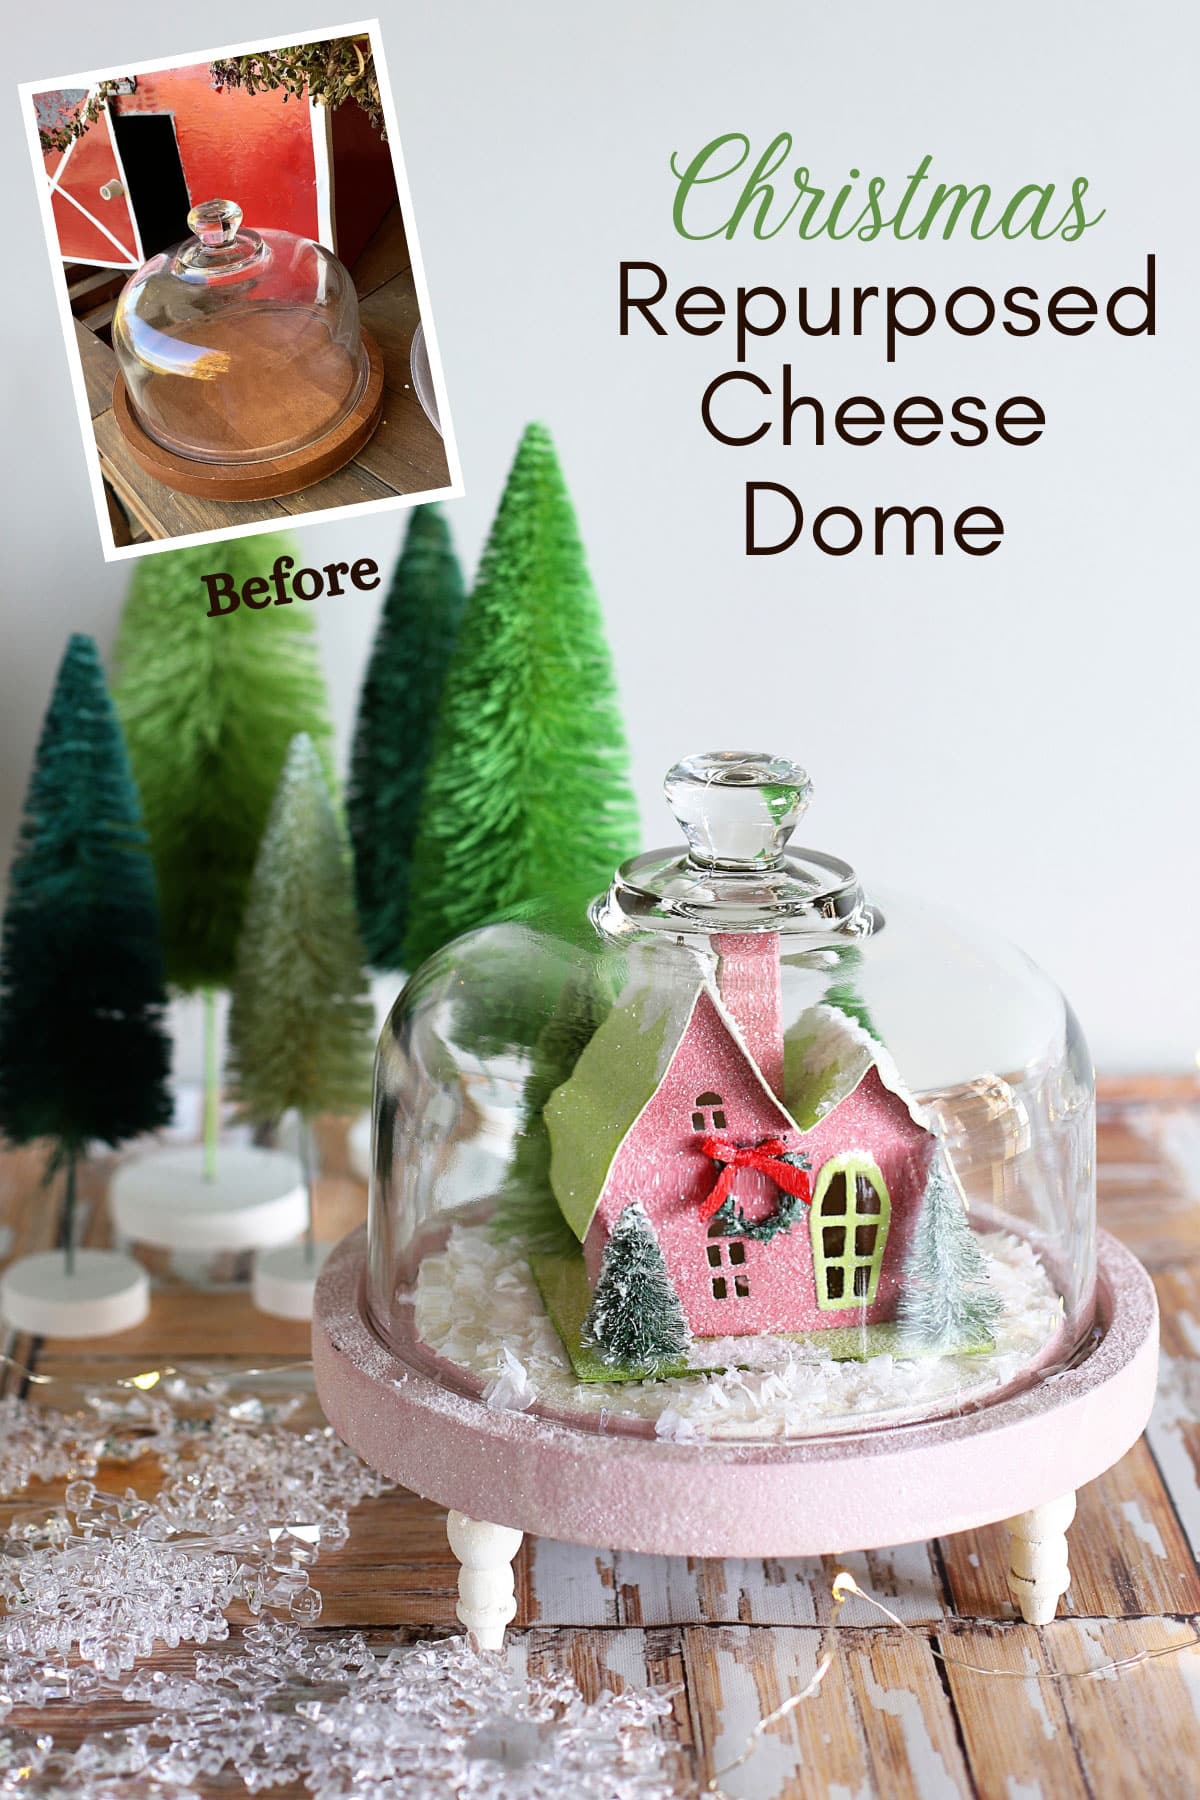
A few years ago I showed you how to make an Easy DIY Waterless Snow Globe from a jelly jar. Today we're going to make something similar, although less shakable, with a thrift store cheese dome.
It's a cheese dome turned winter wonderland Christmas cloche.
Now as much as I enjoy a good hunk of cheese, I never actually use a cheese dome as a cheese dome. I'm not a huge entertainer, so my cheese normally just sets in the wrapper it came in.
But when I found this cheese cover at the thrift store I knew it would be perfect for making a Christmas decoration.
✨ BTW, today is Thrift Store Decor Wednesday, so make sure you hang around to the end of the post to see the rest of the team's thrift store repurposes for the month!
How to Turn a Cheese Cover into a Winter Wonderland Cloche

(This post contains some affiliate links for your convenience. You can read my full disclosure policy here.)
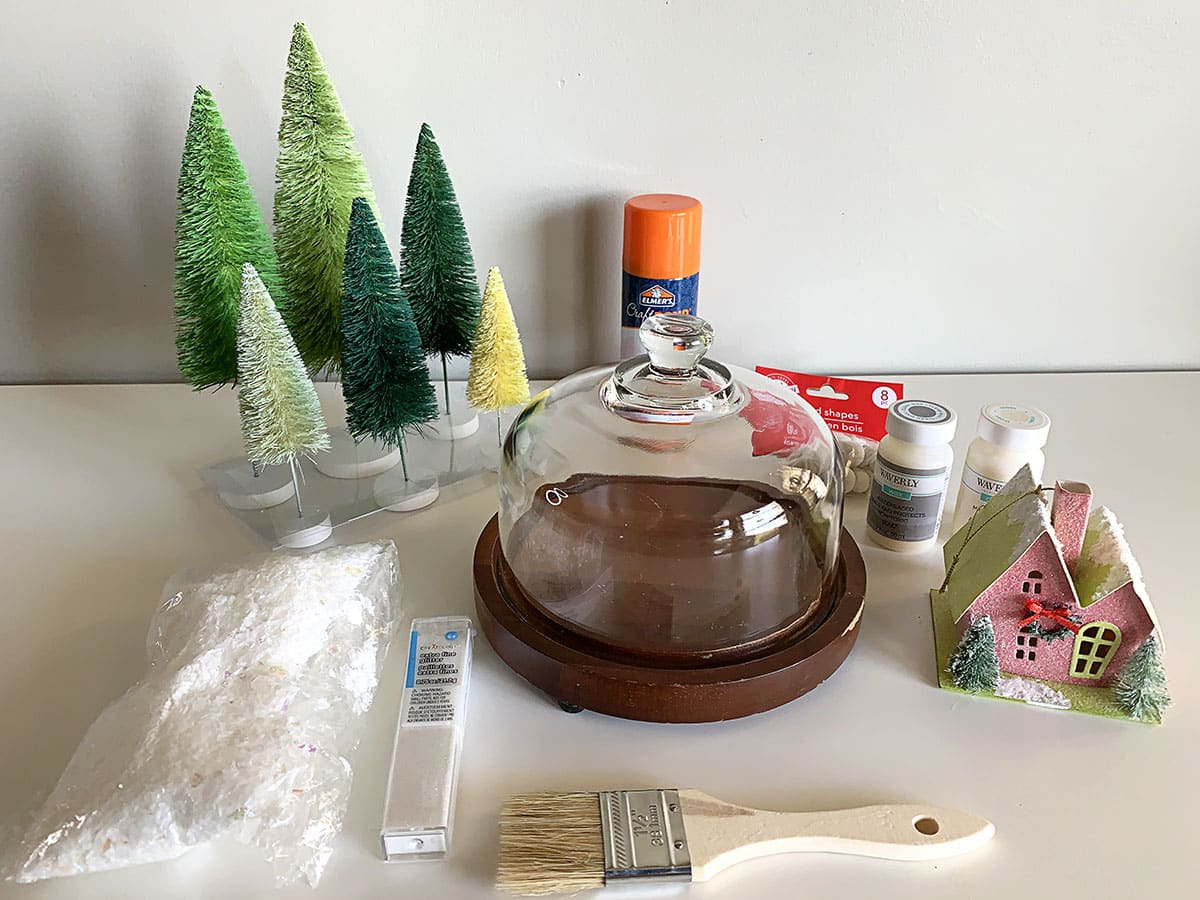
Supplies
- Cheese Dome (inexpensive ones can be found at the thrift store)
- White Paint (chalk or acrylic craft paint)
- Pink Paint - optional, but makes a fun accent (chalk or acrylic craft paint)
- Wooden Riser Feet (optional) - I found mine at Dollar Tree
- Paintbrush
- Glitter
- Fake Snow Flakes (aka Buffalo Snow)
- Spray Adhesive
- Mini Bottle Brush Trees (these are the Target bottle brush trees)
- Paper House (this is the house ornament I found at Target) - more ideas for fillers below
- Hot Glue Gun with glue sticks
- Wire Snippers (optional)
Instructions
Time needed: 30 minutes
Instructions
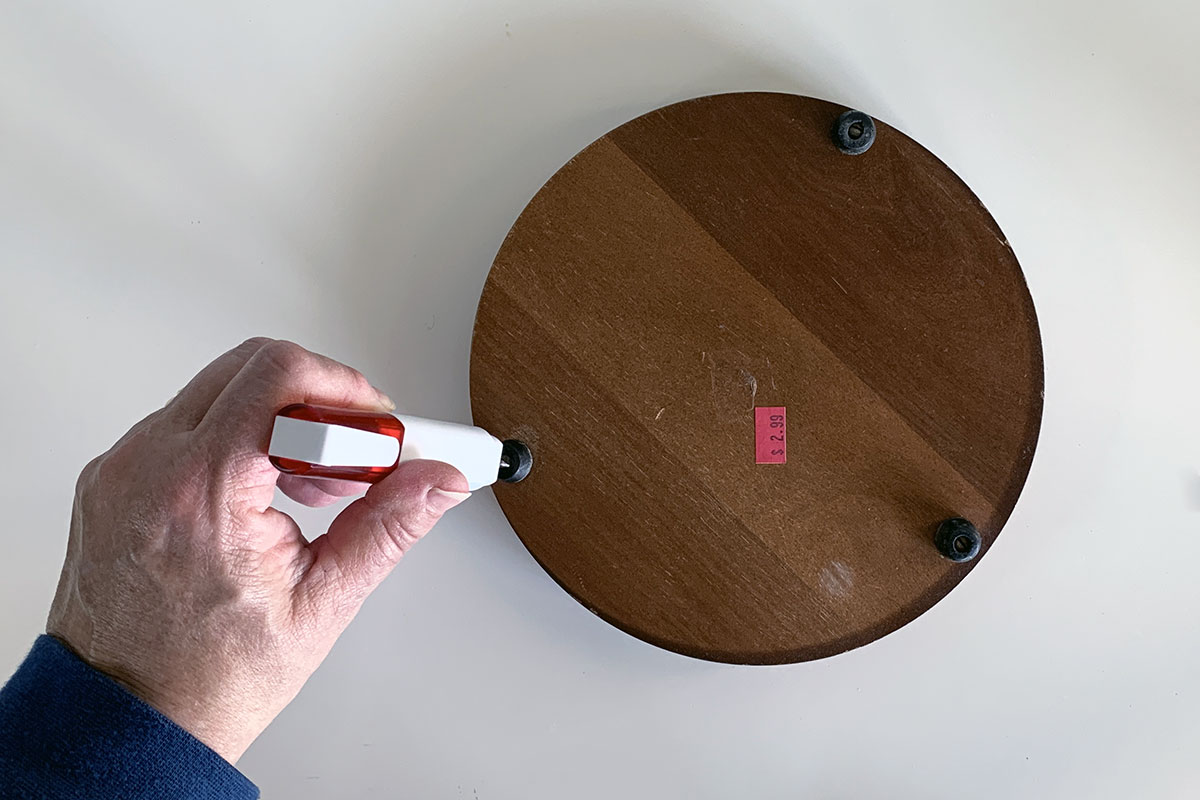
- Unscrew Original Riser Feet
The feet that came with the cheese dome were very very small. Maybe ¼" tall. Since I wanted something taller I am going to replace them.

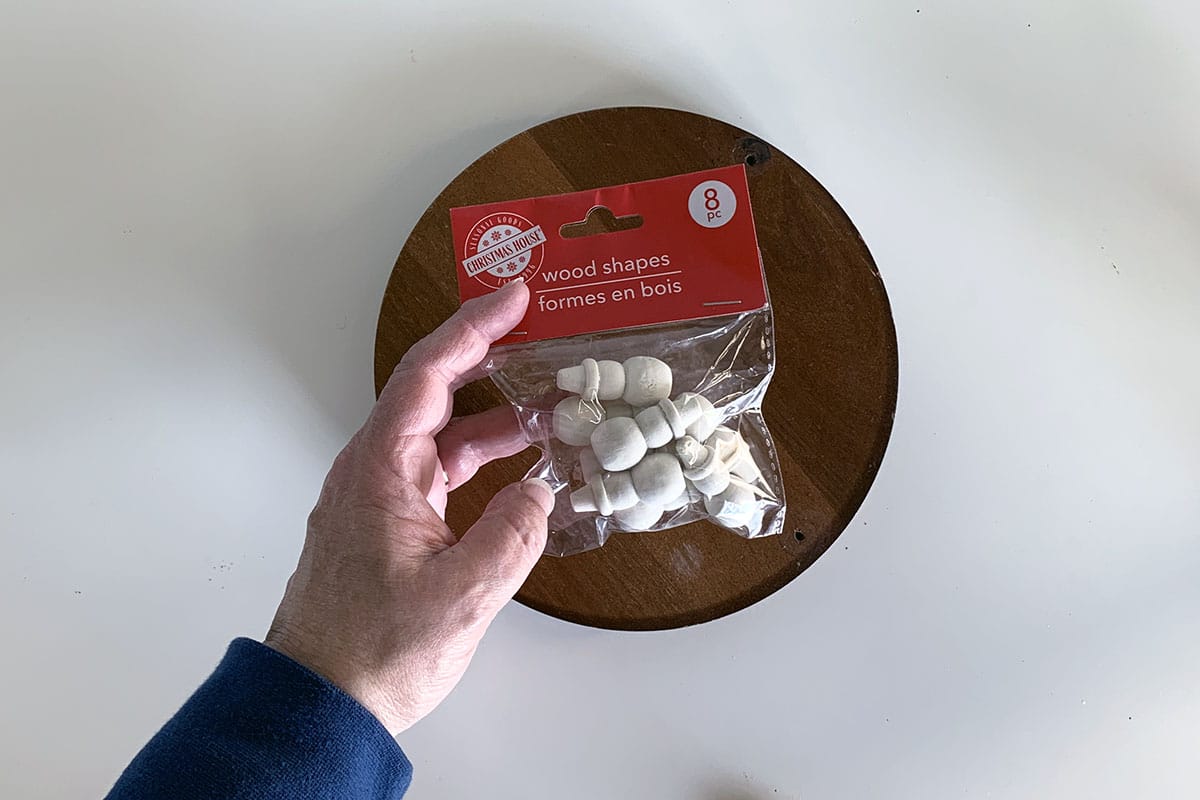
- Add New Taller Feet
Adhere the new feet onto the wooden base with a hot glue gun or E6000 glue. Although it originally had 3 feet, I used 4 feet to make it more sturdy.
- About The "Feet" I Purchased
These are the riser feet I purchased from Dollar Tree.
Spoiler Alert - they're cute tiny little wooden snowmen that are supposed to be used in Christmas crafting.
If you flip the snowmen on their heads, they make perfect little riser feet. - Paint The Wooden Base
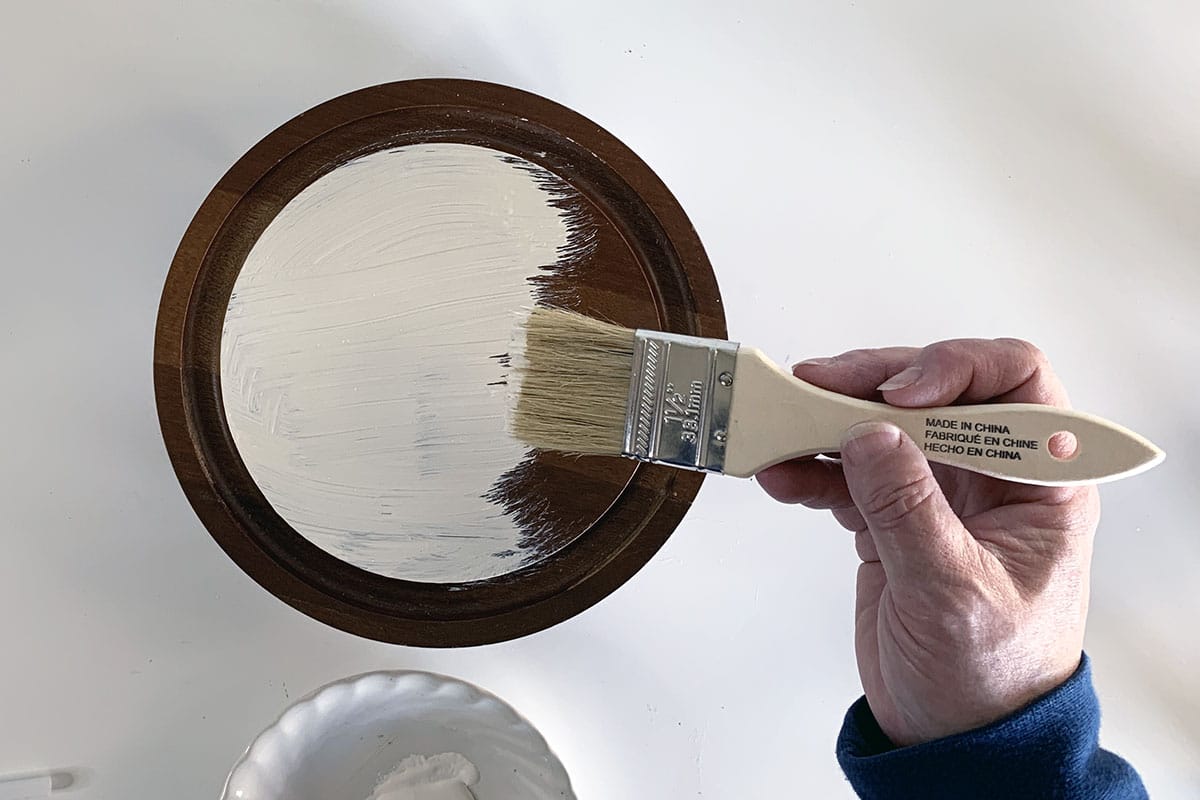
Paint the middle of the dome white. This is where the snow will sit. Also paint the new feet white.
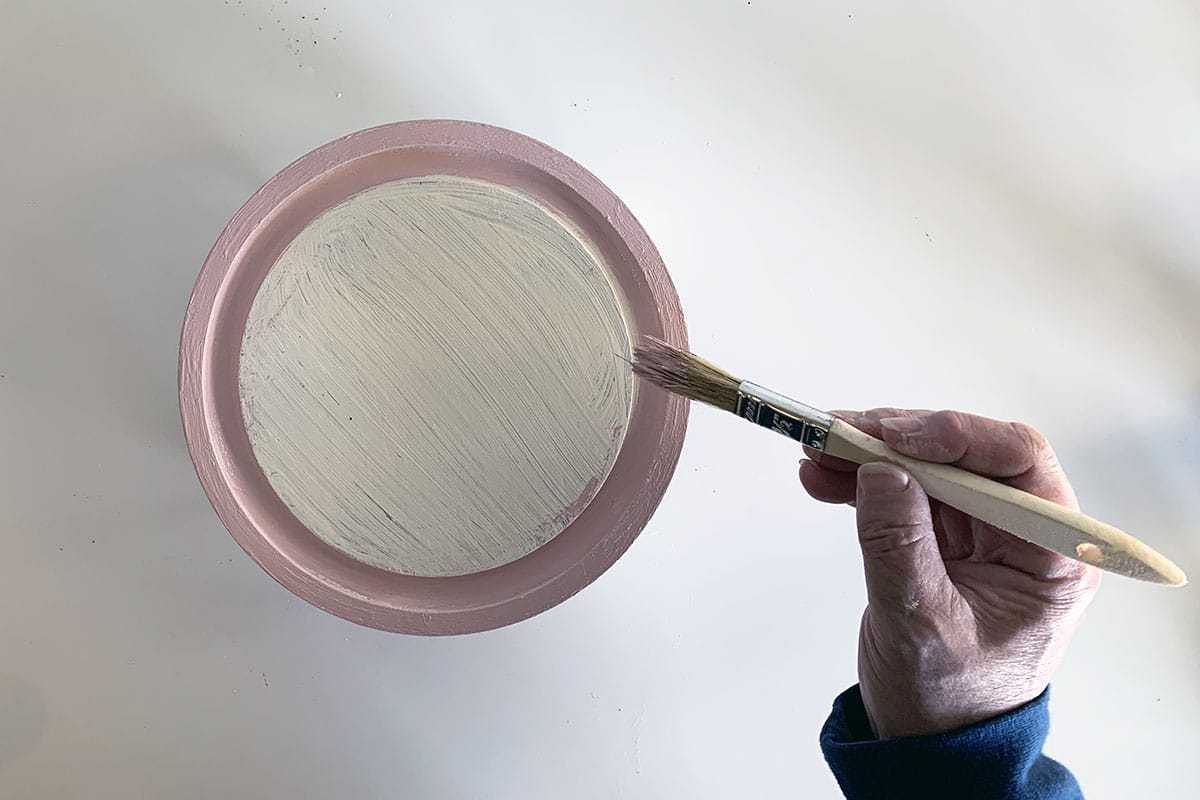
- Add Your Accent Color
Of course, you can use any color for the contrasting color. I chose pink to give it a whimsical slightly mid-century modern look.
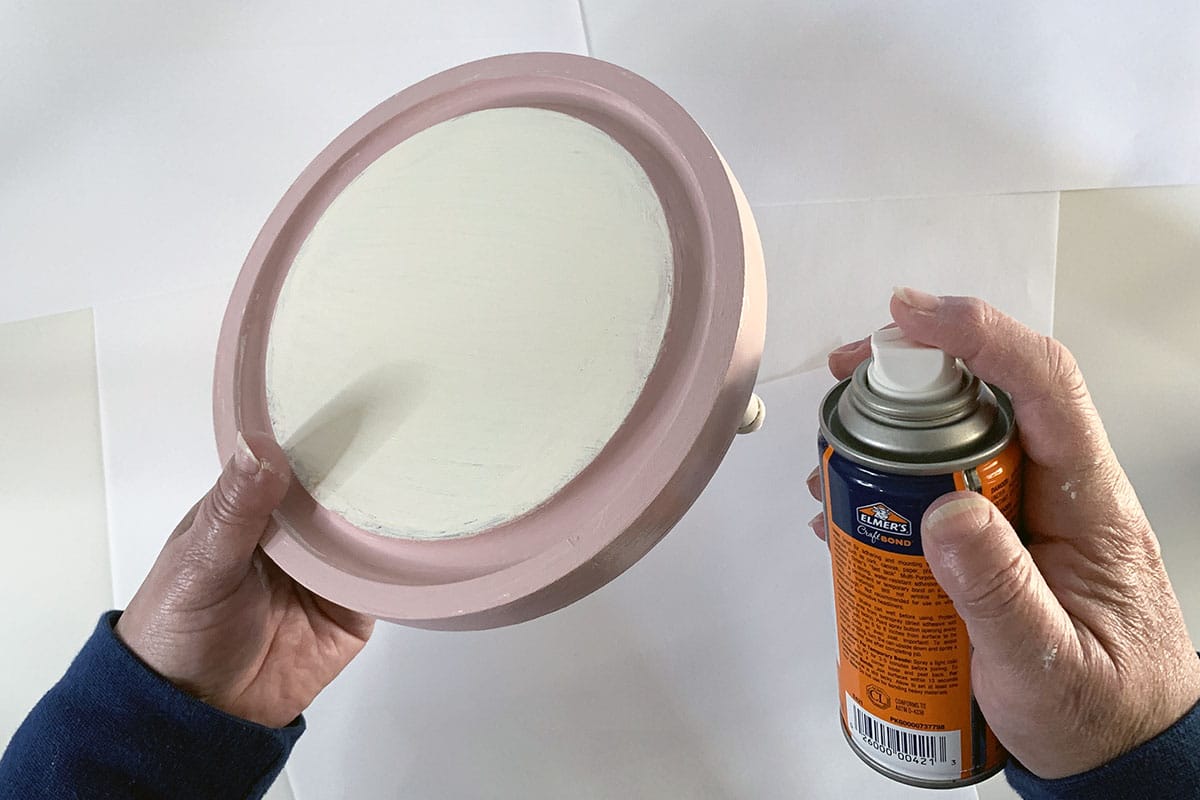
- Apply Spray Adhesive
Spray your adhesive onto the pink section. Work in small sections. No need to put adhesive on the inner white circle yet.
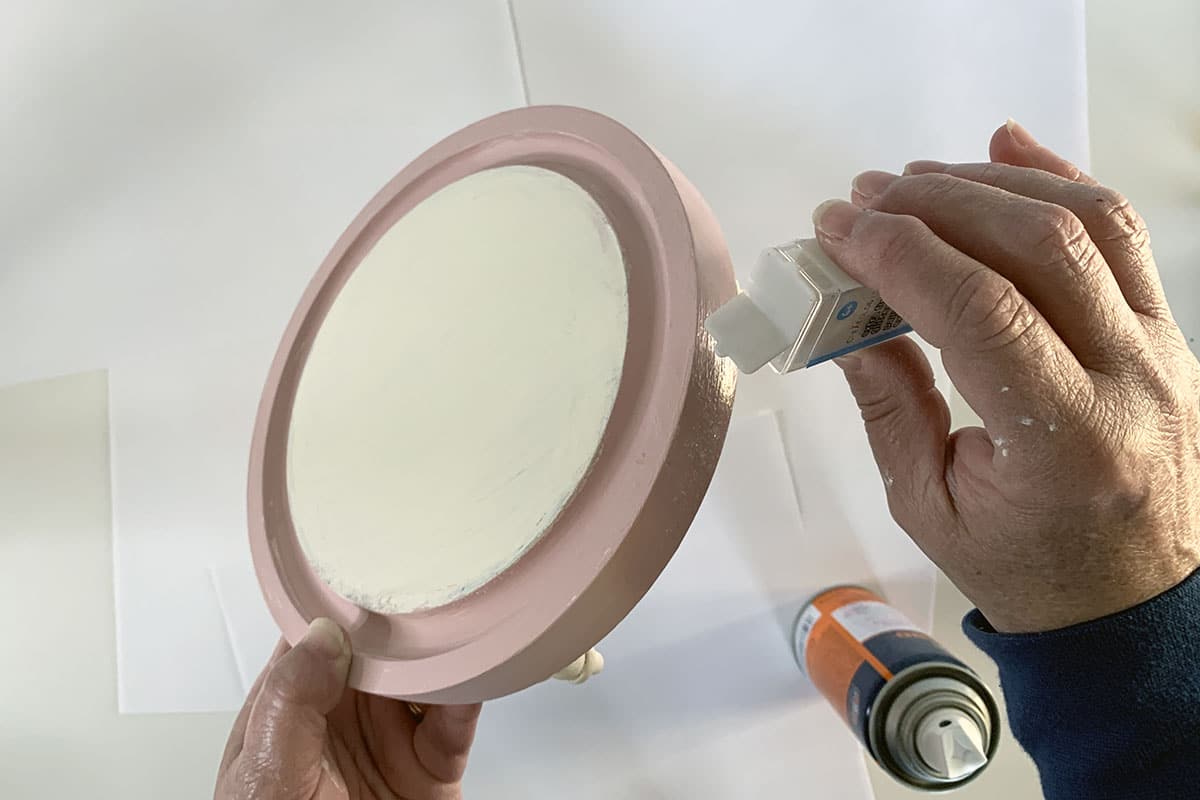
- Add Glitter To Sides
Add glitter to the pink sections, working around the base by applying the spray adhesive then applying glitter, and then moving on to the next section.
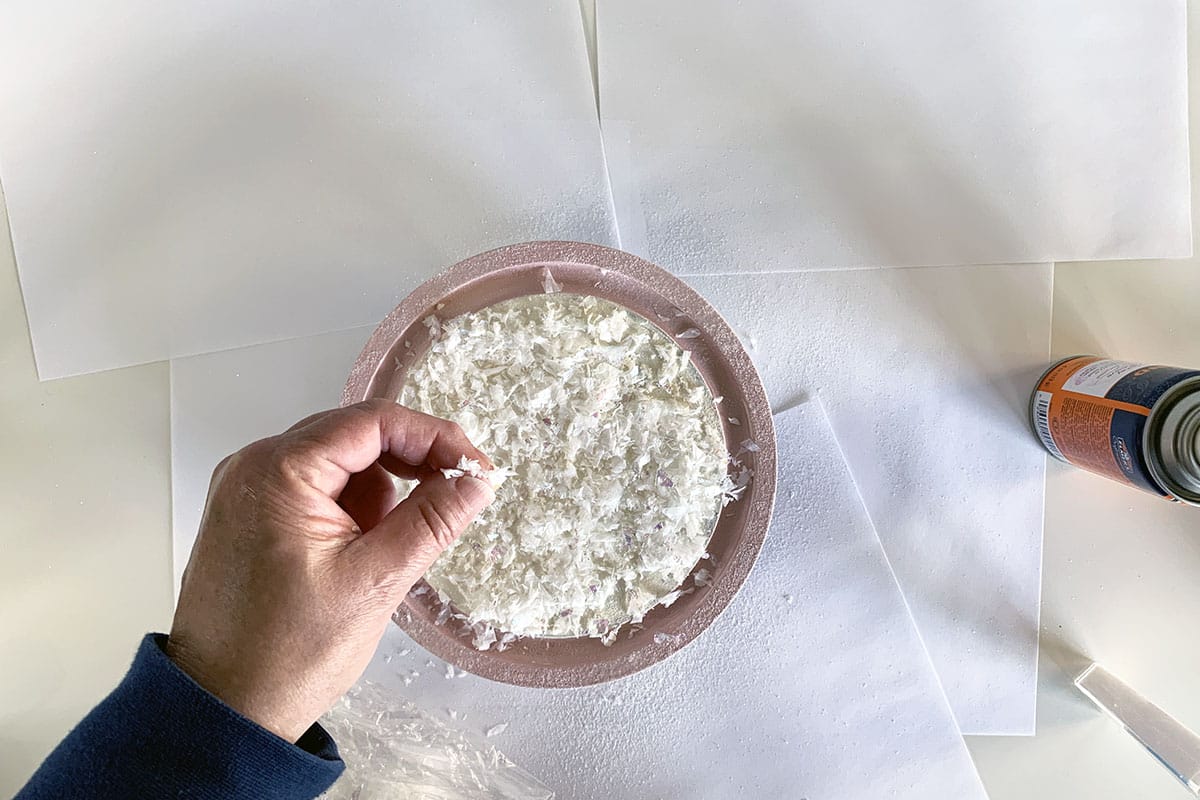
- Add Snow To The Top
After applying the glitter spray adhesive to the inner white circle and add faux snow on top of it.
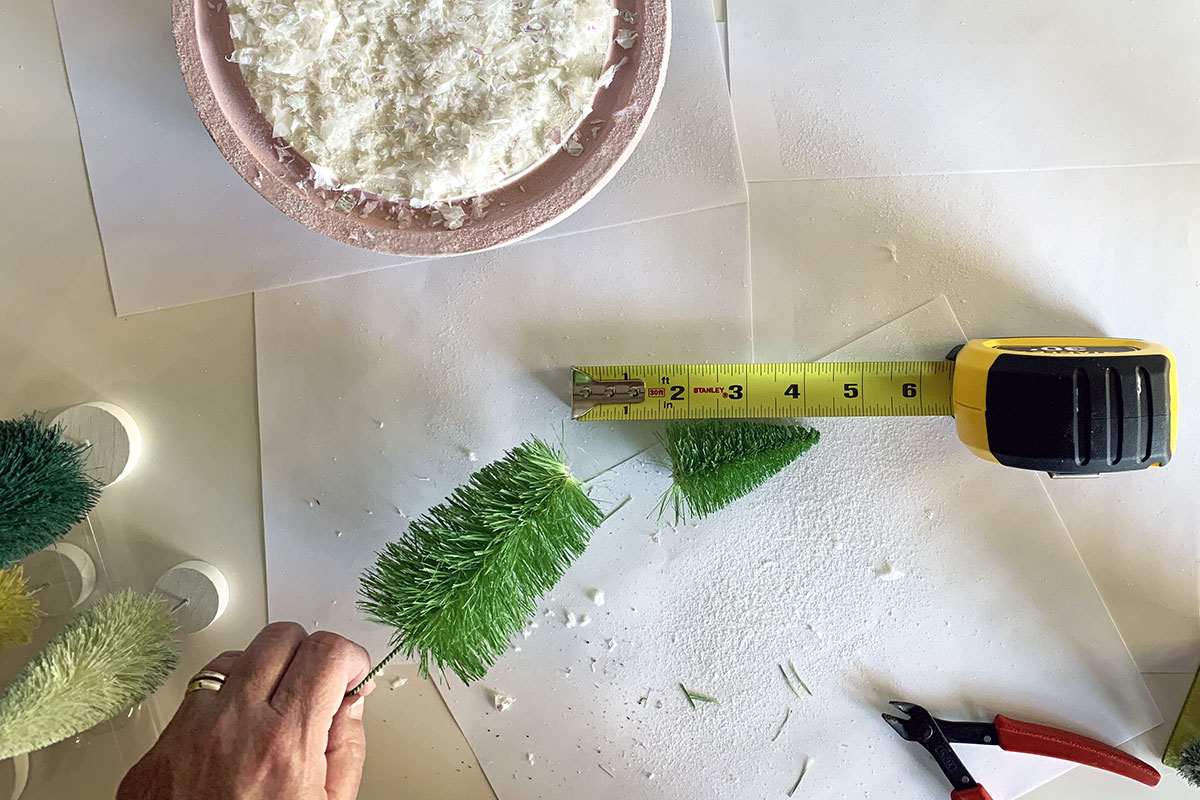
- Trim Trees If Needed
The Target trees were too tall to fit under the glass dome, so I snipped the tops of the trees off and used the top sections as my actual trees. For my cheese dome 3" was a good height for them.
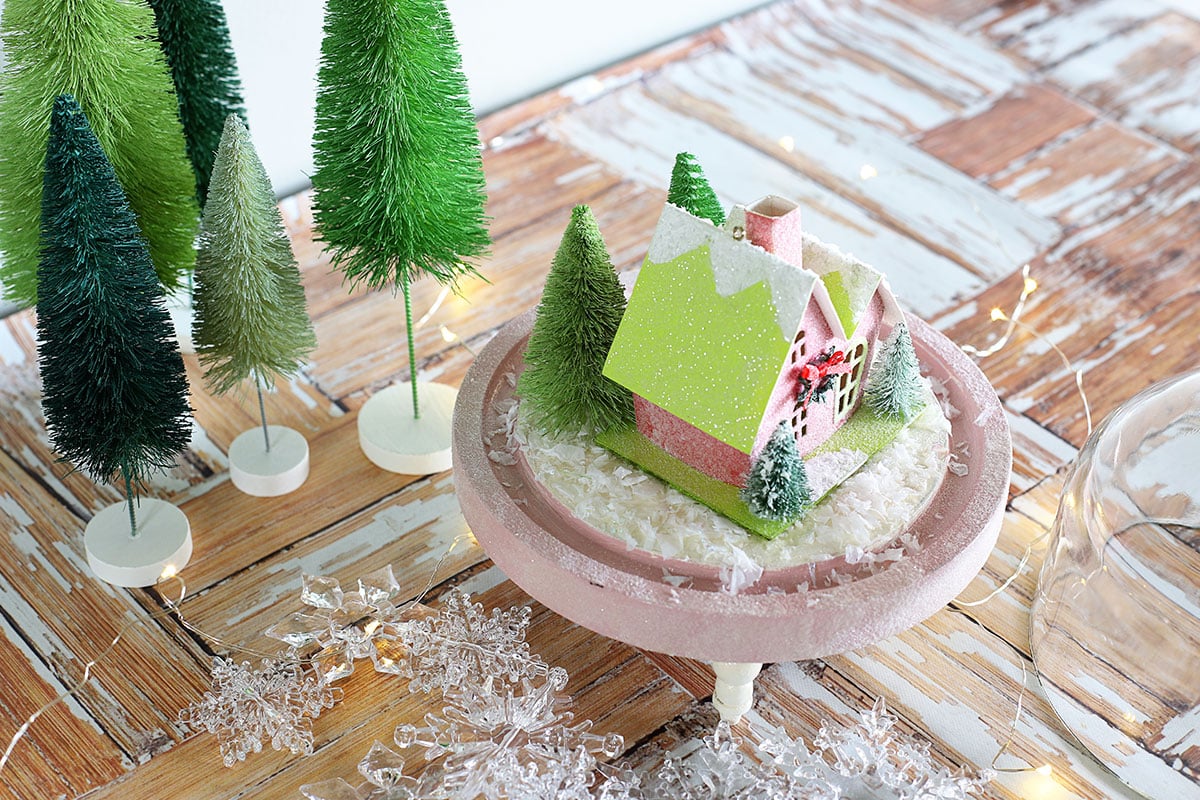
- Place Decorations
Place your trees and house on the wooden base.
- To Glue The Decor Down Or Not To Glue The Decor Down?
It's up to you. I decided not to glue my house and trees down simply because I wanted to have the option of changing out the scene on the inside if I wanted to.
Plus I might want to use this for Valentine's Day decor since it's pink. Not gluing things down permanently worked well for me.
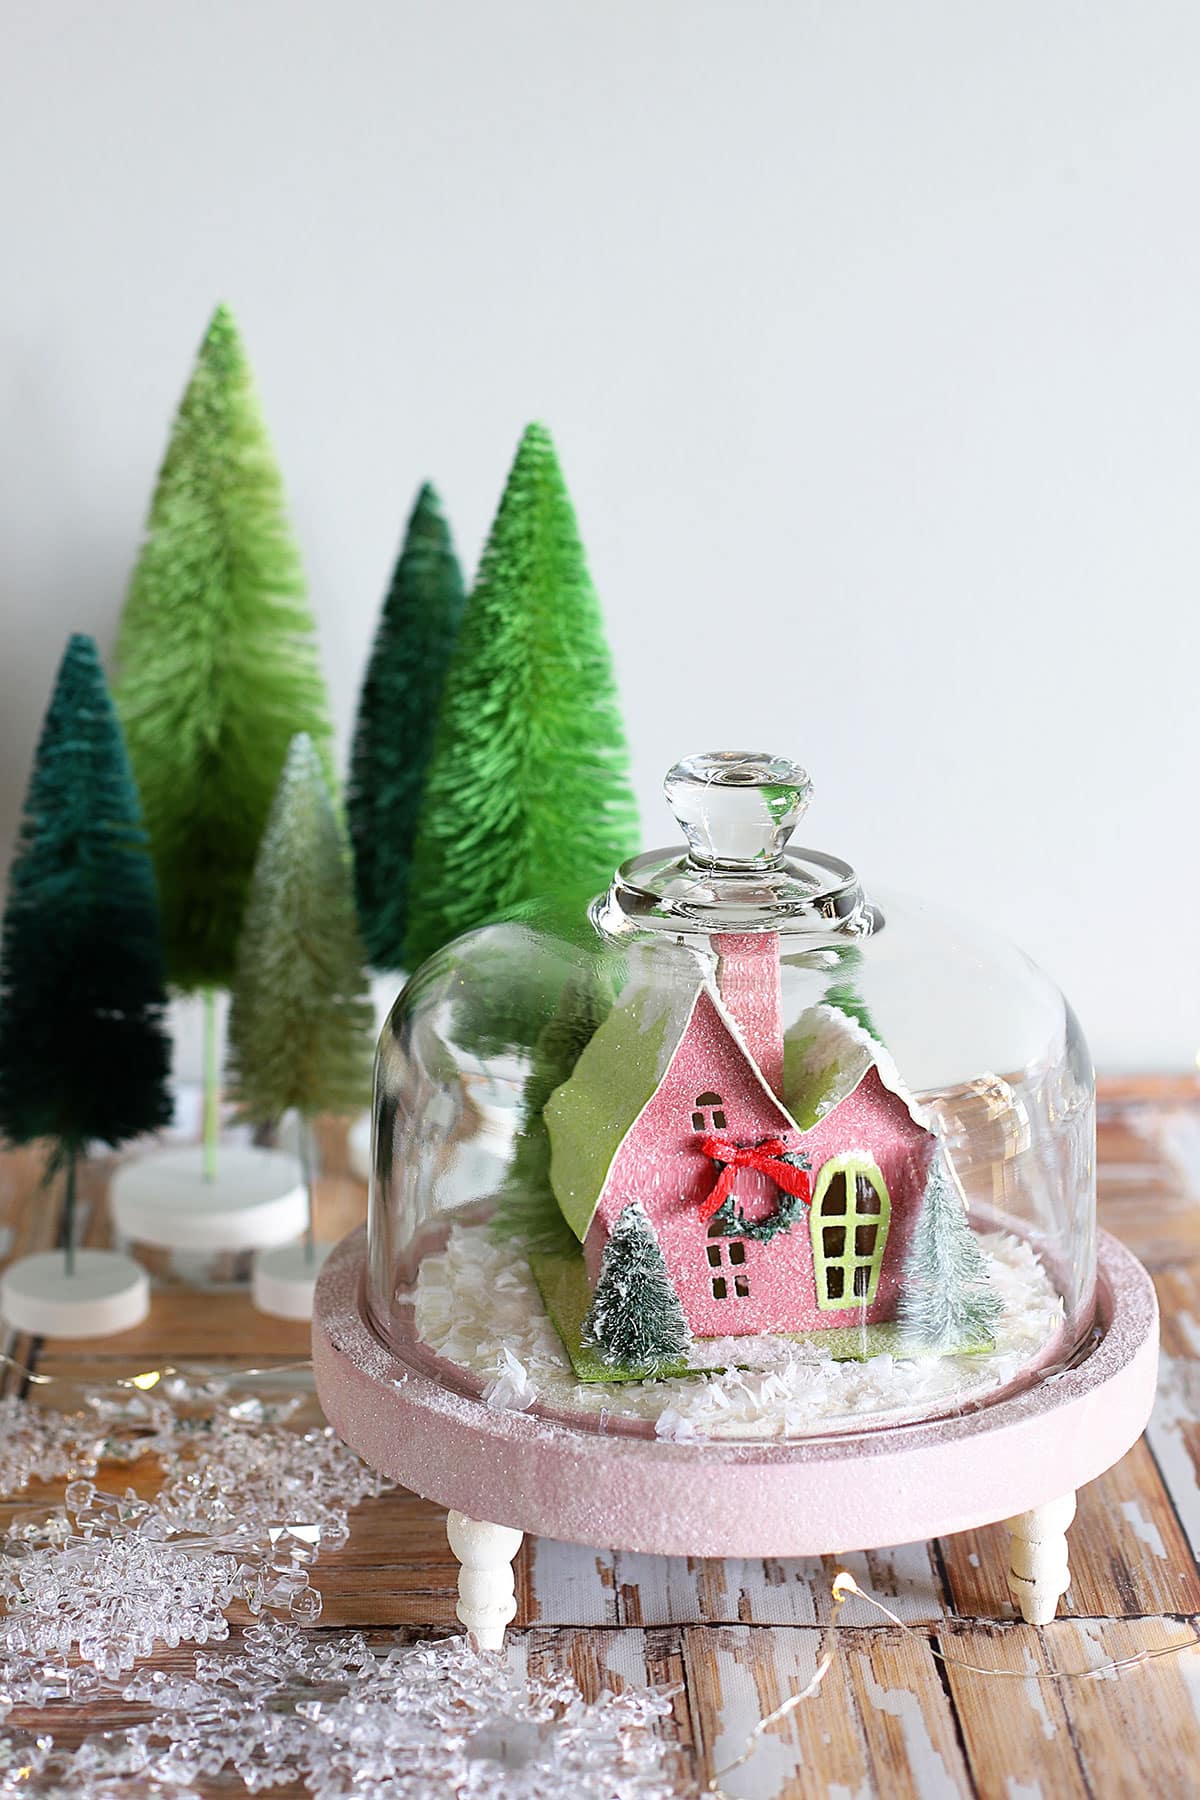
- Replace Dome
Just replace the glass dome and you're ready to go.


Alternatives For Decorating Your Winter Cheese Dome
You don't have to limit yourself to these paper houses, there are so many choices for decorating the inside.
- Holiday Snow Village Figurines - Michaels, Walmart and Amazon all carry a line of miniature people to go with the Christmas village houses (snowmen, ice skaters, carolers, etc).
- Favorite Christmas Ornaments - it would be cute to display a few heirloom ornaments in one of these domes.
- Little Trucks With Christmas Trees In The Back - You can't go wrong with a truck hauling a Christmas tree and most stores carry small versions as Christmas tree ornaments.
- Pinecones And Greenery - I saw so many cute little sprigs of greenery when I was out looking for ornaments that would look cute in there. Add a pinecone or two and you have a simple yet festive look.
Suggestions If You Have Children In The House
Just a note, you notice I did not glue the glass top to the bottom part. This is not the type of "snow globe" you can turn upside down and shake. Nor is it something small kids can play with since there's glitter and paper-like snow involved, not to mention the glass domes on these things are ridiclously heavy.
So if you will have kids or grandkids (or great-grandkids) around, you'd want to keep this as something to just look at and not to play with.
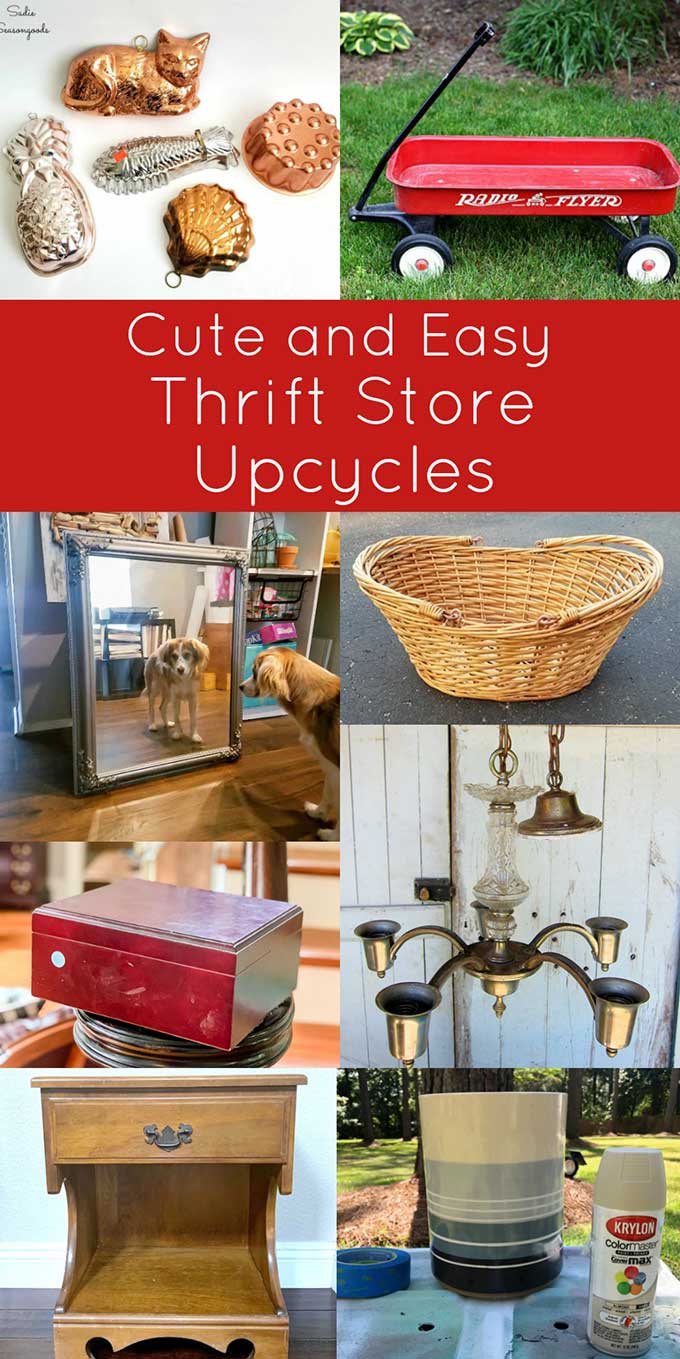
Now let's see what the other Thrift Store Decor Team members are up to this month!
Thrift Store Decor Team Projects
How To Make Snowy Votives - Domestically Speaking
Musical Washboard Christmas Decoration - Organized Clutter
Magnetic Board Paint Makeover - Petticoat Junktion
Ice Bucket Christmas Tree Stand - Our Southern Home
Thanksgiving Wreath With Brass Trivet - Sadie Seasongoods
DIY Christmas Joy Sign - My Uncommon Slice of Suburbia
DIY Upcycled Piano Bench - Shop At Blu
Christmas Carousel Horse - My Repurposed Life
Cheese Dome Repurposed For Christmas - House of Hawthornes (that's me)
Christy | Our Southern Home
Pam,
I have one of these cheese domes. I never use it. I absolutely love this idea, especially with the pink!
Carolyn Dinger
You are so clever....love the pink.
Maryann
So pretty!!!! I love the pink!
gail
Pam! Your cheese dome snow globe is gorgeous! How fun that you used upside-down snowmen as the risers (feet). hahahah
I love all of your tips on this project. I have a couple of these, maybe I'll do one for Christmas. You've given me some awesome inspiration.
pinned!
gail
Carlene
I love the “legs” idea, and the house fit in perfectly! Well done!
Chris Wake
Aw! How lovely! I have a glass dome and some vintage Christmas houses I purchased whilst in the Netherlands. After reading your post, I know exactly how I’m going to use them for a holiday decoration! Thanks so much for sharing! X
Kristin salazar
This is the cutest project ever, I love the soft pink with the houses, and how brilliant to use those little legs from the dollar store! Such a great repurpose!
MrsSW
So sweet - thanks for sharing.
Pinned
Sheila
Sarah @ Sadie Seasongoods
SO cute, Pam!! Cheese cloches make for the best winter scenes, even better than jars if you ask me.
Monica white
Great project! To add the falling snow effect, use a white paint pen to dot the inside of the dome.
Your repurposed items are always brilliant.
Pam Kessler
I was actually going to use that etching cream on the glass to create snowflakes, but I couldn't find a stencil that had snowflakes small enough. Never thought to use a white paint pen though, thanks for the idea!
Linda @ Itsy Bits And Pieces
This is so fun, Pam! I love it! And how creative to use the wood snowmen for legs!
Pam Kessler
So now I'm thinking if I can find some large turned legs on an old chair maybe I can cut them off, flip them over and create reverse engineer some larger snowmen 🙂
Linda @ Itsy Bits And Pieces
OK...now I see some snowman making in my future. Maybe some wooden lamp bases!
Briana from Texas
What a charming idea! It looks absolutely adorable!!
Pam Kessler
Thank you! It was fun to make.